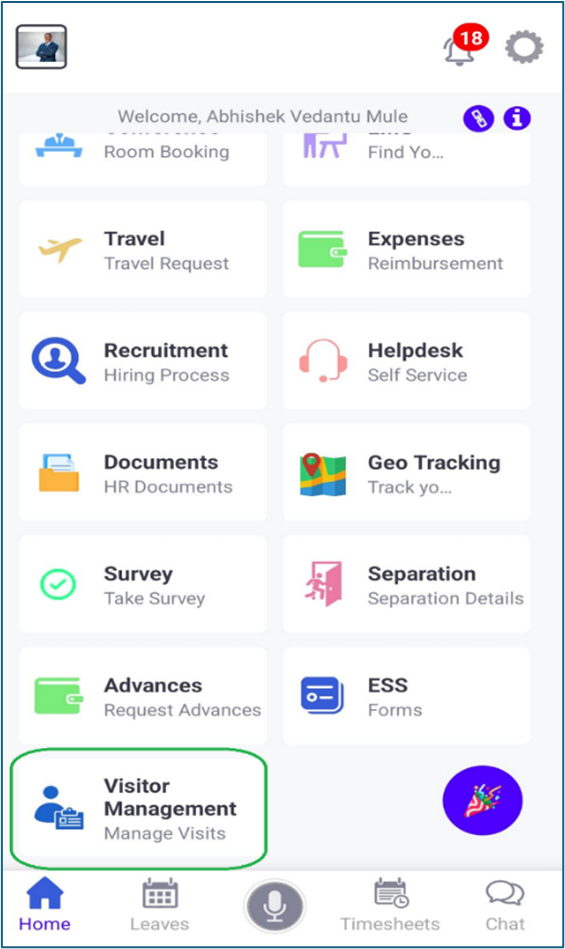
VMS on Mobile App
Visitor Management System can also be accessed through the mobile App, both android an iOS.
The configuration set up on the Admin Configuration through the web application, will be applicable in the mobile app also.
The user can do the following tasks through the mobile app
- Create New Visitor Pass
- Edit a Visitor Pass
- Primary Visitor – Asset Entry & OTP Verification
- Visitor Check-in
- Visitor Check-out / Mark as No Show
- Cancel a Visitor Pass
1. Create New Visitor Pass
Click on the “+” icon to create a new Visitor Pass.
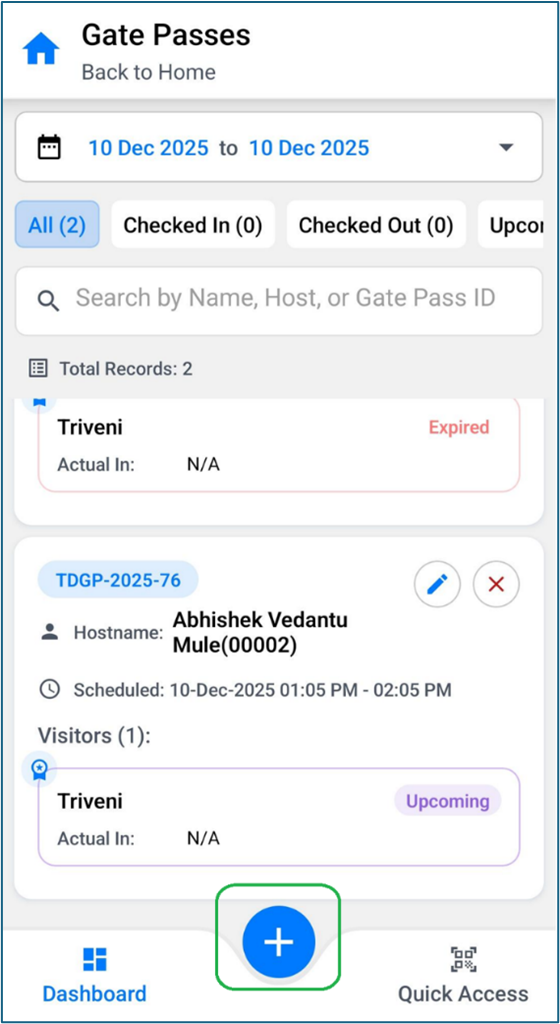
The below screen will be visible.
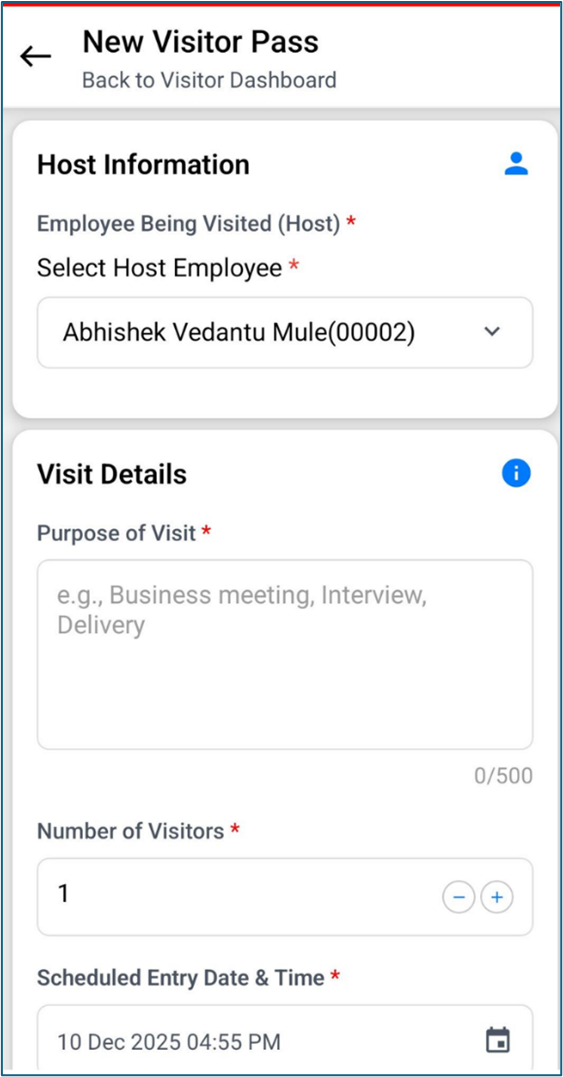
The Host Employee can be selected from the dropdown (Employee Being Visited/ Host). The Purpose of Visit must be entered (minimum 3 characters), the number of visitors can be specified (directly enter or +/-), and entry/exit date and time are scheduled using date pickers (cannot select previous date or time).
Visitor information is filled in, including contact number (must be 10 digits), full name (must have at least 3 characters), company/location, Visitor Email (optional), ID type (selected from a dropdown), and ID number (based on ID type e.g. Aadhaar must be 12 digits). Additional Visitors can be added or removed.
The Primary radio button identifies the main visitor in group scenarios. This is the person whose WhatsApp number will receive the QR code and confirmation message.
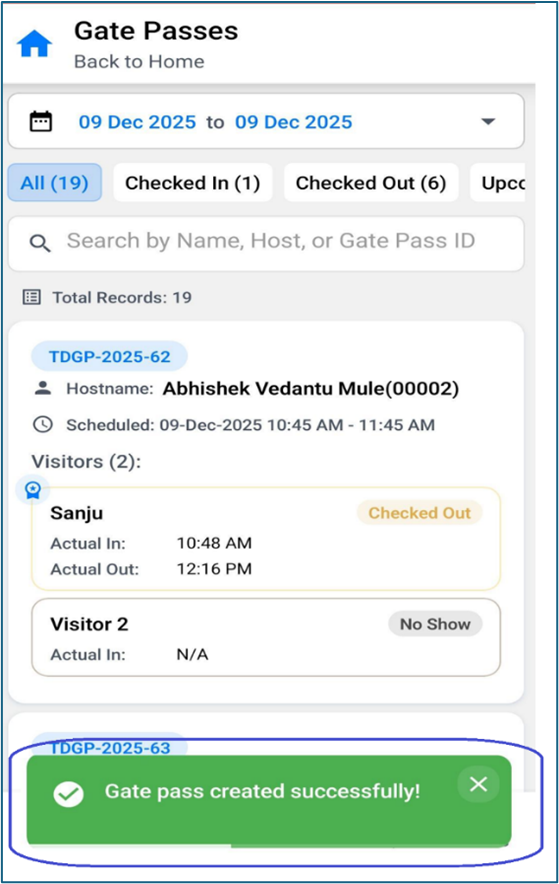
The form can be submitted using the "Create" button or cleared using "Reset."
When the details entered are correct notification message is received on the top right corner.
WhatsApp Notification and QR Code
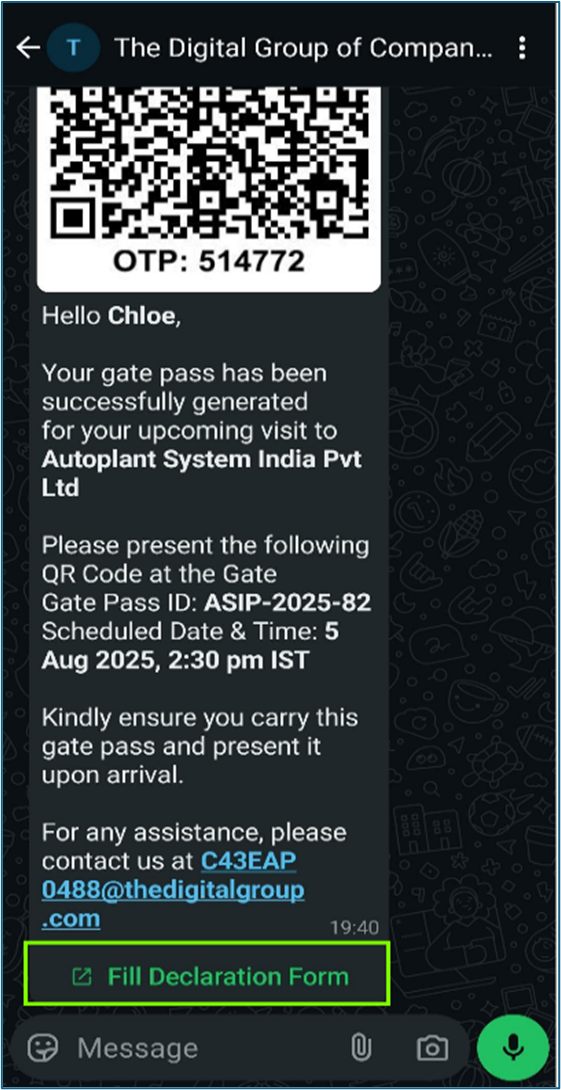
After the visitor registration is completed, a WhatsApp message is sent to the visitor with a QR code and a Gate Pass ID. These can be used for entry by either scanning the QR code at the security desk or manually entering the Gate Pass ID into the system.
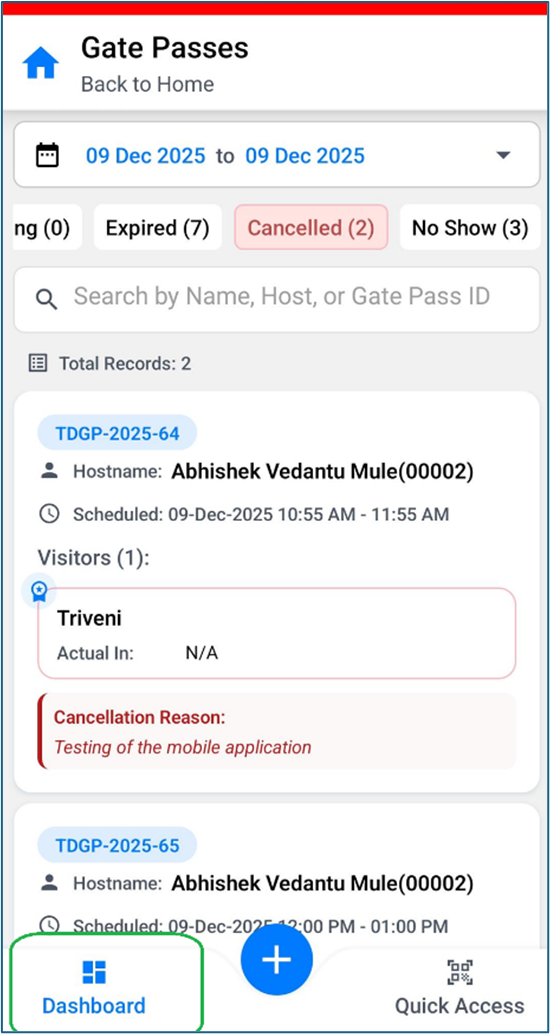
It categorizes all visitor records across multiple tabs, supporting different stages of the visit. Users can filter records by selecting a date or range using the date picker. Each tab includes a Quick Search bar for faster access to specific records as in the Desktop version.
Various tabs are there where the status can be visible as below in the Visitor’s Pass like the desktop version
- All
- Checked-in
- Checked- Out
- Upcoming
- Expired
- Cancelled
- No Show
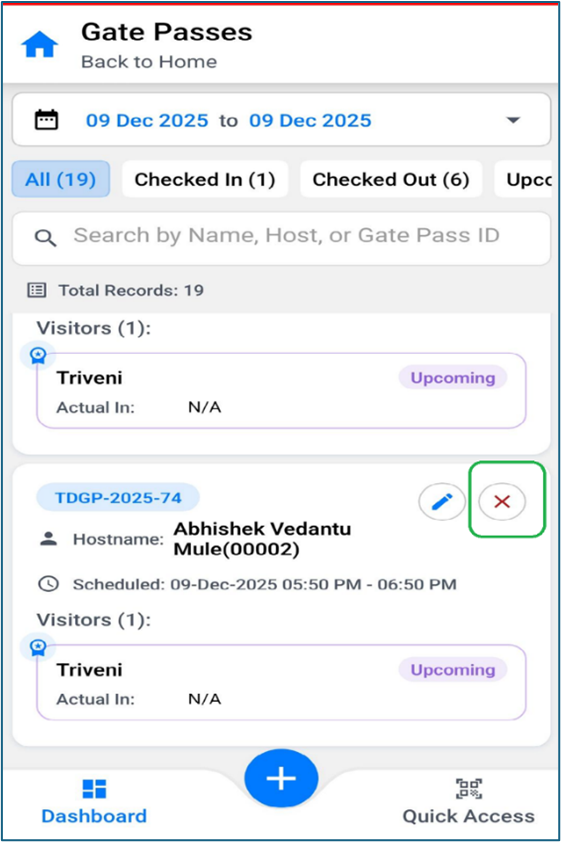
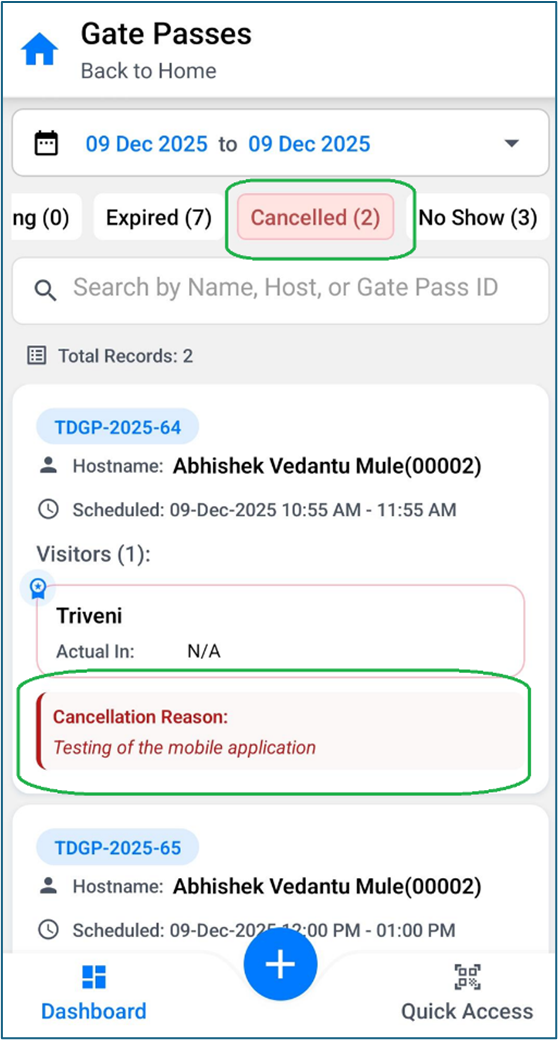
3. Cancel Visit
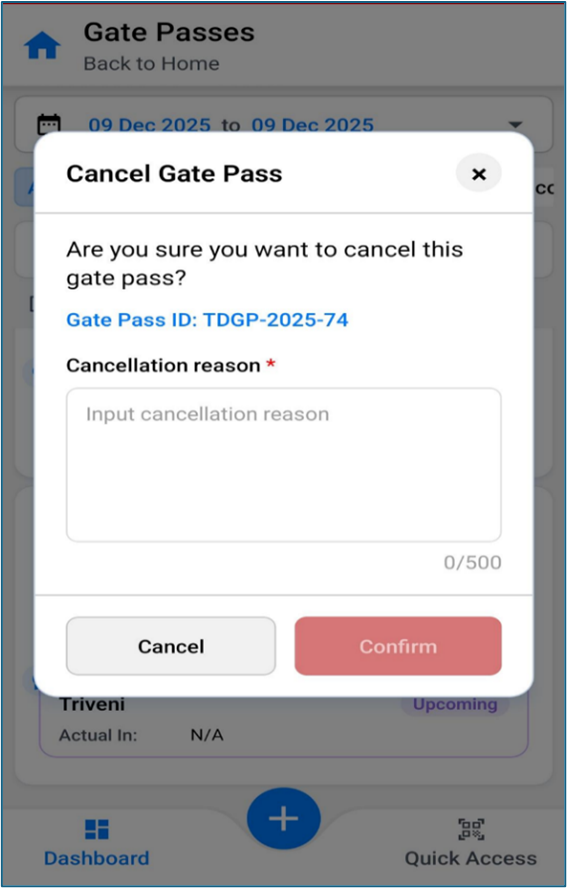
The Cancel icon is only visible for entries that are still in the Upcoming stage — once the visit is checked in or marked otherwise, the option is no longer available. Clicking on the Cancel icon triggers a confirmation pop-up, asking the user to confirm whether they truly wish to cancel the selected visit. This pop-up also contains a mandatory text field where the user must provide a reason for cancellation (up to 500 characters). This step ensures that visit cancellations are intentional and justified.
Once confirmed, the system marks the visit as Cancelled rather than deleting it. The entry is then moved to the Cancelled tab, where the cancellation reason is displayed alongside other visit details. This enables better transparency and audit tracking for withdrawn visits.
Similarly, only upcoming entries can be Edited. When the Edit icon is selected, the user is redirected back to the Visitor Gate Pass screen where they can modify visit details. If changes are made to the host employee, scheduled date/time, or primary visitor, the system automatically generates a new WhatsApp message with an updated QR code and Gate Pass ID. This ensures that the visitor receives the latest visit credentials, always maintaining accuracy and access control.
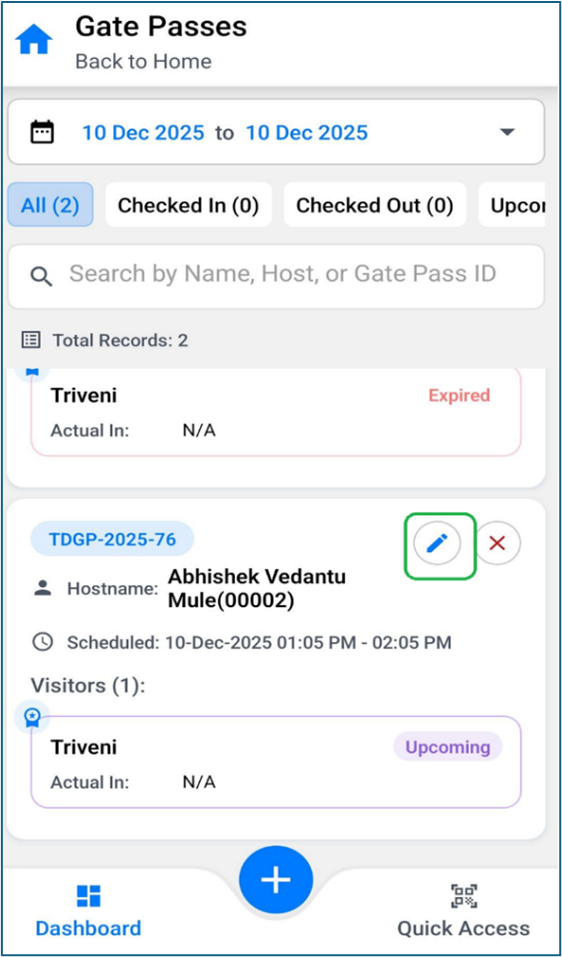
After updating details click the edit button as highlighted above after selecting the details to be modified in the screen as shown below.
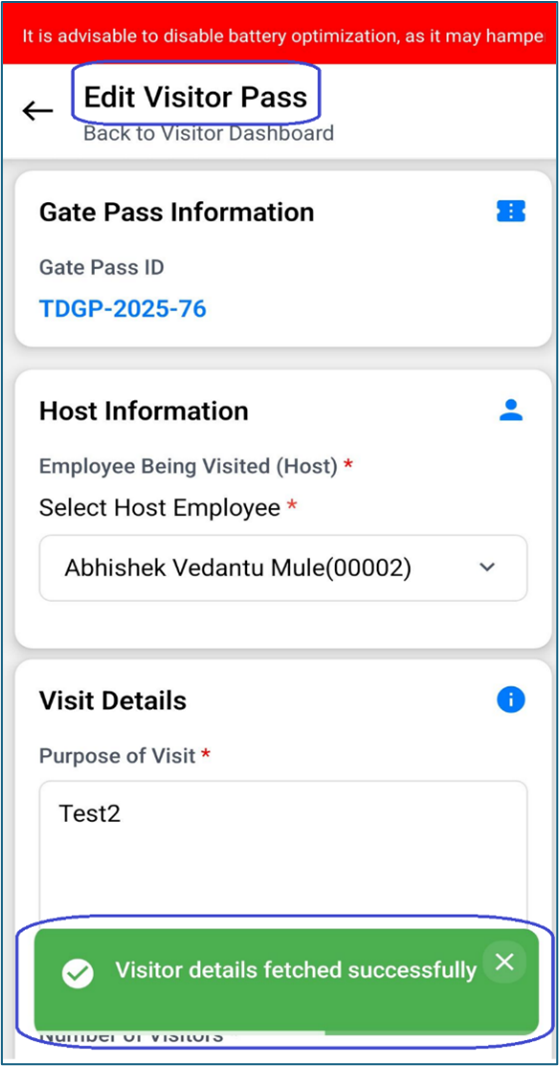
When a user edits an upcoming visitor entry — for instance, by changing the visitor’s name and assigning them as the Primary Visitor — the system immediately updates the visitor’s details. Upon saving the changes, a new WhatsApp message is automatically sent to the updated primary visitor. This message includes the revised Gate Pass ID and a new QR code to reflect the latest information. The old message and QR code become invalid, ensuring security and consistency at the gate.
This behavior is especially important when the Primary Visitor is changed, as they are the one who receives the QR code and acts as the main point of entry for group visits.
This tab shows visitors who are currently on the premises. It helps security personnel and administrative staff monitor active visitors in real-time. Quick Search functionality is included for efficient filtering and search.
Visitors who have exited the premises are listed in this tab. It helps ensure all visitor check-outs are recorded properly. The Quick Search bar remains available for quick access to historical visitor records. The Quick Search bar is available to locate records quickly.
In group visits, if some of the attendees (visitors) check-in while others are unable to join or miss the visit, the absent individuals are marked as No Show. In such cases, the overall visit remains active, but the specific participants who did not attend are recorded as ‘No Show’ and listed in this tab. This section displays the host and visitor details, scheduled entry and exit times, and the visit status. A Quick Search feature is also available to quickly find specific no-show records.
From the Quick Access page, the users have two options:
- Enter Gate Pass ID manually
- Use QR Code Scanner
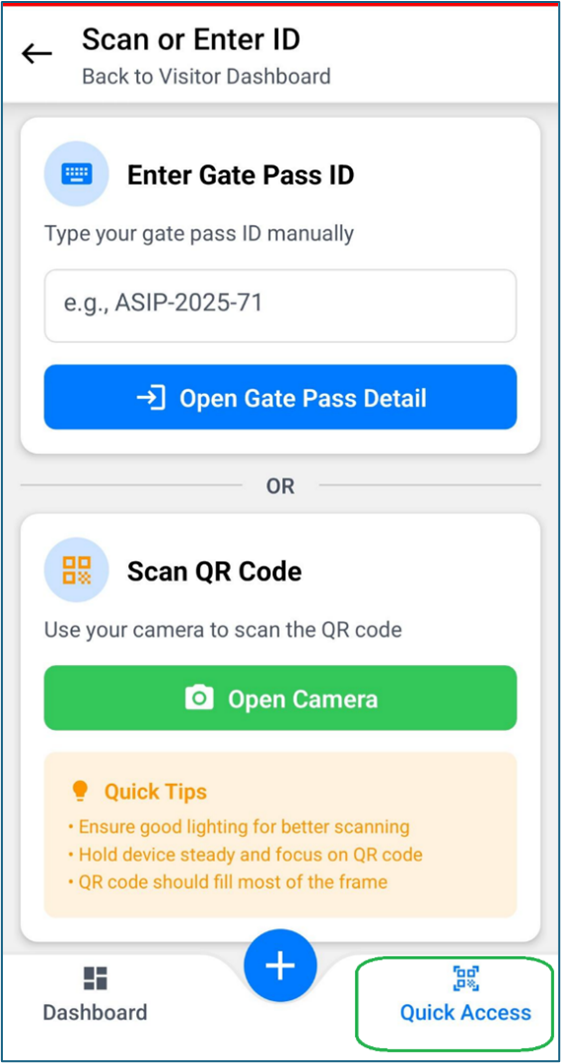
Example: Gate Pass ID Format
In the above screen, the Gate Pass ID is shown as ASIP-2025-71.
Users can access a visit using this ID in two ways:
- Entering the Gate Pass ID Manually
- Check-In / Check-Out Process Using QR Code
Entering the Gate Pass ID Manually:
When the user types ASIP-2025-71 into the input field and submits, the application immediately redirects to the corresponding visit details.
Once the visit is created, a WhatsApp notification will be sent to the user containing the QR code and OTP.
The user can copy the QR code from the WhatsApp message and display it on their screen for scanning.
After receiving the WhatsApp message, the user should temporarily turn off the internet connection and return to the application.
The user can then open the in-app camera and scan the displayed QR code to proceed.
Check-In / Check-Out Process Using QR Code:
When the QR code is scanned, the system automatically redirects the user to the Check-In / Check-Out screen for the corresponding visitor.
A green success message at the top confirms that the OTP has been successfully verified. This notification is prominently displayed to ensure the user can proceed without confusion.
If the user scans the QR code (for example, opened on another device), the mobile camera automatically detects the code and redirects the user to the Visitor Details screen for that specific visit.
Note: This feature allows security personnel or front-desk staff to access visit information instantly, without the need for manual search.
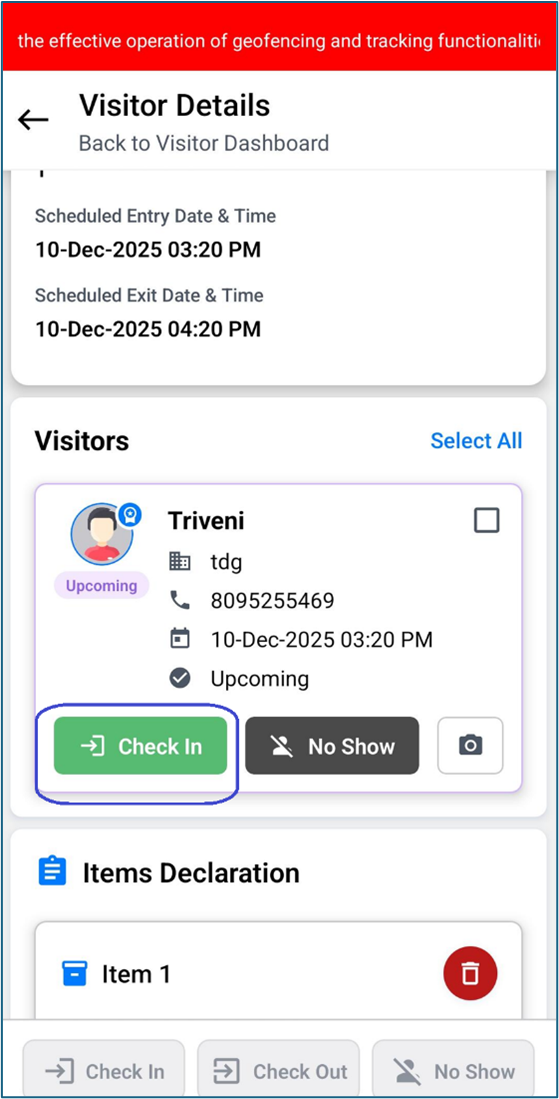
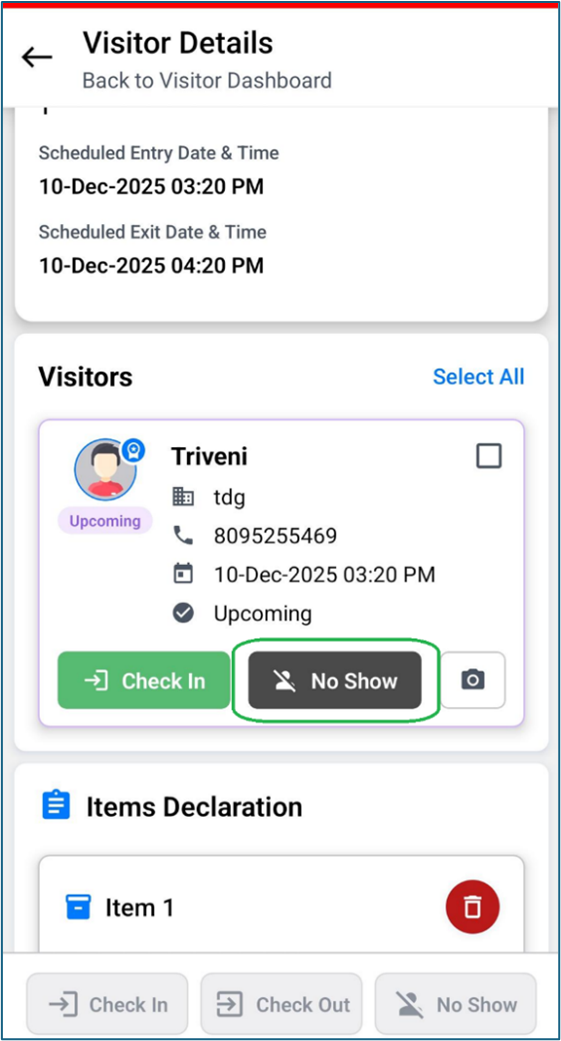
The Visit Details section is clearly structured, presenting key information such as Gate Pass ID, host name, entry and exit time, and visitor details in a well-organized layout.
Each visitor appears in a card-style format, which includes icons for phone number, location, and visit status. The action buttons—Check-In, No Show, and the Camera icon—are intuitively positioned so users can easily understand the next steps.
Visitor Details Page
On the Visitor Details page, users can view the complete list of visitors.
Users have the option to:
- Select multiple visitors and apply an action (such as Check-In) to all selected visitors at once, or
- Take action individually for each visitor.
Capturing Visitor Photo
A Camera icon is displayed next to each visitor’s name.
- Tapping the camera icon opens the device’s camera.
- The user can capture a photo of the visitor.
- Once the photo is captured, it appears next to the visitor’s name.
Additional photo options include:
- Tapping the image to open it in full view
- Zoom in/zoom out functionality to verify clarity
- Retaking the photo by tapping the camera icon again if the image is unclear
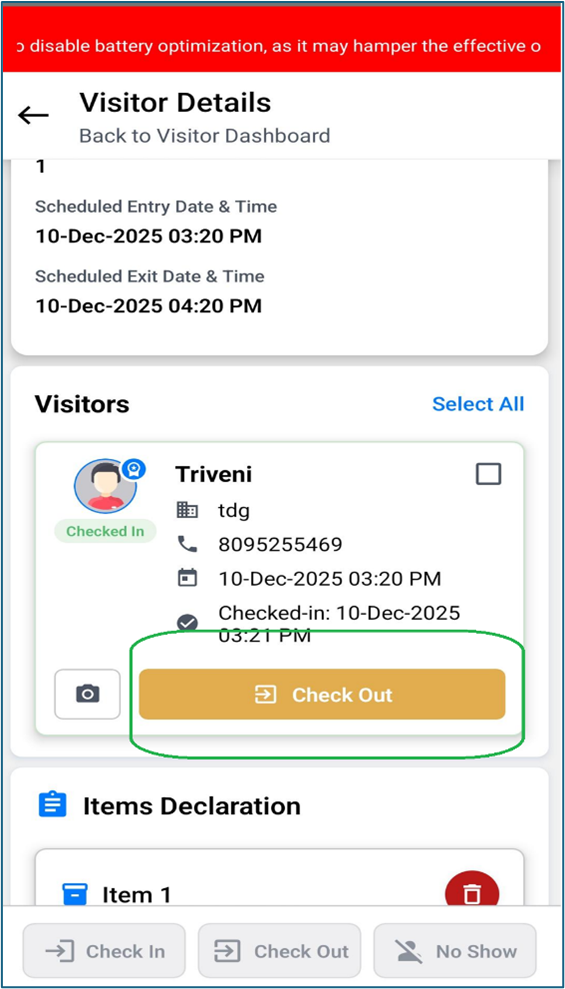
Once the user is satisfied with the photo, they can tap Check-In.
A confirmation message appears:
“Check-In action performed successfully.”
After a successful check-in, the button updates to show the Check-Out option.
Visitor Declaration
A Declaration option is available next to each visitor.
This feature is used to capture items carried by the visitor—such as laptops, mobile phones, and other devices—similar to the desktop version.
Check-In / Check-Out Using Gate Pass ID
Users can also access the Check-In / Check-Out window by entering a Gate Pass ID, just like in the desktop application.
When the Gate Pass ID is entered:
- The system automatically opens the OTP Verification
- After the OTP is successfully verified, the visitor is redirected to the Check-In / Check-Out
Adoption of Custom Configuration Settings on Mobile
All configuration settings applied through the Web Configuration Page should automatically sync with the Mobile Application to ensure consistent behavior across both platforms.
The mobile app reflects the following configurations:
- ID Card Settings
Configurations related to ID Card Type and ID Card Number—whether these fields are Mandatory or Optional—must mirror the settings defined by the admin on the web portal.
- Check-Out Alert Hours
Any configured Check-Out Alert Duration will trigger corresponding alerts on the mobile application, notifying visitors and security staff within the specified timeframe.
- Acronym Changes
Updates to acronyms or short codes made on the web will be automatically updated on the mobile app to maintain uniform terminology.
- Notification Settings
All notification preferences (e.g., enabling/disabling push notifications or email alerts) configured on the web will be applied seamlessly on the mobile app.
The user can easily create a new visit within the application.