Setup Employee Self Service
Employee Self Service details can be set up here.
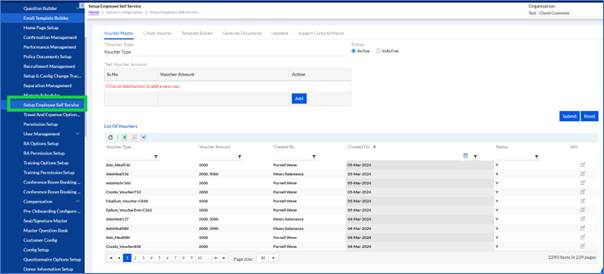
Here the following can be set up
- Voucher Master
- Create Voucher
- Helpdesk
- Support Contact Masters
1.2.1. Voucher Master
Set up the master for voucher requests here.
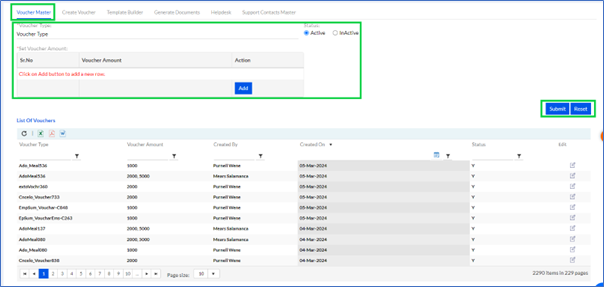
Select Voucher Type, Set Voucher Amount Click Add button.
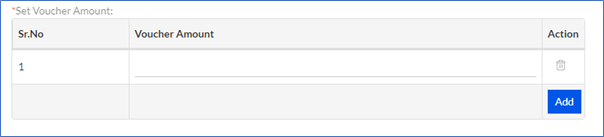
Add multiple Vouchers here or remove by clicking the delete button.
Then Add Submit to create a voucher master.
The previously added Vouchers will be displayed in the “List Of Vouchers”. The admin can edit any of by selecting it and clicking the Edit button.
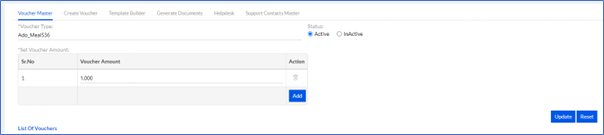
Make changes and click Update.
The List can be exported by clicking the “  ” , “
” , “  ” or “
  ” into Excel, PDF, or Word format respectively.
” , “ ” or “ ” into Excel, PDF, or Word format respectively.1.2.2. Create Voucher
The admin/HR creates, sets the dates and extends validity or deletes vouchers.
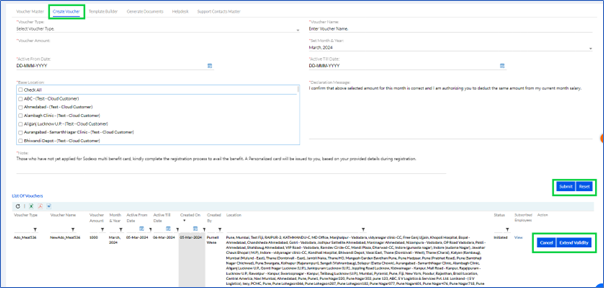
Enter Voucher Type, enter Voucher Name, Voucher Amount, sets Active From Date and To Date by selecting date from calendar, Set Month & Year, selects Base Location, Declaration Message already displayed.
Note- Those who have not yet applied for Sodexo multi benefit card, kindly complete the registration process to avail the benefit. A Personalized card will be issued to you, based on your provided details during registration.
Click Submit to create a voucher.
The previously added Vouchers will be displayed in the “List Of Vouchers”. The admin can cancel or extend validity by clicking on the buttons as displayed above.
The List can be exported by clicking the “ ” , “ ” or “ ” into Excel, PDF, or Word format respectively.
” , “ ” or “ ” into Excel, PDF, or Word format respectively.1.2.3. Helpdesk
Here the Help Desk details that can be availed by employees can be set up here.
1.2.3.1. Helpdesk Category
There are 2 types of helpdesk categories on organizations level i.e. system defined and user defined which can be set up in Customer Config.
1.2.3.1.1. System Defined
When the customer sets for system defined the radio button needs to be selected as highlighted.
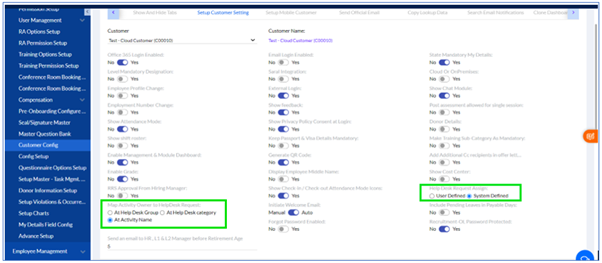
1.2.3.1.2. User Defined

1.2.3.2. Helpdesk Master
1.2.3.2.1. System Defined
Admin/ HR can create Help Desk Group and Map Category.

Enter the Help Desk Group name, Map Applicable Helpdesk Category.

The Help Desk Category can be Request, Suggestion or Complaint.
Select the Status Active/InActive. Click on Submit to add new Helpdesk Group.
The previously added Helpdesk Group will be displayed in the “List Of Helpdesk Group”. The admin can edit any of by selecting it and clicking the Edit button.
The List can be exported by clicking the “ ” , “ ” or “ ” into Excel, PDF, or Word format respectively.
” , “ ” or “ ” into Excel, PDF, or Word format respectively.Additionally, you can Create Activities For Help Desk Category

Select Help Desk Group, select Help Desk Category, Select the Status Active/InActive and optionally add Activity Name, then click Submit to Create Activities For Help Desk Category.
or Assign Activity Owners

Select Help Desk Group, select Help Desk Category, Select Activity Name, Assign To, Select the Status Active/InActive, then click Submit to Assign Activity Owners.
1.2.3.2.2. User Defined
We are not creating activity owners for user defined. Activity owner selects activity owner as a user from employee self-service UI page.

Enter the Help Desk Group name, Map Applicable Helpdesk Category.

The Help Desk Category can be Request, Suggestion or Complaint.
Select the Status Active/InActive. Click on Submit to add new Helpdesk Group.
The previously added Helpdesk Group will be displayed in the “List Of Helpdesk Group”. The admin can edit any of by selecting it and clicking the Edit button.
The List can be exported by clicking the “ ” , “ ” or “ ” into Excel, PDF, or Word format respectively.
” , “ ” or “ ” into Excel, PDF, or Word format respectively.Additionally, you can Create Activities For Help Desk Category

Select Help Desk Group, select Help Desk Category, Select the Status Active/InActive and optionally add Activity Name, then click Submit to Create Activities For Help Desk Category.
1.2.4. Support Contact Masters
Here all the support contact masters are set for the employees to reach out.
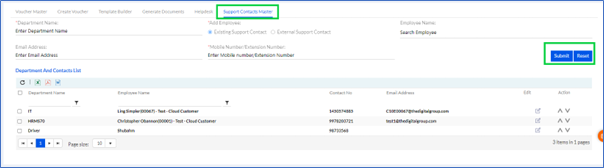
Enter the Department Name Add Employee (the employee can be Existing Support Contact or External Support Contact), optionally search Employee Name, optionally enter Email Address and add Mobile Number/ Extension Number then click Submit to add Support Contact Master.
The previously added Support Contact will be displayed in the “Department And Contact List”. The admin can edit any of by selecting it and clicking the Edit button. The List can be exported by clicking the “ ” , “ ” or “ ” into Excel, PDF, or Word format respectively. The rows can be moved up and down by clicking the Up and Down Arrow icons respectively.
” , “ ” or “ ” into Excel, PDF, or Word format respectively. The rows can be moved up and down by clicking the Up and Down Arrow icons respectively.