TimeSheet Approval
On this page, the Managers can Approve the Timesheets of their team members. This page is only accessible to the Managers who can view a list of the Timesheets submitted by the team members, for approval.
For the approval the Approver can take various actions.
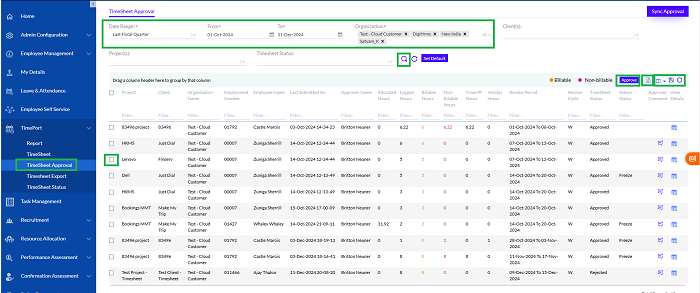
There is the provision for Managers to search Timesheets for specific projects or within a certain date range, by entering the required details and then clicking on the Search icon. The Refresh icon is used to refresh the data entered.
The Manager can directly approve the Timesheet by selecting the rows in the grid and clicking on the Approve button.
The data on the Timesheet Approval grid can be exported to a spreadsheet by clicking on the MS Excel icon. The View Column icon offers the user the option to view more columns on the same grid. The user needs to select the columns from the drop-down.
Every Timesheets entry has a respective checkbox against it, which needs to be checked to perform specific actions on that particular Timesheets.
The “Sync Approval” button, when clicked, simply runs the job and changes the status of the Submitted Timesheet to Sent for Approval status.
To view the details of the Timesheets, the Manager needs to click on the View Details icon. Clicking on it will take the Manager to the View Details screen, as shown in screenshot.
Approving the Timesheets
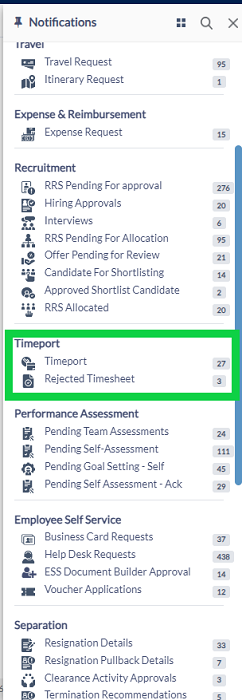
The Manager gets notified by emails or through the notification button.
Clicking the notification button opens the following screen.
The Manager/Approver can approve Timesheets by doing the following steps
- Select the Timesheet and click on the Approve button on the Timesheet Approval page.
- View the details of the Timesheets on the View Details page and then click on the Approve button on the View details page.
1] Approving from the Timesheet Approval page
Here the Manager/Approver can approve one or more Timesheets by selecting the checkboxes and then clicking on the Approve button.
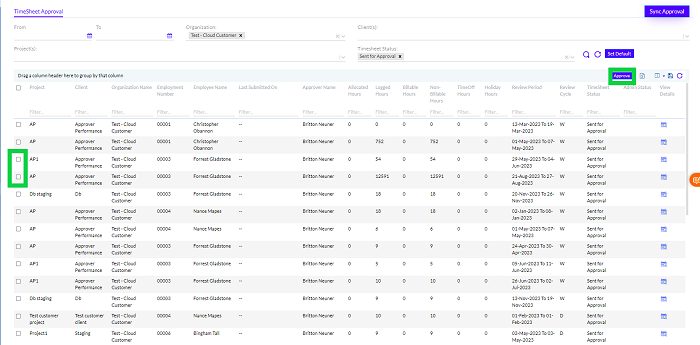
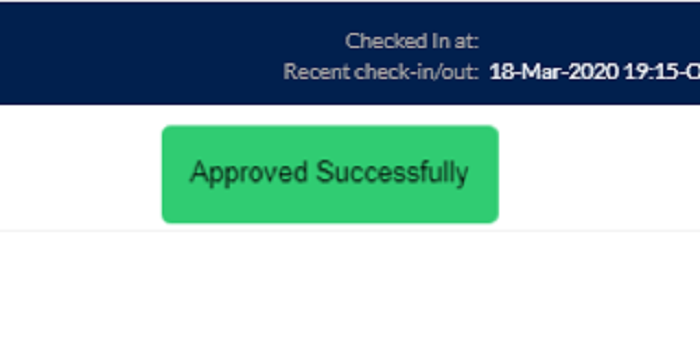
When the Manager/Approver clicks on the Approve button, a pop-up message appears confirming the Approval of the Timesheets.
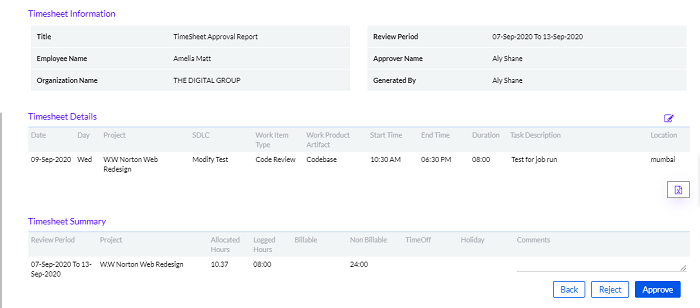
2] Approving from the View Details Page
When the Manager clicks on the View Details icon, the details appear as shown in the screenshot below.
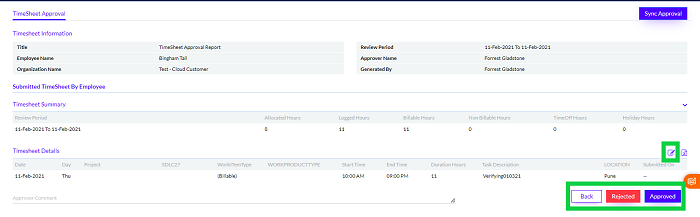
The Manager can approve the Time Sheet directly from this page by clicking on the Approved button or reject it by clicking on the Rejected button.
When the Manager/Approver clicks on the Approve button, a message appears confirming the Approval of the Timesheets.

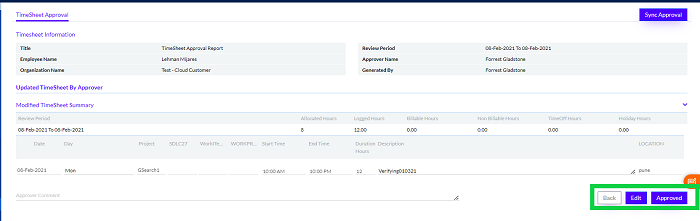
Once the Approver clicks on the Edit icon (Copy to Clone), then he can edit the Timesheet. When the Approver clicks on the Copy to Clone icon to edit, the Reject button disappears, as shown below.
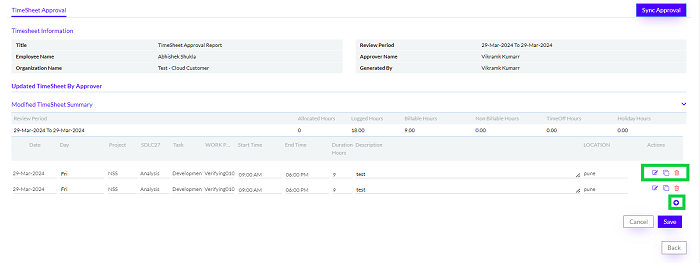
On behalf of the employee, manager can edit the timesheet, add the time sheet and copy the timesheet as highlighted in the screenshot below. Manager can also delete the timesheets.
Rejection of Timesheets
There is also the provision for the Manager to reject a Timesheet and this can be done on the View Details page for that particular Timesheet, by clicking on the Reject button, as shown in Fig 24.

When the Manager clicks on the Reject button, it is mandatory to enter the reason for the same, as shown below.

Once the Manager clicks on the Rejected button, a notification appears confirming the rejection of the Timesheets.

** Note: Once the Manager has rejected the Timesheets, it goes to the Employee for correction. The Employee needs to correct the details and resubmit the Timesheets, after which it again goes for approval to the Manager, once the correction is over.