Timeport/Task Management - RA Options Setup
In the admin config the admin sets up the various configurations for projects and clients.
1.1.1. Client:
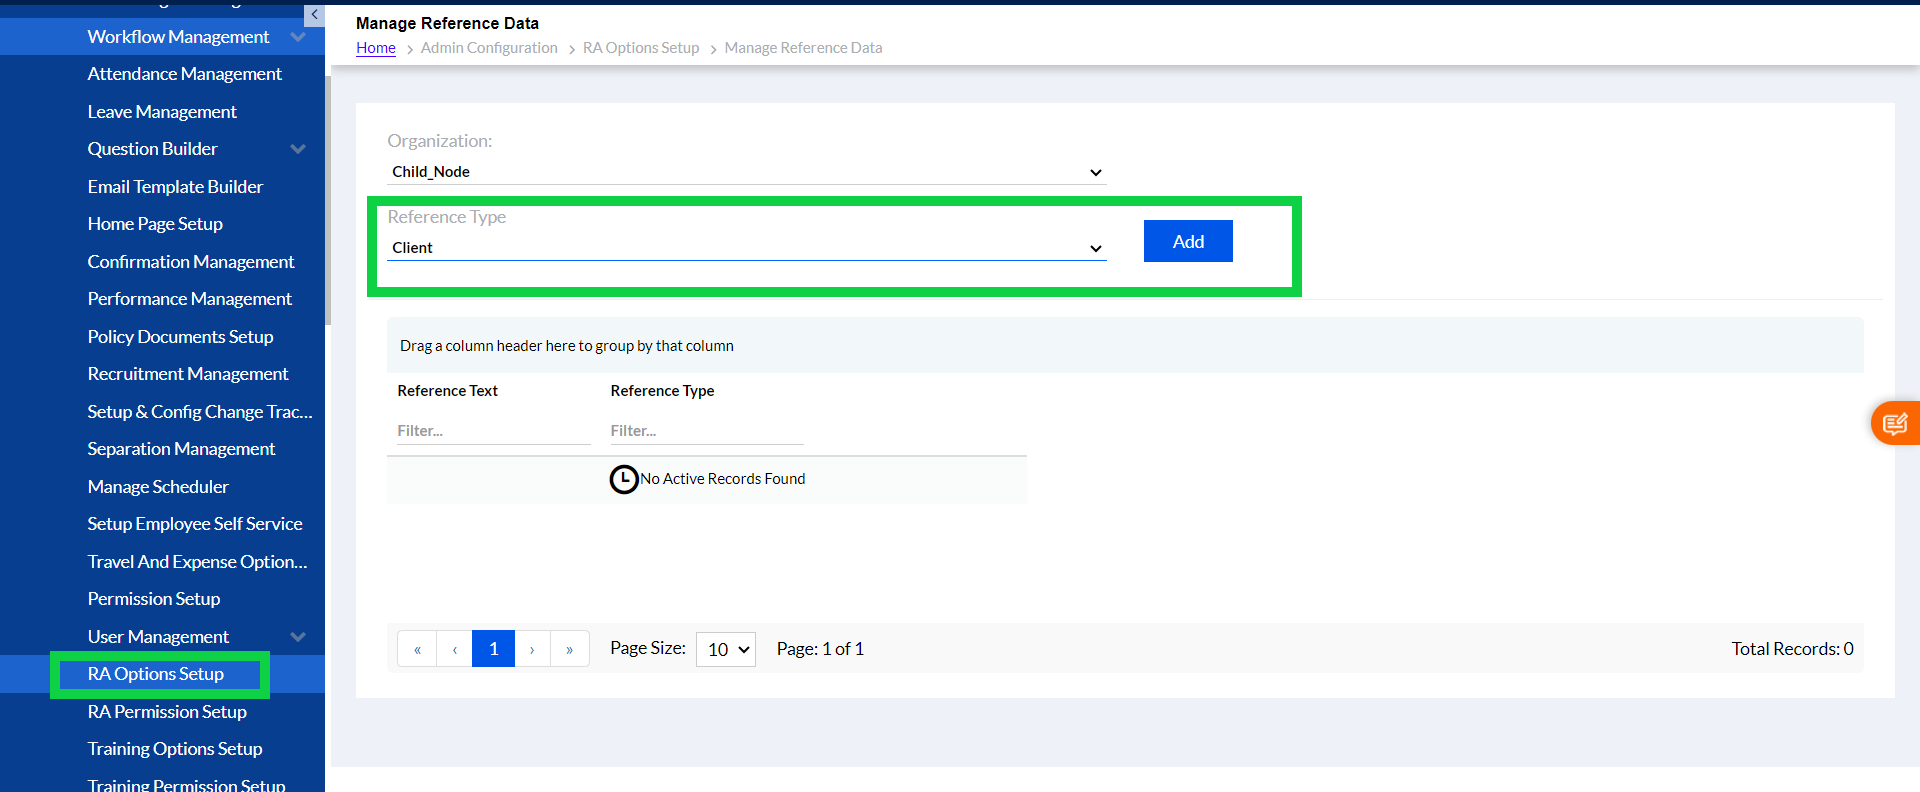
Click the RA Options Set up, select Organization, from dropdown list, Click Client in Reference Type dropdown list and click Add as shown in the screenshot below.
Once you click the Add the following screen opens.
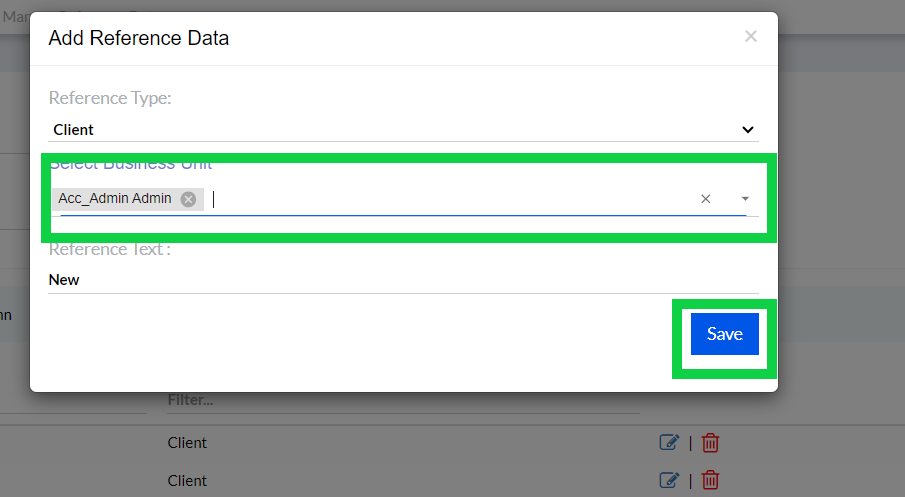
Select Reference Type as Client from the dropdown. Select Business Unit, add Reference Text and click Save to add the reference data about client.
Once the client is created its displayed below in the list.
You can drag Column Header and group your desired data from the list as shown in the screenshot below. You can Edit or Delete any data by clicking the respective icons shown highlighted in the below screen.
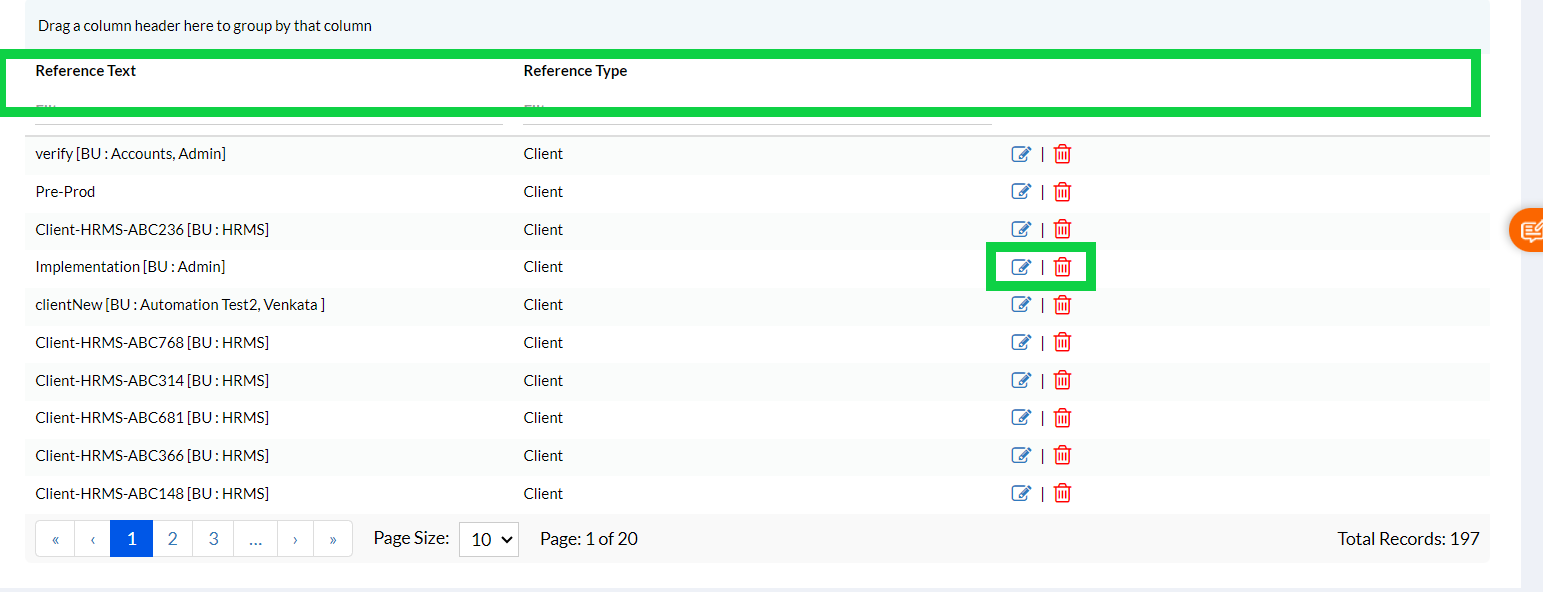
Additionally, you can directly filter required data.
This the process of client creation.
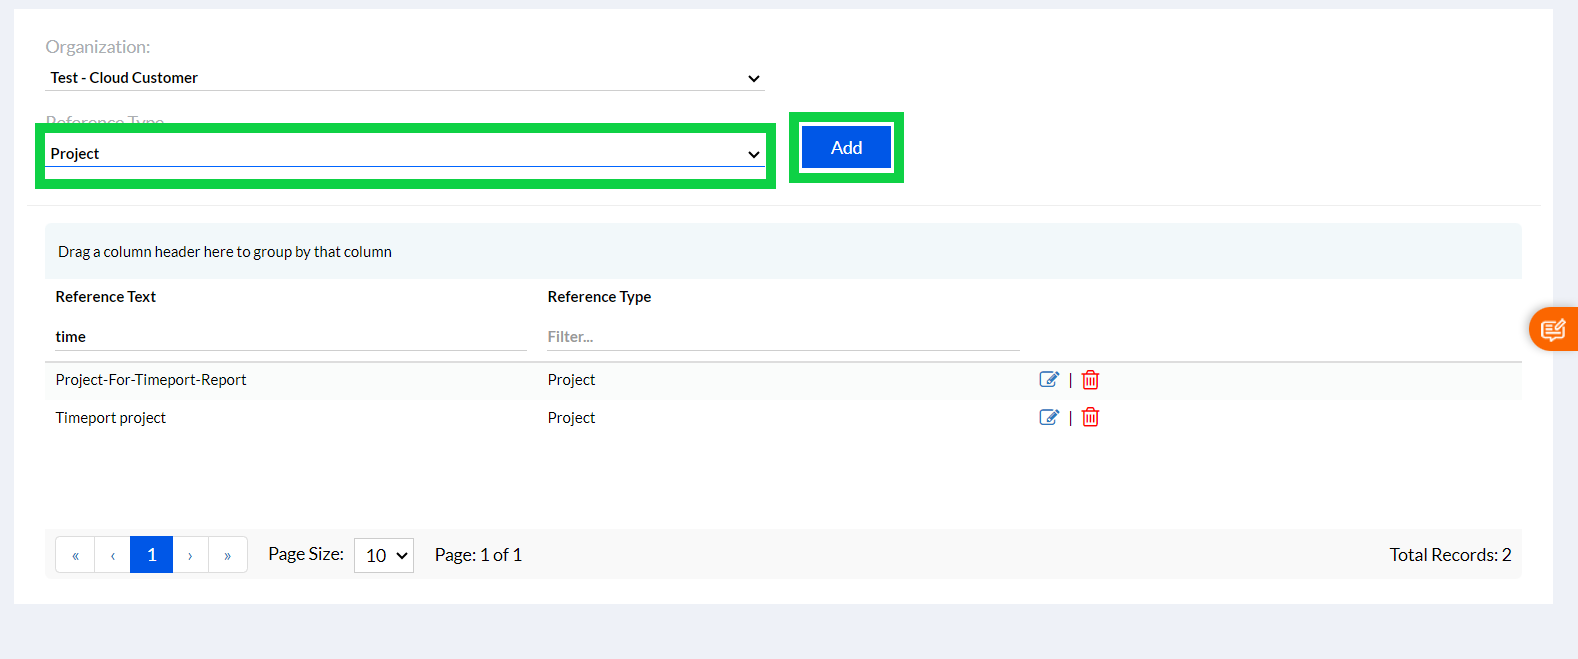
1.1.2. Project:
Click the RA Options Set up, select Organization, from dropdown list, Click Project in Reference Type dropdown list and click Add as shown in the screenshot below.
Once you click the Add the following screen opens.
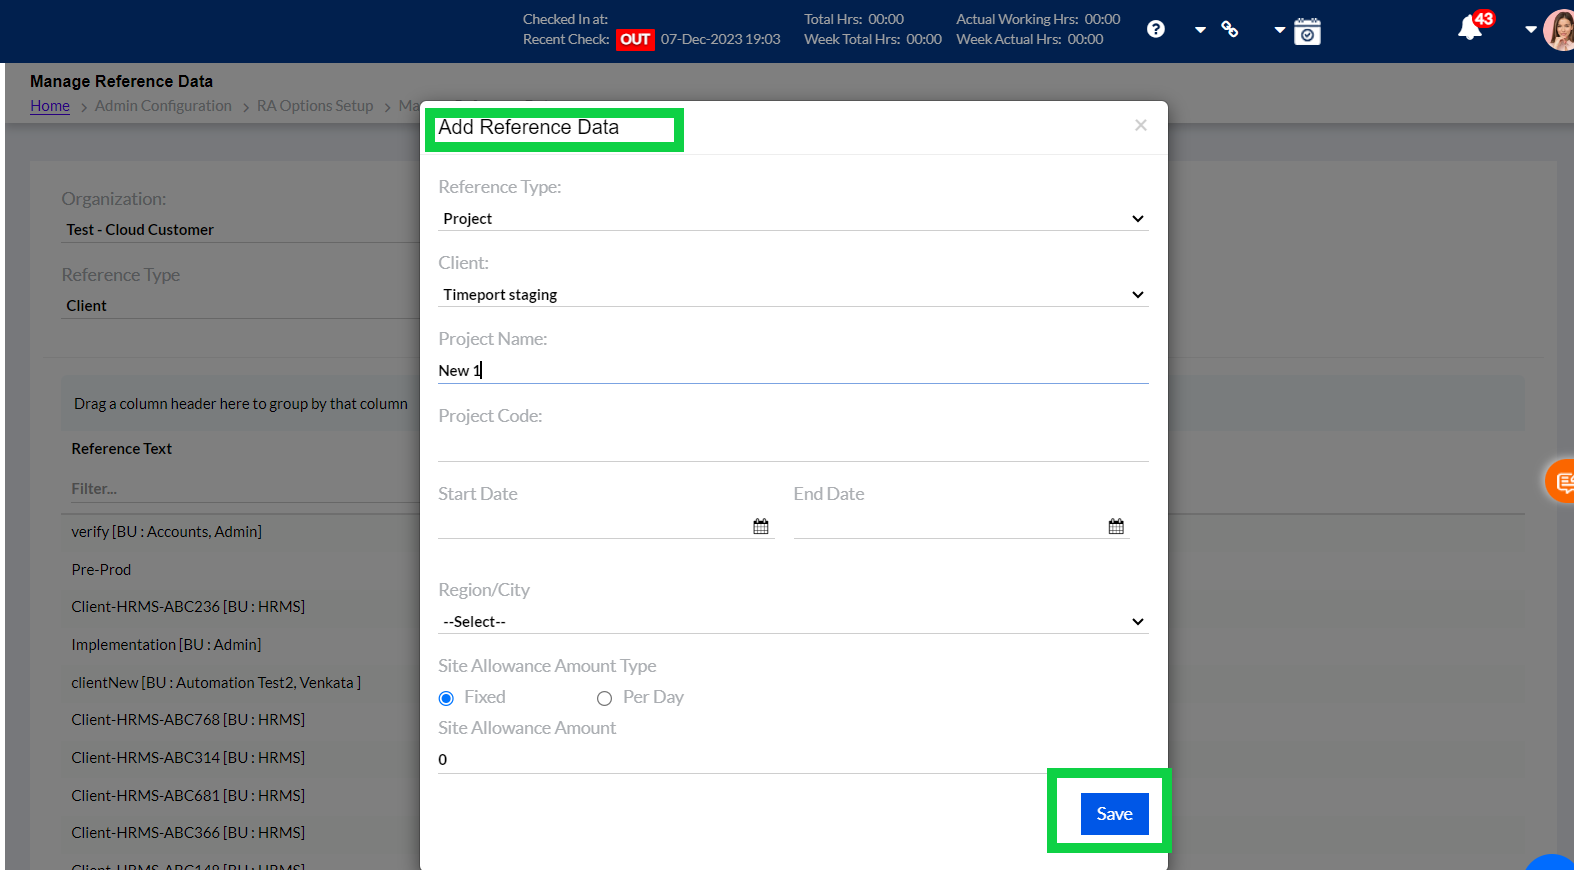
Select Reference Type as Client from the dropdown. Give the Project Name, Project Code (optional), Start Date and End Date (also optional), select Region /City (optional) and select whether the Site Allowance Amount Type is Fixed/Per Day. Additionally, fill the Site Allowance Amount and click Save to add the reference data about project.
Once the project is created its displayed below in the list.
You can drag Column Header and group your desired data from the list as shown in the screenshot below. You can Edit or Delete any data by clicking the respective icons. Additionally, you can directly filter required data.