Recruitment Management
All the details of the process can be set up and managed from the admin config. The various tabs of recruitment management are set up here.
CTC Permission Setup
The CTC Permission can be Setup here.

CTC Access Permission can be given to Role or Employee
CTC Access Permission to Role
Here, the permission is given to the person with a particular role as shown below.
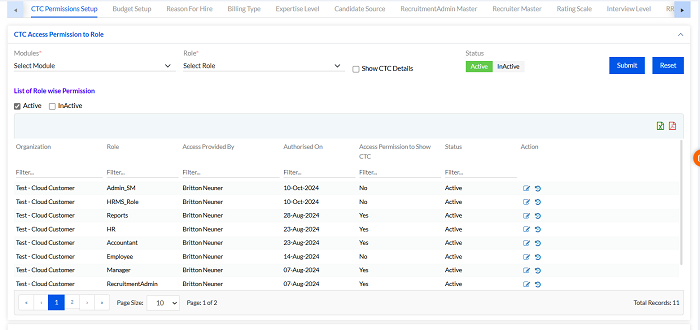
In Modules, Select Modules, Role, Check the Show CTC Details box (if you want the user to view it), select Status Active/InActive and Submit. The previously added Role wise Permission are enlisted below in the List of Role wise Permission. There are different export buttons to export the data to PDF, and Excel, respectively.
CTC Access Permission to Employee
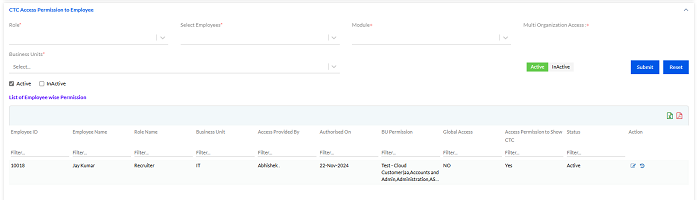
Select Role, Select Employees, Module, Multi Organization Access, Business Units, select Status Active/InActive and Submit. The previously added Employee wise Permission are enlisted below in the List of Employee wise Permission. There are different export buttons to export the data to PDF, and Excel, respectively.
1.6.2. Budget Setup
The Budget Setup is done here for recruitment.

The Business Unit, Cost Center, Budget Type, Budget Details, Est. Start Date, Est. End Date, Budget Details Section- Pre-Approved Amount, Select Currency, Position Title, Number of Positions, Requested Amount, Balance Amount for approval, Reason For Request, Approval- Total Requested Amount for Approval, Total Requested Amount, Total Pre-Approved Amount, Total Balance Amount for approval, and Requester Comments are needed to be entered by the user. The Supporting Documents need to be uploaded additionally (Max size is 4MB). Only files with the following extensions are allowed: png, jpg, jpeg, pdf, xlsx, xls, docx, doc.
Then Save and Submit. It will go to the next level for approval according to the workflow.
The Budget List will be displayed below, with details.

Here the Budget ID are designated to the entries and there is an action column with View and History Details icon to be accessed for each Budget ID. On clicking a particular Budget ID the following details will be displayed about the budget.
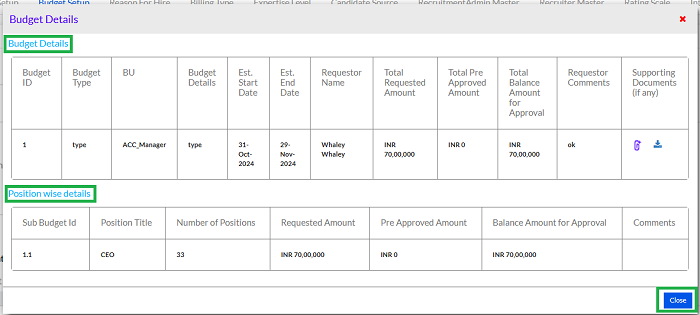
Here, the Budget Details and the Position wise details can be viewed. Click on Close button after viewing.
1.6.3. Reason to Hire
The Hiring Reason can be Filled up here.
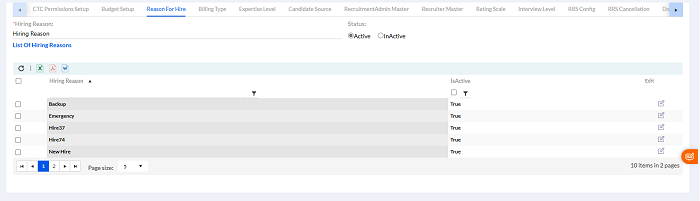
Fill the Hiring Reason, select Status Active/ InActive and click Submit to submit the hiring reason. The previously added Hiring Reasons are enlisted below in the List of Hiring Reasons. There are different export buttons to export the data to PDF, DOC and Excel, respectively.
1.6.4. Billing Type
The Billing Type can be entered here.
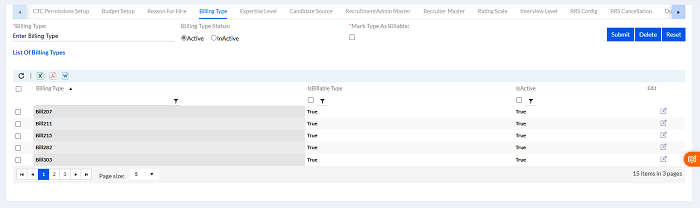
Select the Billing Type from the dropdown menu, select Status Active/ InActive and click Submit to submit. The previously added Billing Type are enlisted below in the List of Billing Type’s. There are different export buttons to export the data to PDF, DOC and Excel, respectively.
1.6.5. Expertise Level
The Expertise Level can be entered here.
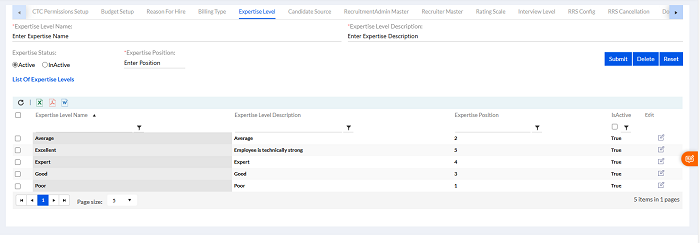
Select the Expertise Level Name and Expertise Level Description from the drop-down menu. The previously added Expertise Level are enlisted below in the List Expertise Levels. There are different export buttons to export the data to PDF, DOC and Excel, respectively.
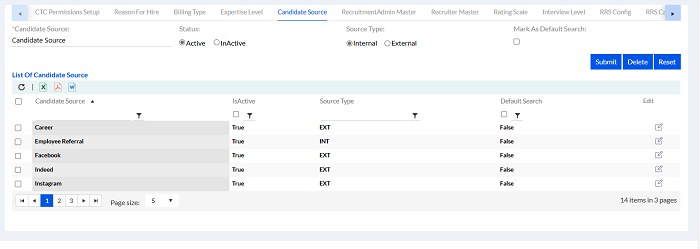
1.6.6. Candidate Source
The Candidate Source can be added here. Candidates can be External or Internal. The Status can be Active/ InActive. The List of Candidate Source will be displayed below.
1.6.7. Recruiter Admin Master
The Recruitment Admin Master can be set here.
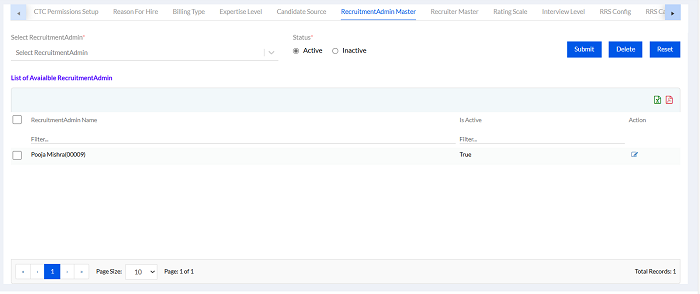
The Recruiter Admin for the hiring process can be selected here. Select the Recruiter Admin, mention Status Active/InActive, and Submit. The List of Available Recruiters will be displayed below. There are different export buttons to export the data to PDF, and Excel, respectively. If recruitment admin role is not added in system previously, then any existing employee can work as recruitment admin only after adding into this master.
1.6.8. Recruiter Master
The Recruiter Master can be set here.
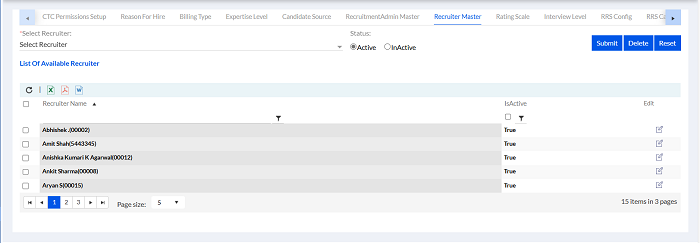
The Recruiter for the hiring process can be selected here. Select the Recruiter, mention Status Active/InActive, and Submit. The List of Available Recruiters will be displayed below. There are different export buttons to export the data to PDF, and Excel, respectively.
1.6.9. Rating Scale
The Rating Scale can be set here.
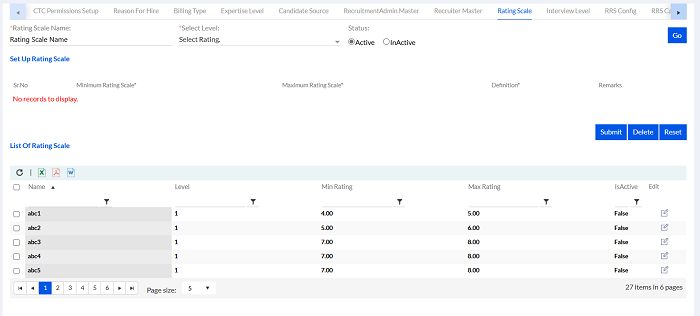
Add the Rating Scale Name, Select Level, and add Status Active/InActive. Set Up the Rating Scale by putting the Minimum and Maximum Rating Scale, its Definition, and add Remarks and then Submit to create Rating Scale. The previously created List of Rating Scale will be displayed below. There are different export buttons to export the data to PDF, DOC and Excel, respectively.
1.6.10. Interview Level
The Interview Level can be set here.
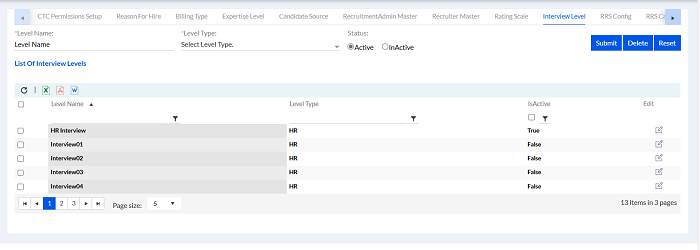
Add the Level Name, and Level Type and put the Status Active/InActive and Submit to create the Interview Level. The previously created List of Interview Levels will be displayed below.
There are different export buttons to export the data to PDF, DOC and Excel, respectively.
1.6.11. RRS Config
The RRS Config is set Here.
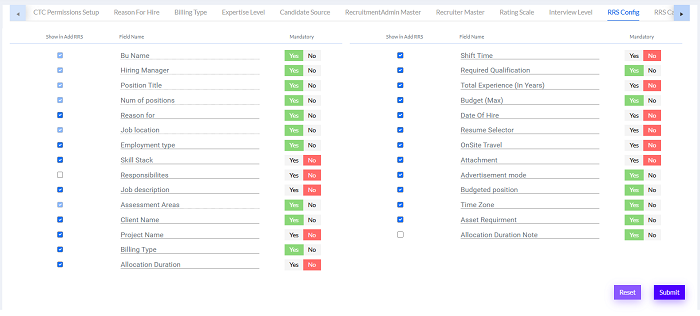
Here the user can set the configuration with Show in Add RRS (Check or uncheck box), Field Name, Mandatory (Yes/No).
Field Name can be -Num of positions, Reason for, Job location, Employment type, Skill Stack, Responsibilities, Job description, Assessment Areas, Client Name, Project Name, Billing Type, Allocation Duration. Then click on Submit.
1.6.12. RRS Cancelation
The RRS Cancellation Reasons can be created here.
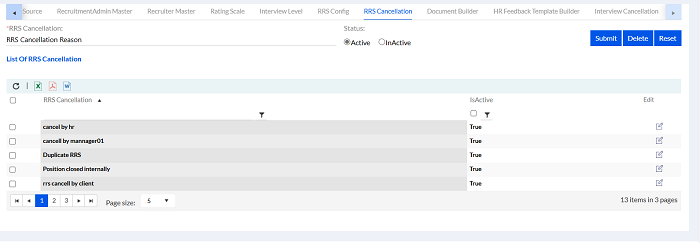
Add the RRS Cancelation and fill in the RRS Cancelation Reason, put the Status Active/InActive, and Submit to create the RRS Cancelation. The previously created List of RRS Cancellation will be displayed below. There are different export buttons to export the data to PDF, DOC and Excel, respectively.
1.6.13. Document Builder
The Admin can add the template of the Offer Letter.

Add the Template Name, Template Description and create the Design, Fonts, etc. Click on Save to save the Template. The previously created List of Templates will be displayed below.
There are different export buttons to export the data to PDF, DOC and Excel, respectively.
1.6.14. HR Feedback Template Builder
The Admin can add the template of the HR Feedback here.
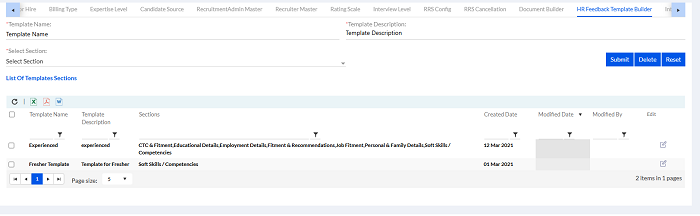
Add the Template Name, Template Description and create the Design, Fonts, etc. Click on Save to save the Template. The previously created List of Templates Sections will be displayed below.
There are different export buttons to export the data to PDF, DOC and Excel, respectively.
1.6.15. Interview Cancelation
The Interview Cancelation Reason can be filled here.
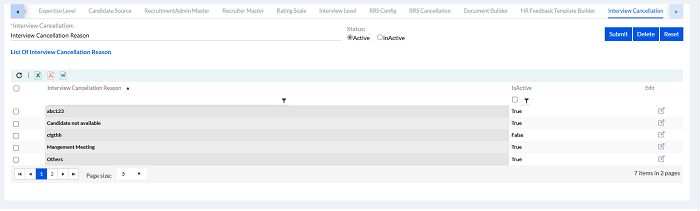
Fill the Interview Cancelation Reason here. The previously added Interview cancellation reasons are enlisted below in the List of Interview Cancelation Reasons.
There are different export buttons to export the data to PDF, DOC and Excel, respectively.