Workflow Group Setup
In the Workflow Group Setup, the Admin can create workflow groups for the entire organization. On the Workflow Group Setup page, the Admin needs to enter Workflow Group Name, enter the Effective From date, Select Employees from the drop-down, add Workflow Group Details, select Business Unit, select Location, mark if the employee Is an Authorized Signatory, select Employee status as Active/Inactive, and then click on the Save Group button, as highlighted in the screenshot below. The Reset button can be used to reset the values entered.
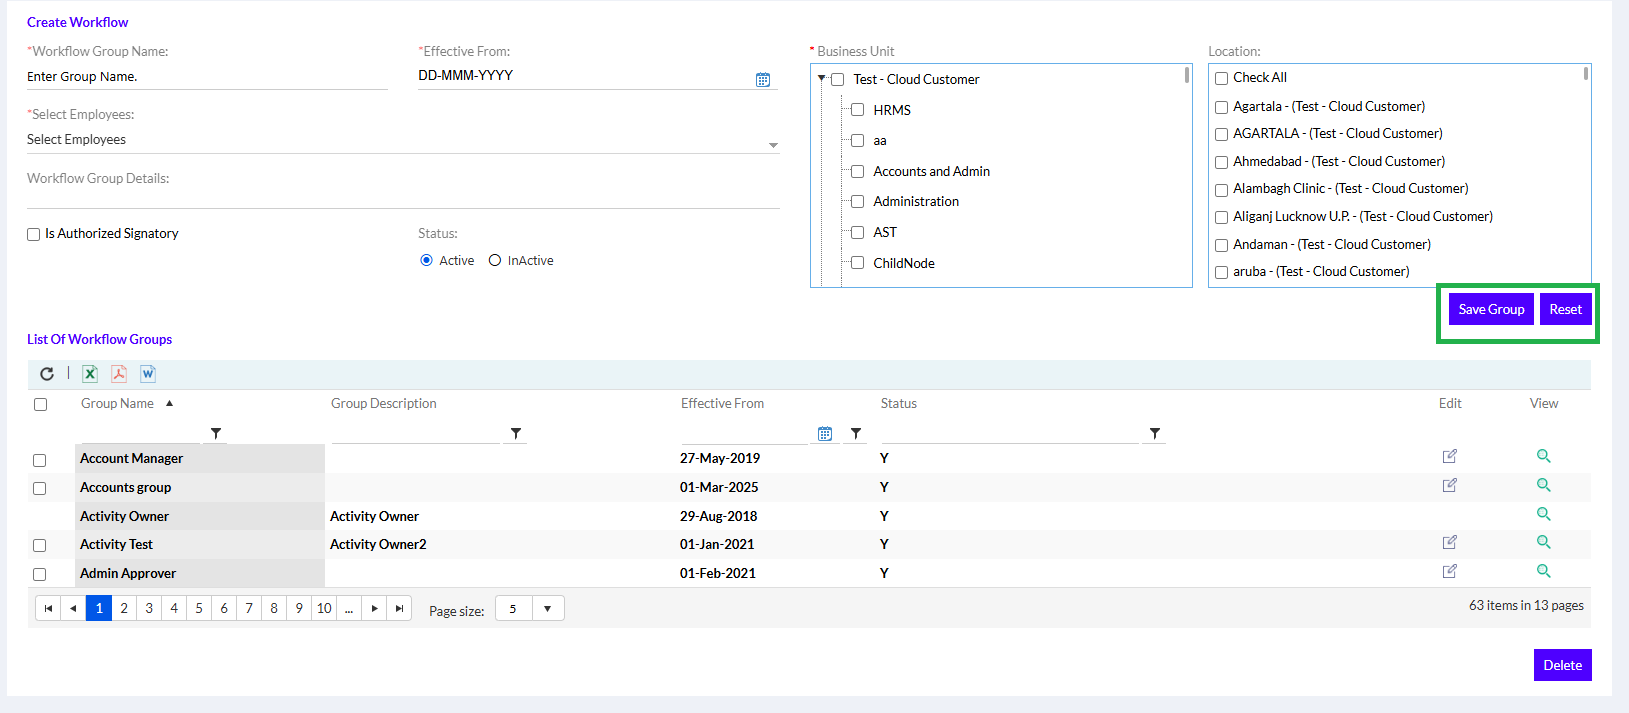
Once the workflow group has been approved, it appears in the List of Workflow Groups, as shown in the screenshot above
To edit/delete any entry in this list or view details of any workflow group, the Admin needs to check the box against the entry and then click on the Edit icon or Delete button, or View icon.
Once the Admin clicks on the View icon, the details of the workflow group appear, as shown below. The Admin has the option to reset the values by clicking on the Reset button.
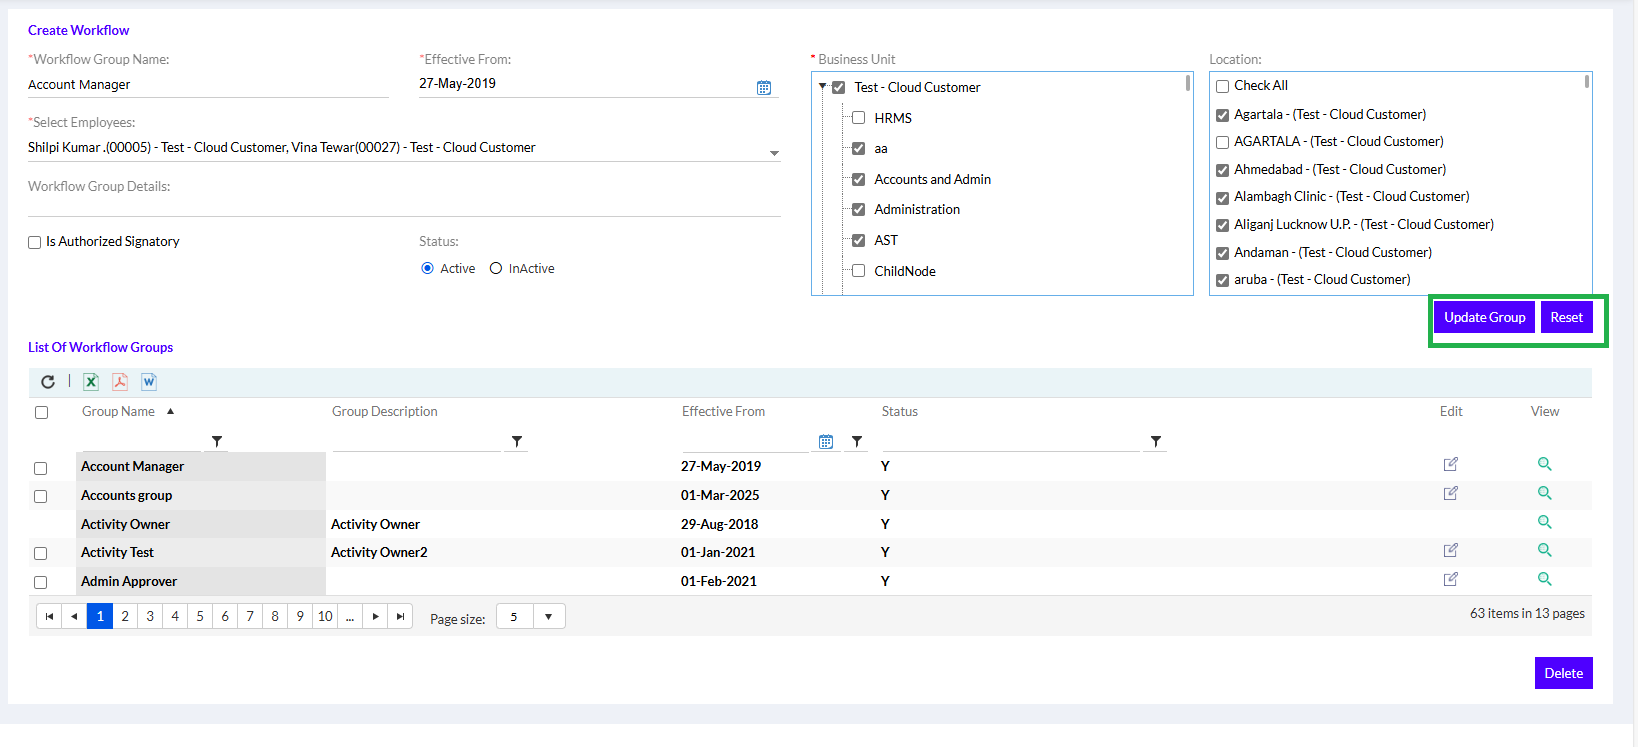
Once the Admin clicks on the Edit icon, the details of the workflow group appear, as shown below. The Admin can make the necessary changes and click on the Update Group button, as highlighted in the screenshot below. The Reset button allows the Admin to reset the values entered.