RAS - Admin Configuration
The admin can set the configuration for the module here. The Business Unit Label can be changed accordin to the user requirement (For example, instead of Business Unit we can use Department) in the customer config - Admin configuration part and wherever Business Unit are mentioned will be changed to that label. All the Manage Access, Manage Allocation, Shared Allocation, Lock Policy and Reports will be impacted.
The RAS Options Set Up and RAS Permission Set Up are there, which can be set here.
The Admin Config consists of the following sections:
1. RA Options Set Up
2. RA Permission Set Up
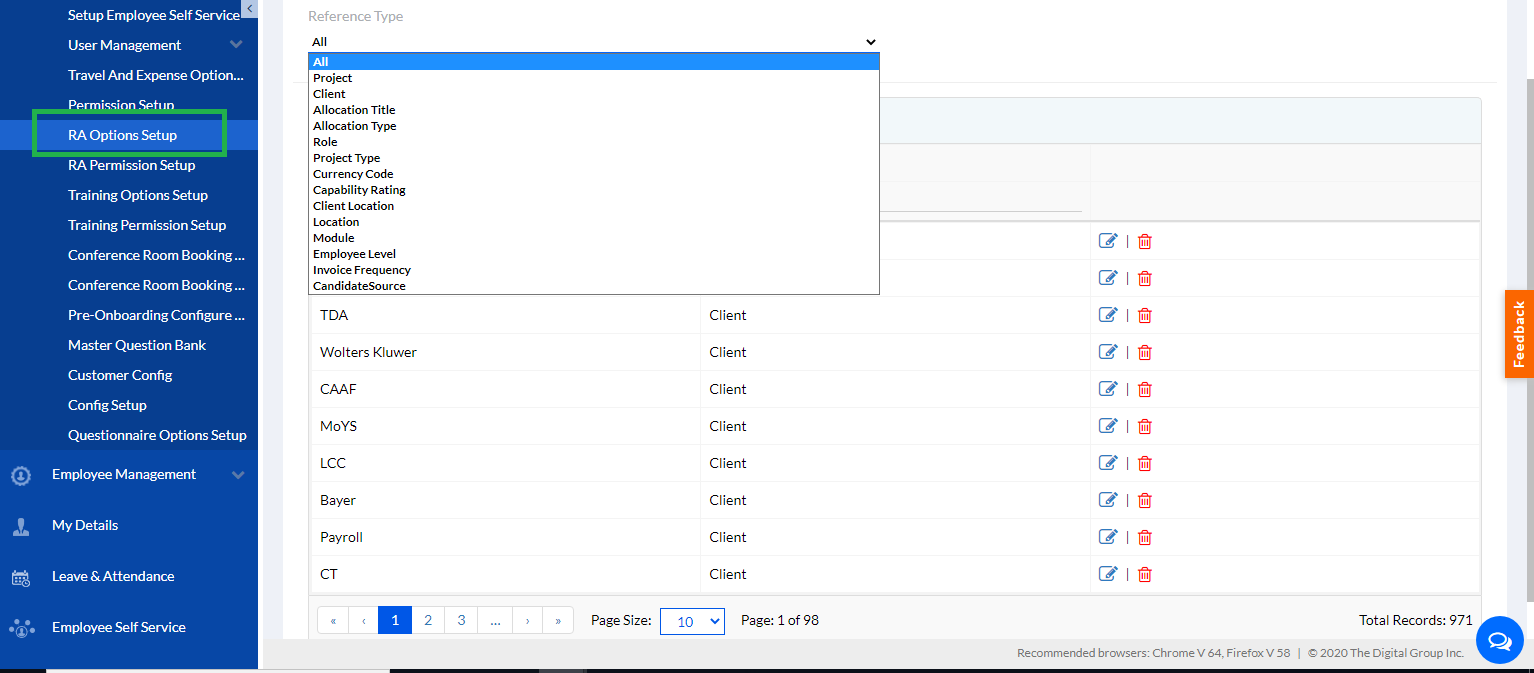
1.1. RA Options Set Up
This is for Admin users. From RA option set up user can add Project, Client, Allocation Title, Allocation Type, Role, Project Type, Currency code, Capability Rating, Client Location, Location, Module, Invoice Frequency etc.
Some of the data like Employee ID, Employee Name, Designation, Grade (if applicable), Reporting Manager, Functional Manager, Business Unit, and Resource Location this data is default and cannot be edited.
Note: Modified By & Modified Date is also set by default.
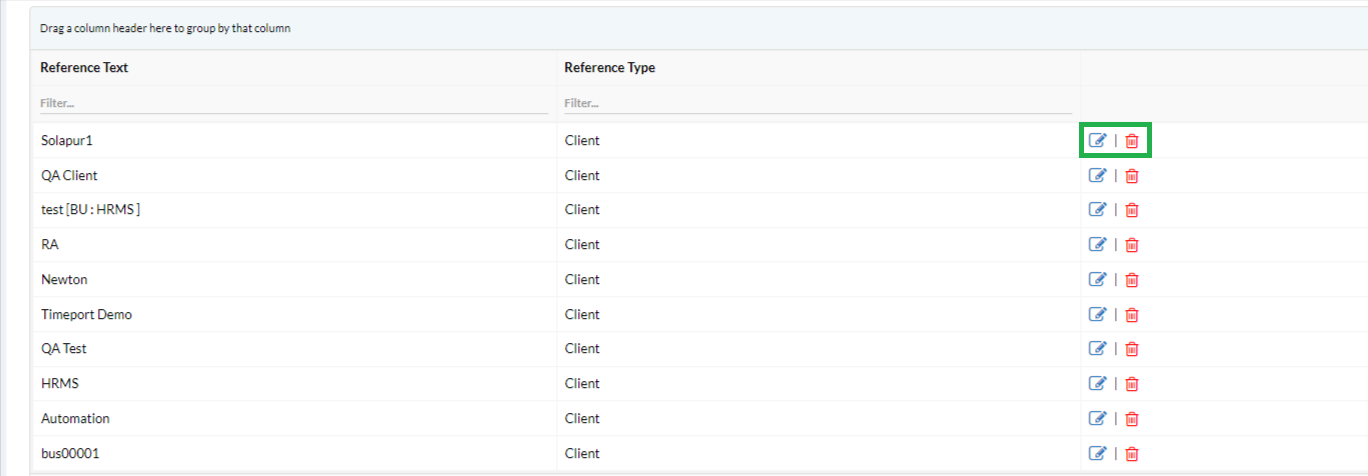
The previously set data are displayed below in list. The admin can edit or delete the entries by clicking on the Edit or Delete icons as show in the screen below.
On clicking the Edit button, a screen with details opens as given below.
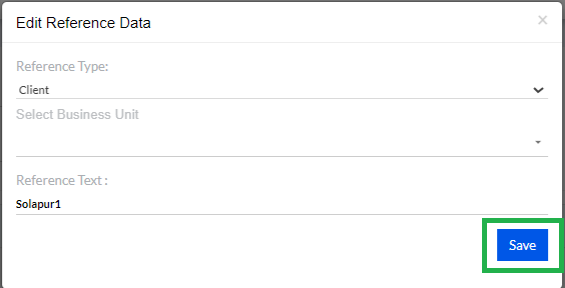
The Admin can make changes and click on the save button to save the changes as shown in the above screen.
1.2. RA Permission Set Up
From the RA Permission Set up Admin users can give permission to Managers, HR or RAS providers or any person to whom Admin User wants to give access. The Permission is given according to Role or Employee. Please check the below screenshot for a better understanding.
Note: Admin User has access to all the Permissions.
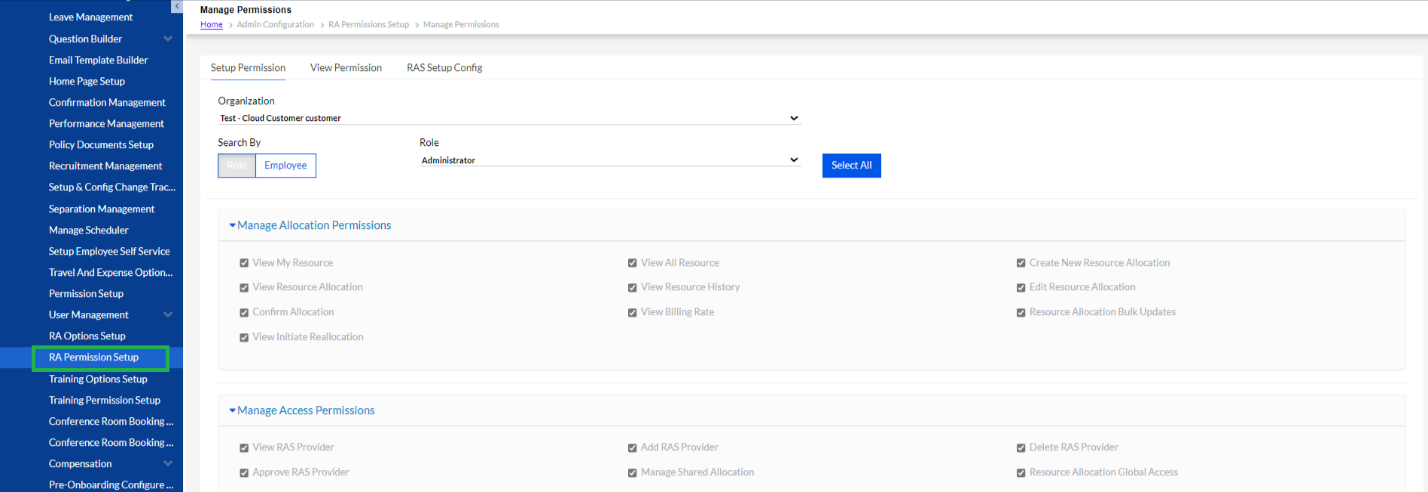
Here Admin can select the Role and give the permissions accordingly. Admin users can give permission by selecting Employee and clicking on the Save button.
There are 3 setup tabs
• Setup Permission
• View Permission
• RAS Setup Config
1.2.1. Setup Permission
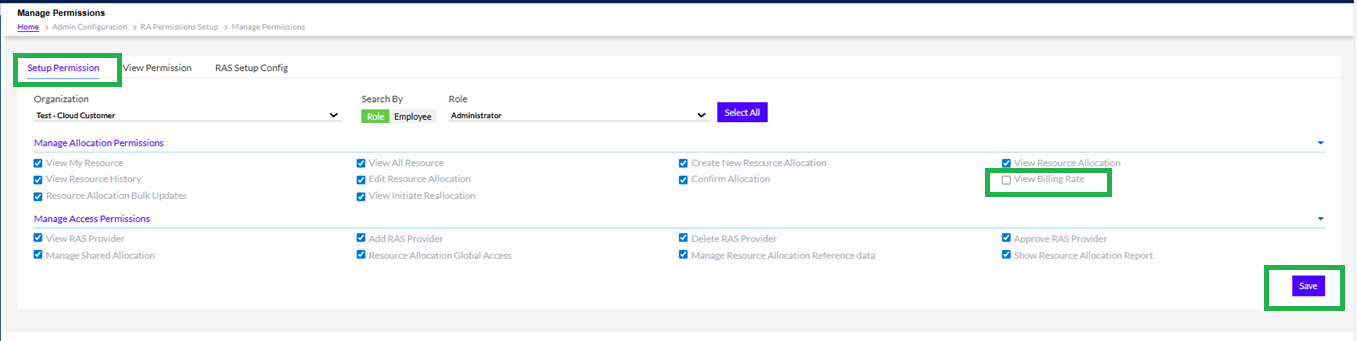
After selecting details like Organizations and Search By either Role or Employee. In Role you can select from dropdown or you can Select All, but in Employee you can search particular employee by typing the name.
Then select the Manage Allocation Permissions you want to give the employee or role by checking the respective boxes. There is a View Billing Rate Check Box, if it is checked then billing rates will be displaced in “Add Allocation”
Similarly, select the Manage Access Permissions you want to give the employee or role by checking the respective boxes. Finally click on the Save button as shown above to save the setups.
1.2.2. View Permission
Here, the Admin user can view the permissions given to an employee or role.

The list can be exported in Excel format by clicking the Excel Icon as given in the above screen.
1.2.3. RAS Setup Config
Here, the Admin can Setup the configuration for the RAS various fields.
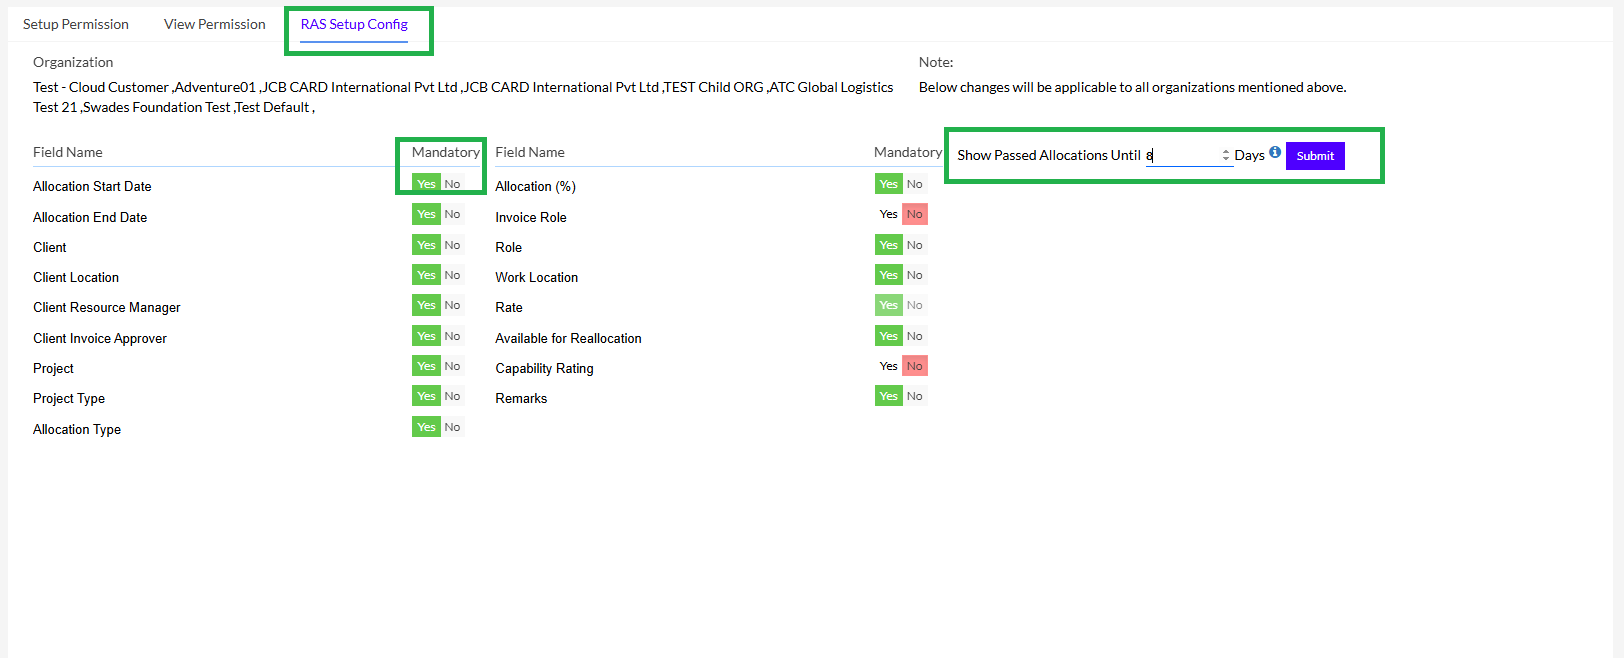
The Admin can change the Fields from Mandatory Yes or No to No or Yes as shown in the above screen simply clicking Yes or No, and then clicking on the Submit button to save. There is a feature to Show Passed Allocation, where the Admin can set the value in days and Submit.
Note: The changes will be applicable to all organizations mentioned above.