Interview Dashboard
The interview dashboard
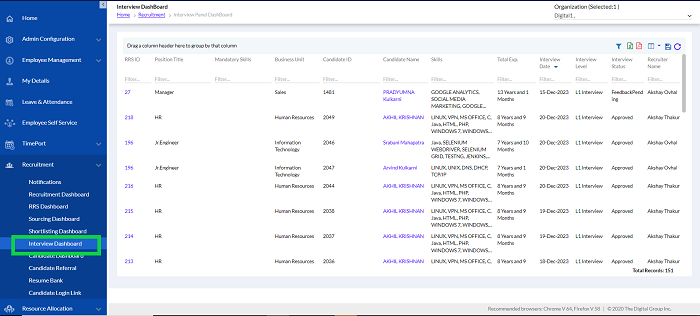
The columns can be grouped together by dragging the column header as shown in the below screen or a Filter can be used to filter the data in the grid, or can be exported in the form of Excel or PDF format by clicking on the respective icons as shown below. It can also be saved or reset by clicking on the respective icons.

Once the Candidate is shortlisted and shown on the Interview Dashboard. As highlighted below.
The following screen opens up.
Schedule an interview by clicking on the calendar. Fill in the Time Zone, Interview Level, Interview mode, Date, Start Time etc. Select the Interview Template as previously set in Admin Config with pre-set questions. Then click on Schedule to schedule the interview. The interview will be scheduled successfully.

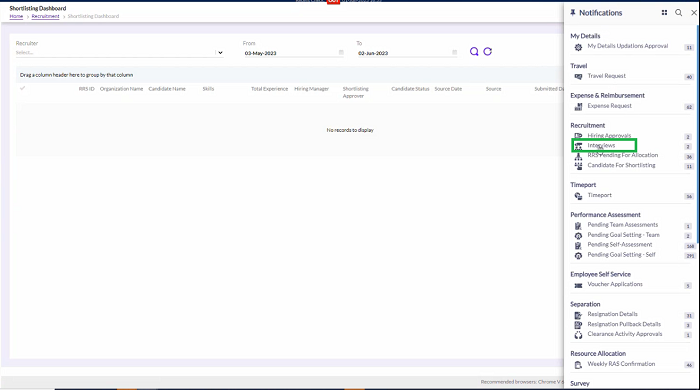
Now the Interview Panel will check in the bell Icon notifications, click on the Interview.
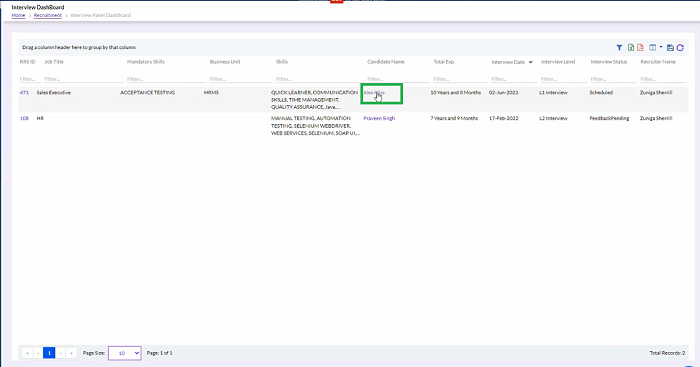
The Following screen will open and now click on the Candidate.
Fill the feedback here.
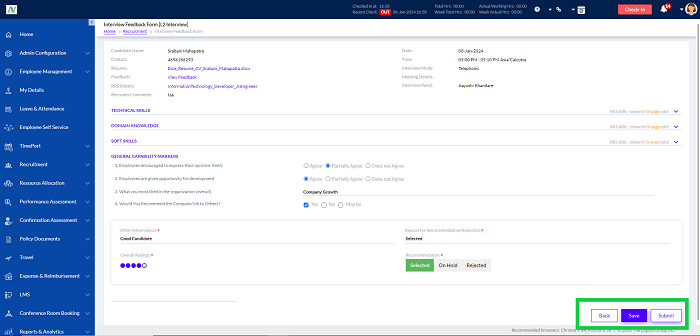
Feedback questions are according to the particular interview templates, like L1 or L2 etc.
Fill in the details, of various skills, Ratings, General Capabilities Markers, Other Observations, Overall Ratings, and Reasons for Recommendation or Rejection. Then Click on Selected, On Hold or Rejected on that basis. Then Submit the Feedback as highlighted in the above screen.
If the candidate is put Onhold at interview level then that candidate will be moved to Onhold – Candidates on notification grid. From there, the panel can further approve/reject the interview feedback.
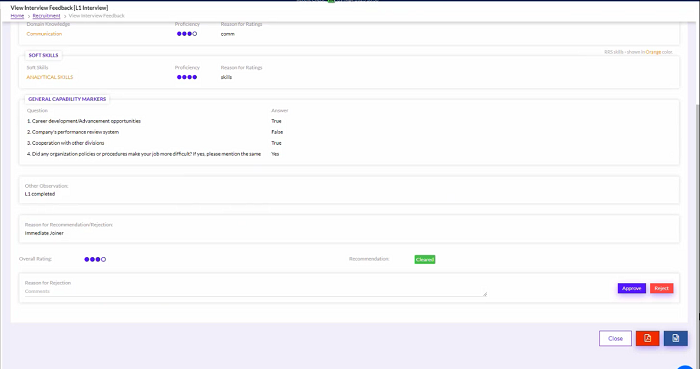
After Interview feedback is submitted the Recruiter has to Approve or Reject the Feedback.
The details filled in will be displayed. The Recruiter will click Approve or Reject buttons as shown in the below screen after giving comments. If rejected will go back to the Interview Panel and again panel can refill the feedback form and can send it back to recruiter.
Like this, the Recruiter can create other L2 or HR interviews in a similar manner and follow the same procedure.
Then Recruiter will initiate Hiring Approval if all levels of interviews are cleared.
We can navigate to below screen from interview dashboard by clicking on calendar icon OR From Recruitment dashboard select candidate from the drop down and click on 2nd milestone i.e. on Initiate Hiring Icon.
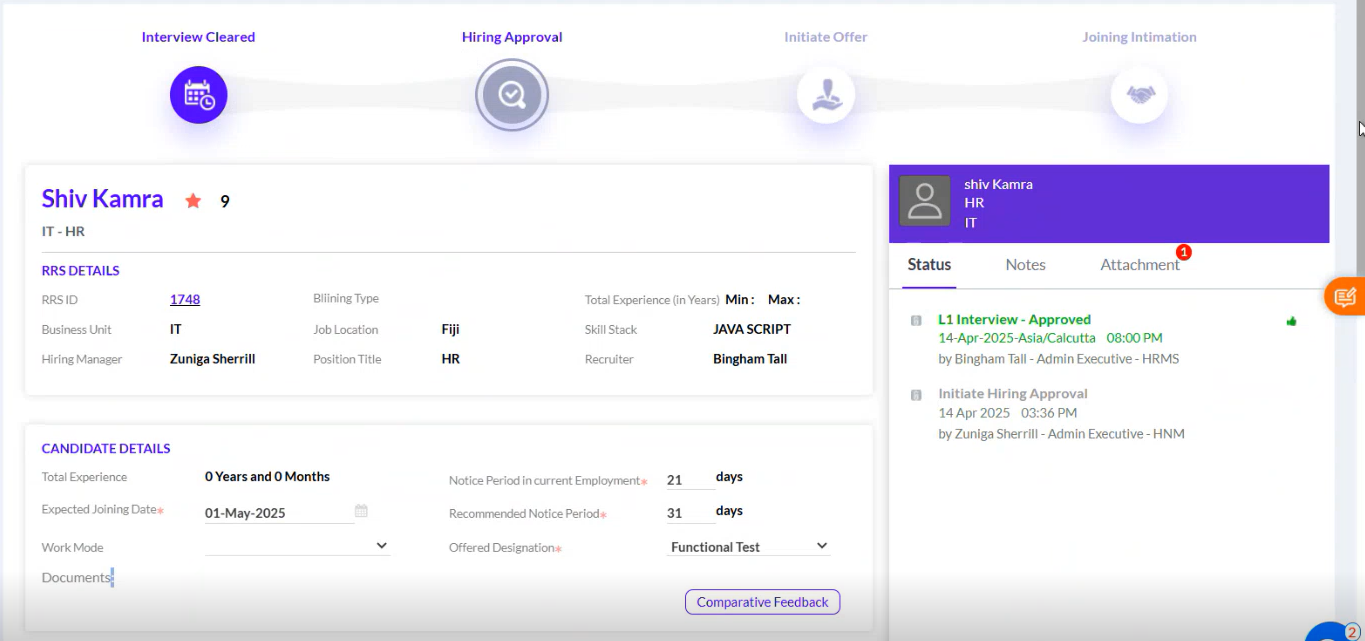
The recruiter will add all the mandatory fields and click on Submit to send for Hiring Approval after giving comments and uploading supporting documents (PDF, Zip, Doc Formats supported) if any. It will go for approval as per the workflow set previously in the Admin Config.
The Approver will get email notifications and on clicking the Bell Icon, the notifications for Hiring Approvals.
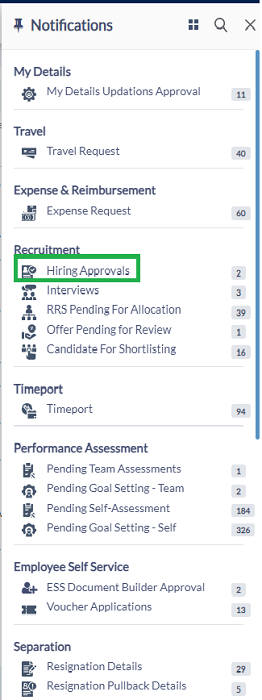
The notifications for approvals will be displayed as below. There are different export buttons to export the data to PDF, and Excel, respectively.
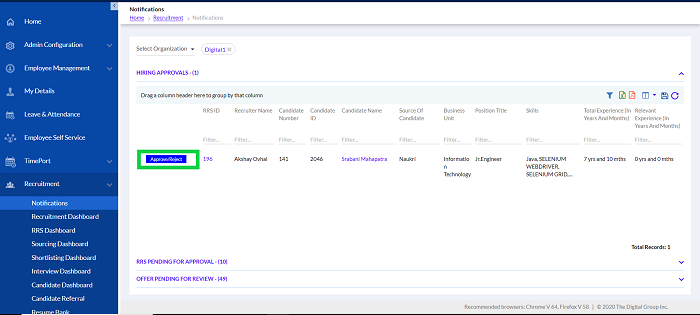
Click on Approve/Reject button as highlighted in the above screen.

Click on the Approve/Reject button as highlighted in the above screen after giving comments. In initiate hiring approval page, approver can see candidate expected and recommended CTC, Comparative feedback, RRS details and see attachment comments and status into slider. If Rejected candidate cannot be processed further for that particular RRS.
If Candidate is approved it will go to next level approval as per workflow group setup. Once all the approval authorities approve the candidate status will get changed to Hiring Approved and now recruiter can generate offer letter for candidate into initiate offer page.
Certain candidates are kept on hold on Hiring approval levels due to some reasons during these are displayed in the OnHold subtab as shown below, which can be seen in the OnHold Candidate Notifications Grid.
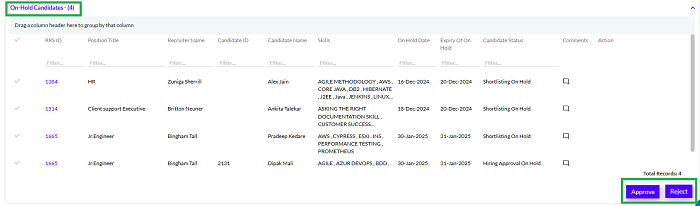
Here, also the recruiter can Approve or Reject.
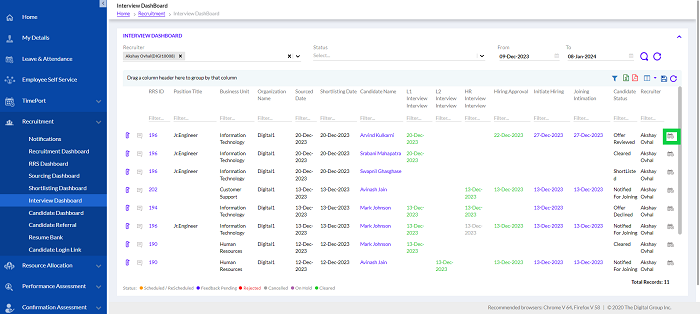
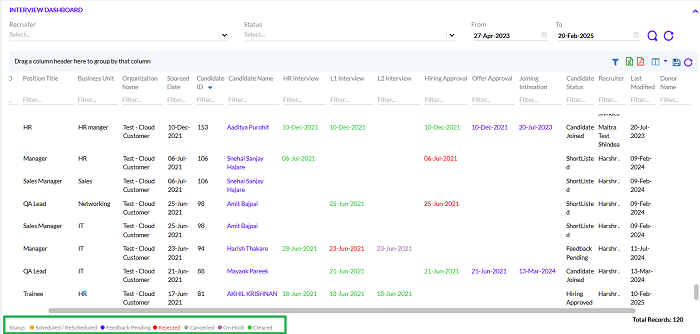
The Interview Dashboard displays various stages in various colors as displayed in below screen.
Recruiter can navigate to initiate offer page from Interview dashboard page by clicking on calendar icon OR from Recruitment Dashboard by selecting candidate from the drop down and clicking on initiate offer icon. There are different export buttons to export the data to PDF, and Excel, respectively.
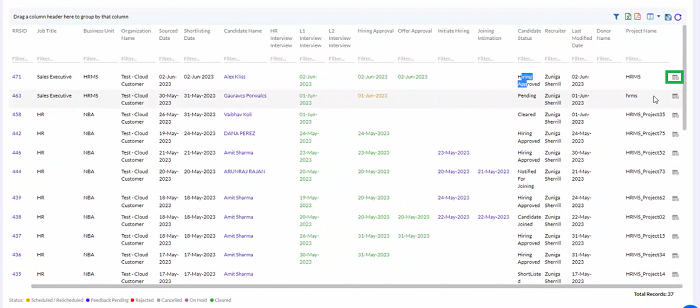
Or we can navigate through Recruitment Dashboard and search Candidate Name.
.png)
Click on Initiate Offer as highlighted in the below screen.

In the Initiate Offer page the Recruiter will create the offer letter.
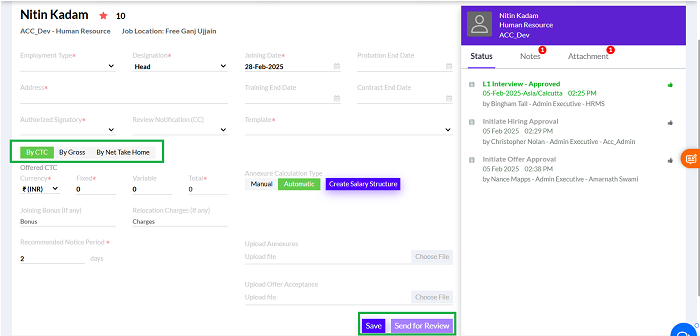
There is a new feature where the offer letter can have 3 options of Offered CTC- i) By CTC, ii) By Gross or iii) By Net Take Home. This configuration is previously set in Admin Config under Compensation.
The Annexure calculation type can be Manual or Automatic. For automatic it will create all the values from the backend and display. For the Manual, the recruiter has to add all the Data. After that Click on Save the Offer Letter will be generated as shown below.

On clicking on the View Offer Letter, the offer letter will open in a PDF format.
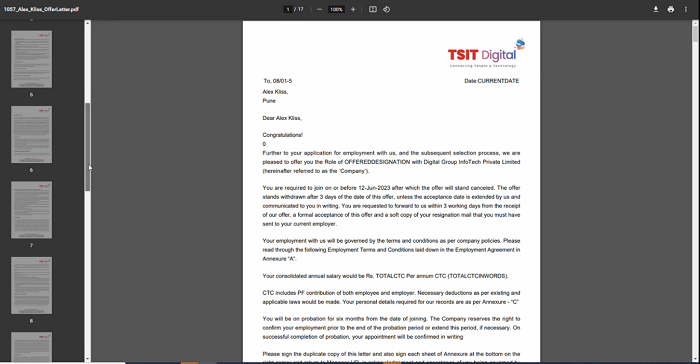
The Salary Structure is displayed as previously set. The Offer Letter template and annexure as setup in admin config is combined together to display the offer letter
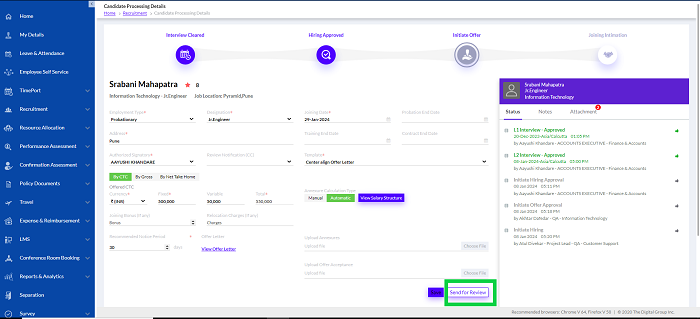
After creating Offer Letter, the Recruiter sends it for review as highlighted in the screen below
There is an option to pullback an offer letter by the recruitment admin after offer letter generation. The user has to mention the reason for pullback.
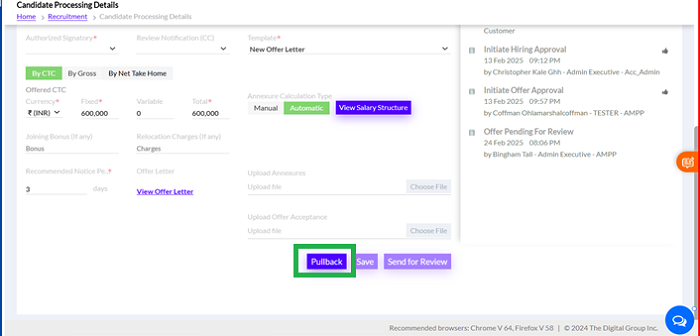
After pullback, it can be sent for revision.

The reviewer can get notifications through email and view them through Bell Icon (Offer Letter Pending for Review).
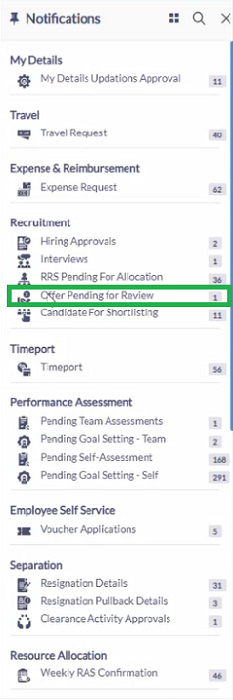
Clicking on the Offer Pending for Review the reviewer screen opens.
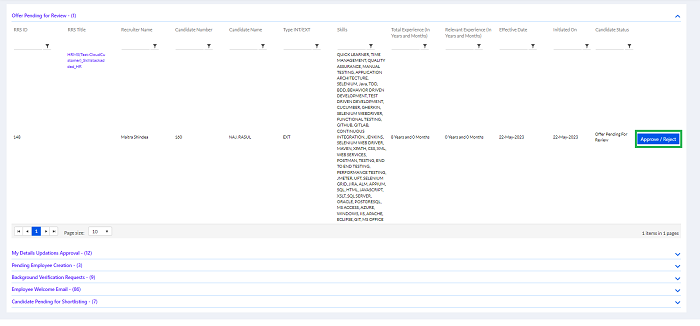
The HR Manager is able to see all the details here. They can download the attachments.
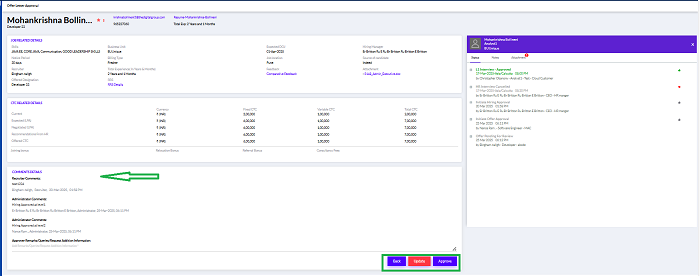
Previous comments are visible here. After approval of Offer Letter by HR manager, it will again go back to the recruiter.
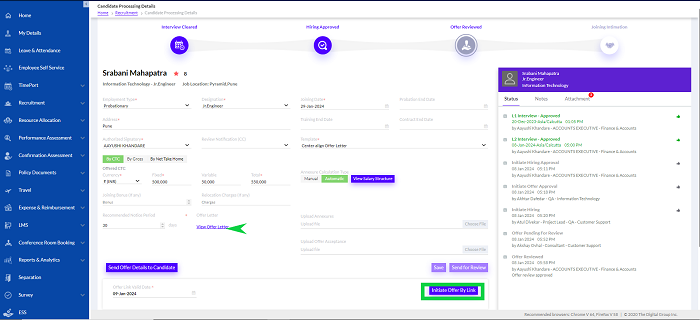
The Recruiter can share offer letter to candidate in 2 ways one is through email by clicking on send offer details to candidate button and second one is through candidate login link by clicking on share offer by link button. The recruiter can directly send the Offer Letter from here by clicking on the Send Offer Letter Details to Candidate (as highlighted in the screen above) or Download the offer letter form View the Offer Letter as shown by an arrow in the above screen and send the candidate through the mail. Once clicking the Send Offer Letter Details to Candidate button, the following screen opens.
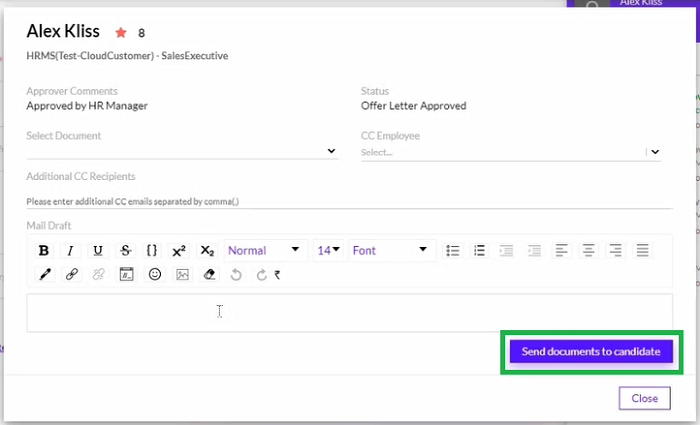
The additional recipients can be added here manually and the document-Offer Letter can be attached here. After clicking the ‘Send documents to candidate’ button, it will be sent to the candidate.
The offer letter can be sent to the candidate, either manually or automatically.
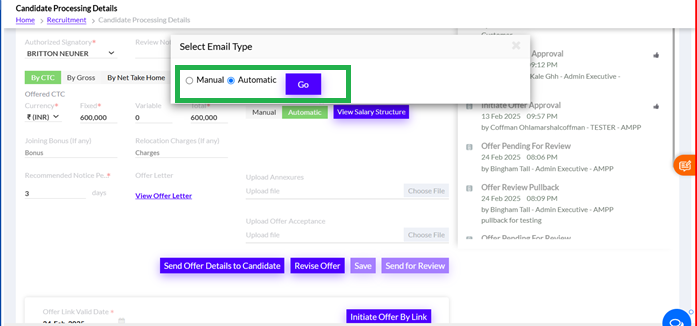
If the automatic option is selected there are pre-defined email bodies. The mail is triggered automatically, in the pre-set format.
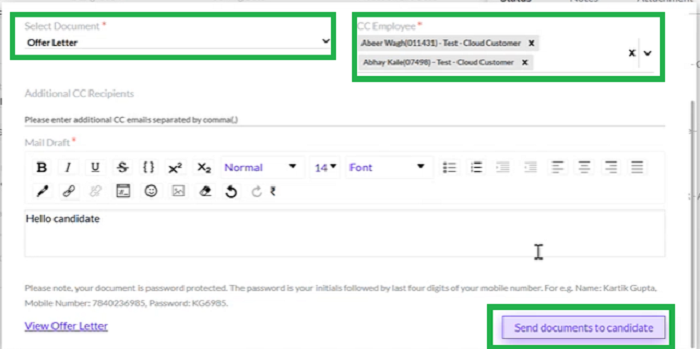
If Manual is selected, select the document and add the employee, in CC Employee and additional recipients if any. Then draft the mail, send documents to candidates. Email will be triggered to candidates, CC and additional recipients too.
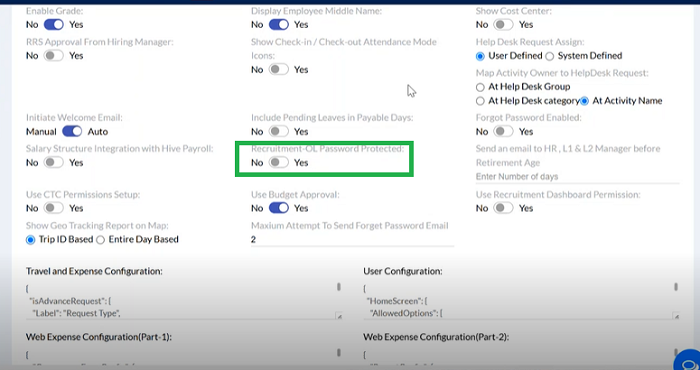
There is an option to View Offer Letter on click of the respective button. If in the Customer Config the Offer Letter is set as password protected, then the user needs password to open the document. For that it needs to be enabled in Customer Cofig page as shown below
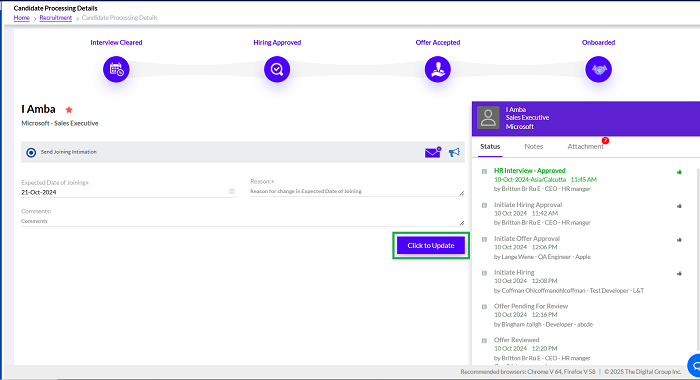
If candidate accept the offer then only it will move to next step. If the candidate accepts the offer, rejects HR will convey the recruiter. The recruiter will mark the status as Offer Accepted through the system.
Recruiter has to initiate Joining Intimation by selecting the respective radio button, enter comments and Submit.
Now the particular candidate will be displayed in the pre-onboarding of the Employee Management Module as Pre-Onboarding Candidate. You can select the candidate’s name here to proceed with pre-onboarding.
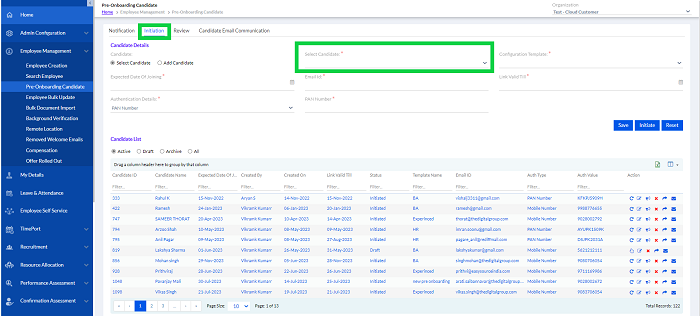
There is export button to export the data to Excel format.