Travel - My Requests
The new requests can be created and their status can be viewed here for self.
2.1.1 Creating a New Request
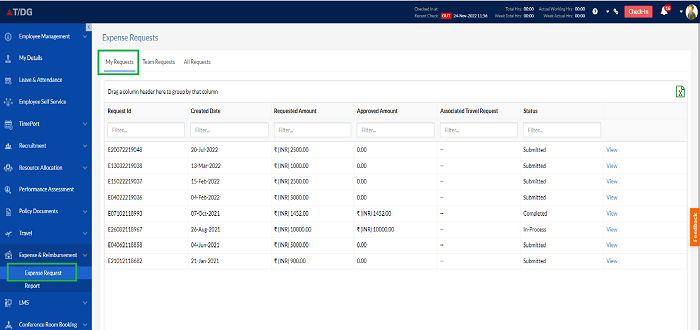
In order to create a new Expense request, the user has to click on the Click New Request button on the bottom right corner of the Expense Requests page, as highlighted in the screenshot below.
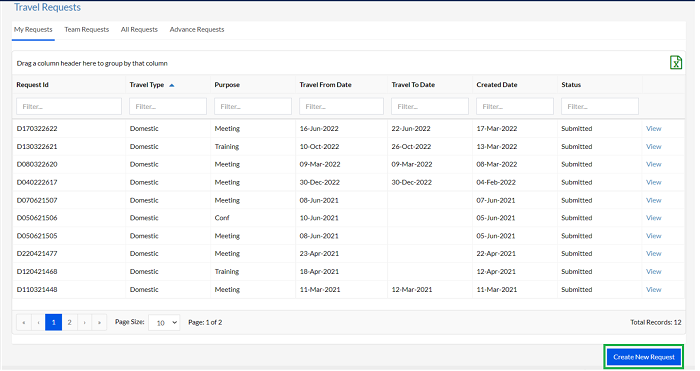
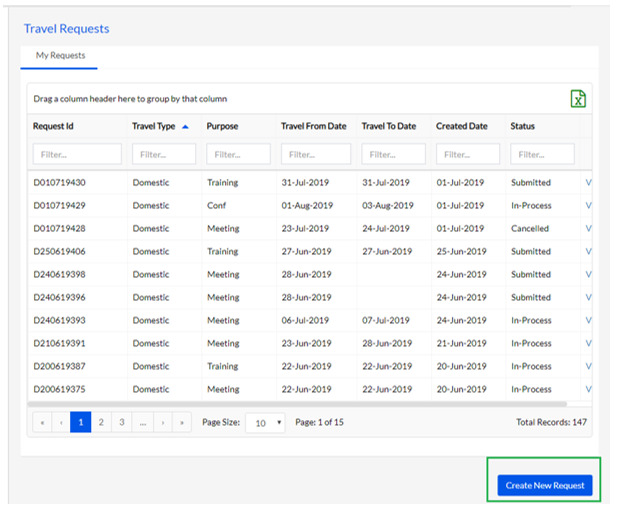
In order to create a new Travel request, the user has to click on the Click New Request button on the bottom right corner of the page, as shown below.
On clicking the button, the user is directed to the request creation page. The process of creating of a new Travel Request requires the user to enter information in the following 3 steps, as shown in the screenshot below:
- Travel Information
- Travel Schedule
- Accommodation
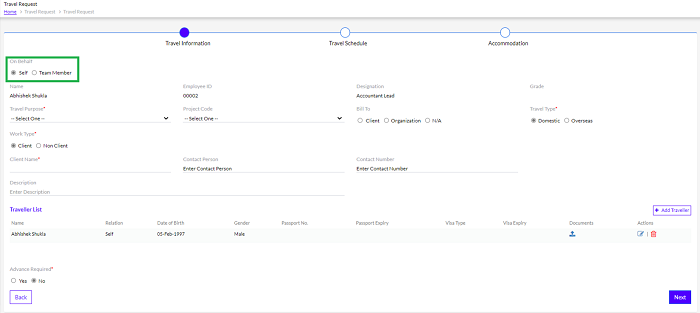
There is a provision for the Manager to raise a travel request for a team member. This can be done by selecting the Team Member radio button, as highlighted in the screenshot below.
Travel Information
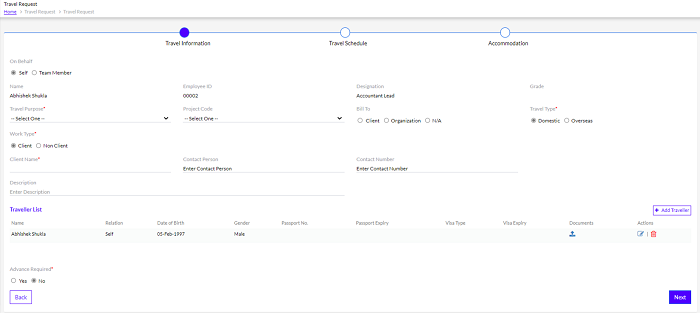
The Travel Information section refers to the basic essential information about the traveler and other details, that need to be added by the user. These include the following. (Refer to the screenshot below.)

- Travel Purpose: The user can choose the most relevant purpose from the drop-down menu.
- Project Code: The user needs to choose the Project Code the travel is regarding.
- Bill To: Can be the client or the organization. If not either, the user can select the ‘N/A’ option.
- Travel Type: Can be Domestic or Overseas
- Work Type: Can be Client or Non-Client
- Client Name: The name of the client, if applicable
- Contact Person: The contact person in the area where the user is traveling to
- Contact Number: The contact number with the country code (Example +91 for India)
- Description: Any other miscellaneous detail that the user might want to add.
** Note: All the fields are customizable and can be customized by the Admin through the Admin Configuration tab.
**Note: The parameters on this page can be customized by an organization at their convenience. They can even add more boxes or parameters or reduce them. The information required can also be customized.
**Note: It is important to note that the data for the following are automatically fetched by the system from the database are added by default. This data cannot be edited by the user from this page.
- Name:
- Employee Id:
- Designation:
- Grade:
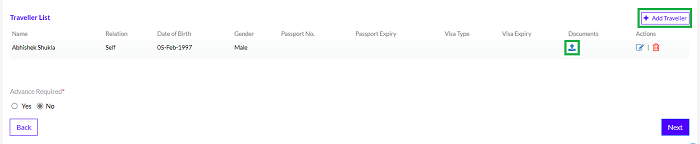
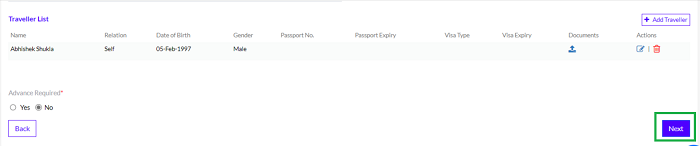
The Traveller List section shows the list of travelers for that request. By default, the system fetches the data of the user who is raising the request, under the following parameters: This is shown in the screenshot below.
- Name:
- Relation:
- Date of Birth:
- Gender:
- Passport No:
- Passport Expiry:
- Visa Type:
- Visa Expiry:
- Documents:
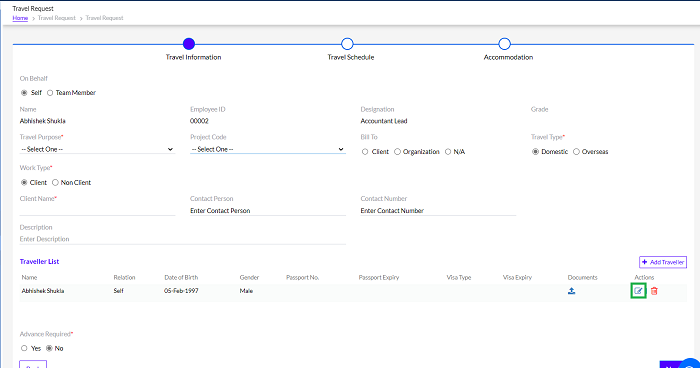
If the user finds any of the fetched information to be inaccurate, they can edit the information by clicking on the Edit icon as highlighted in the screenshot below.
On clicking on the Edit button, the user can update the details in the pop-up window that appears and click on the Save button as highlighted in the screenshot below.
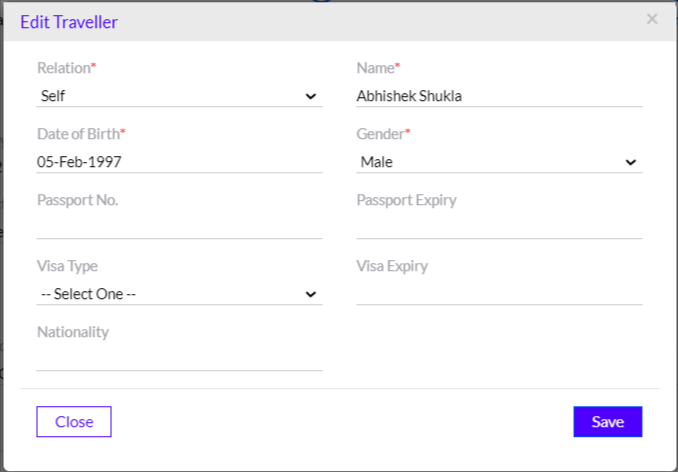
**Note: The changes made in the user details on this page, will be limited to the purpose of the Travel Request only, and these details will not be updated in the employee database.
Adding a New Traveler
The user has the option to add one or more travelers, in addition to themselves, and they can either be a spouse, parents or children. To add another traveler, the user needs to click on the Add Traveler button. The user can also upload the required documents by clicking on the upload icon under the Documents column, as highlighted in the screenshot below.
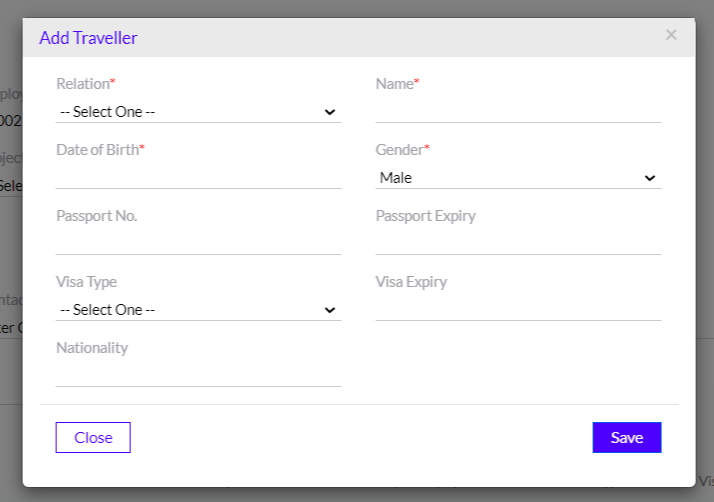
Once the user clicks on the Add Traveller button, a pop-up window appears where user can fill the details and click on the Save button, as highlighted in the screenshot below.
**Note: The user can add as many travelers as required, by clicking on the Add Traveler button multiple times and filling the details for every additional traveler.
If the user requires any advance payments in various currencies, he/she can also select the Yes or No radio buttons, to state whether advance is required or not, as highlighted in the screenshot below.
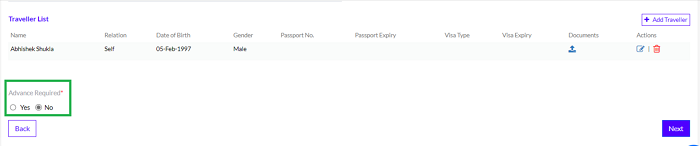
If Yes, add advance amount and Advance payment Mode.

Once all the required information has been successfully entered, the user clicks on the Next button, as highlighted in the screenshot below, to move to the next section.
Travel Schedule
This Travel Schedule page allows the user to enter details about the Travel Schedule. The user can add one or multiple schedules, as required. The parameters the user is required to fill in are as follows, and are shown in the screenshot below:
- Source: A mandatory field. The city where the journey starts.
- Destination: A mandatory field. The city where the journey ends.
- Ticket Booking Preference: Ticket can be booked by the employee or the organization (Travel Desk)
- Book Return Ticket: Can be Yes or No
- Depart On: Mandatory field. The date on which the journey begins
- Arrive On: The date of arrival to destination.
- Travel Mode: Mandatory field. Can be a flight, train, bus, or car
- Travel Class: Mandatory field. The class of flight or train as applicable
- Comments: Any additional information the user might want to provide.
** Note: All the fields are customizable and can be customized by the Admin through the Admin Configuration tab.
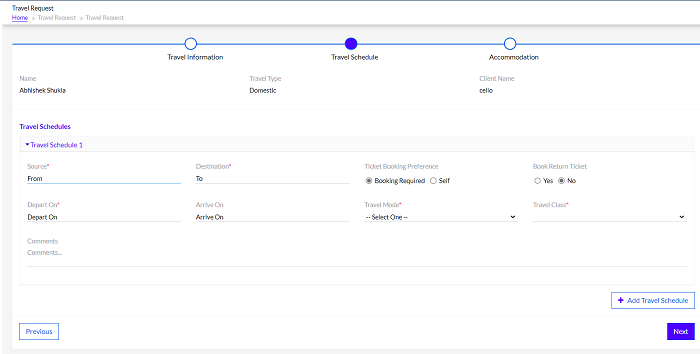
The user can add more Travel Schedules by clicking on the Add Travel Schedule button as highlighted in the screenshot below.

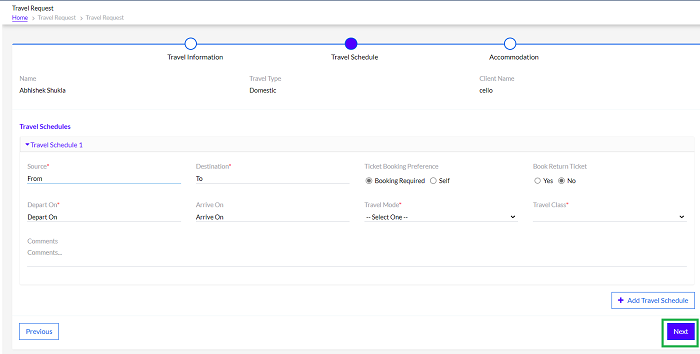
Once all the required information has been successfully entered, the user clicks on the Next button, as highlighted in the screenshot below, to move to the next section.
Accommodation
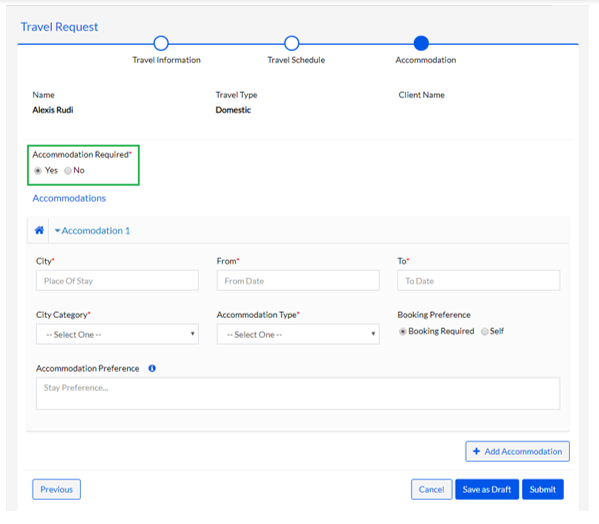
On this page, the user needs to fill in the details of accommodation during the trip. The page appears as shown in the screenshot below.
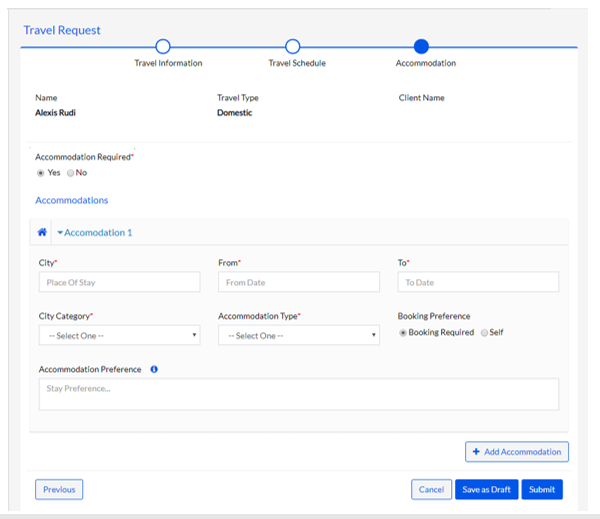
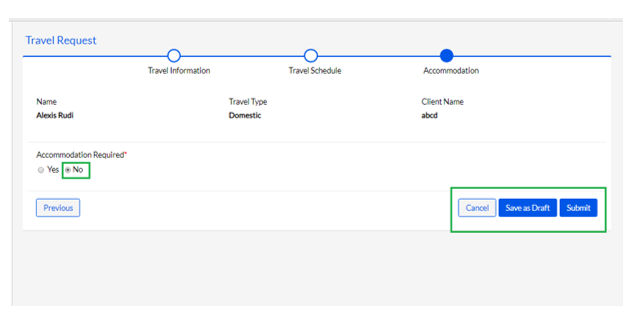
The user can select the Yes or No radio buttons, as highlighted in the screenshot below, depending on whether they need paid accommodation.
If they click on No, they are not asked for any details and they can directly go ahead and use the Submit, Cancel or Save as Draft buttons for the request, as highlighted in the screenshot below. Clicking on the Cancel button cancels the request while clicking on the Save as Draft button allows the user to save the request details without submitting it.
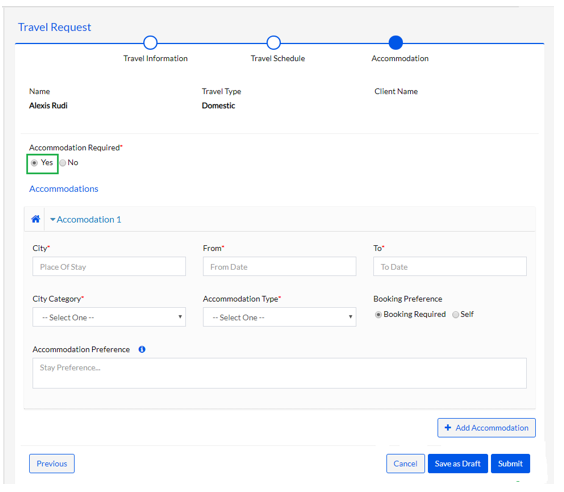
However, if they click on Yes, the following details are required to be filled in, as shown in the screenshot below.
- City: A mandatory field. The city where they need accommodation.
- From: A mandatory field. The start date.
- To: A mandatory field. The end date.
- City Category: A mandatory field. The type of city. The drop-down will be customized as per Domestic or International destinations
- Accommodation Type: A mandatory field. Can select a relevant type from the drop-down.
- Booking Preference: Can choose to book by self or through the Organization (Travel Desk).
- Accommodation Preference: Any details the user might want to mention.
** Note: All the fields are customizable and can be customized by the Admin through the Admin Configuration tab.
**Note: The parameters on this page can be customized by an organization as per their convenience. They can even add more boxes or parameters or reduce them. The information required can also be customized.
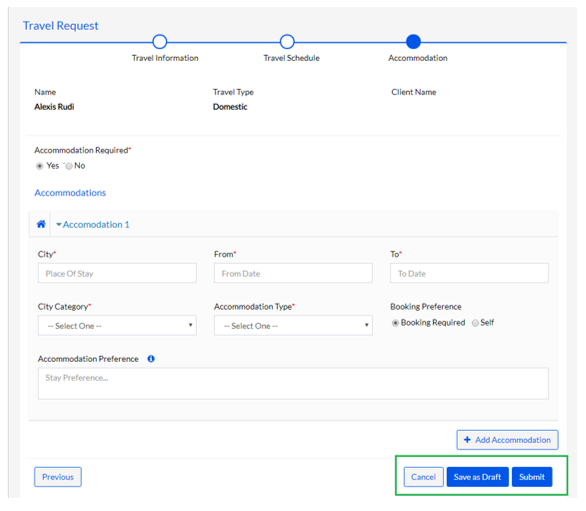
Once all the required fields are filled in, the user can click on the Submit button to submit the request. The user can also choose to cancel the request by clicking on the Cancel button. The user may also save the request as a draft for future access by clicking on the Save as Draft button. The buttons are as highlighted in the screenshot below.
**Note: The employee who has raised the Travel request, can edit request as long as it is in the Submitted status. Once the request is approved by the L1 and L2 managers, it can no longer be edited by the employee who has raised the request.
**Note: When the user submits the Travel request, an email is triggered to all the stakeholders.
2.1.2. View Request
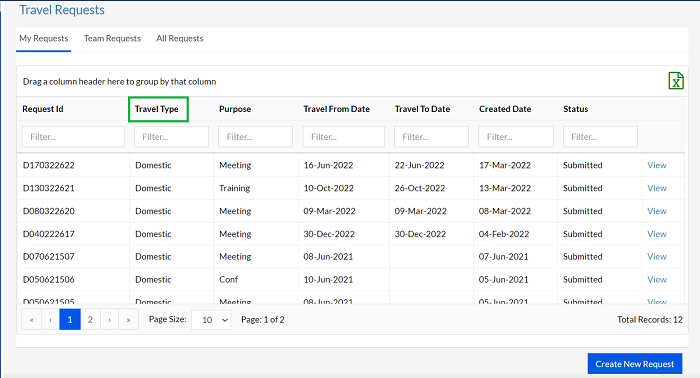
The user can see a list of travel requests raised by them in the past, along with the details against each request, such as travel type, purpose, date, status, etc. in separate columns. This is shown in the screenshot below.

There is also a Status column that shows the status of each request, which can be any one of the following, as highlighted in the screenshot below.
- Submitted: Indicates the employee has filled in all the details and submitted the request.
- In-Process: Indicates that the request is being currently worked upon, but is not yet approved.
- Completed: Indicates the request has been approved and all the necessary actions have been completed.
- Cancelled: Indicates the request has been canceled.
- Saved as Draft: Indicates the request has not been submitted yet and has been saved as a draft by the employee.
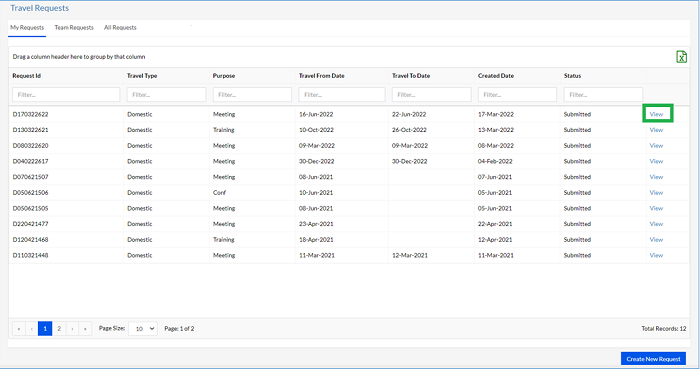
**Note: User can Edit the Travel request as long as it’s in the Submitted status (till the request gets approved).
The user can click on the View button next to each request to get detailed information about that particular request, as highlighted in green in the screenshot below.
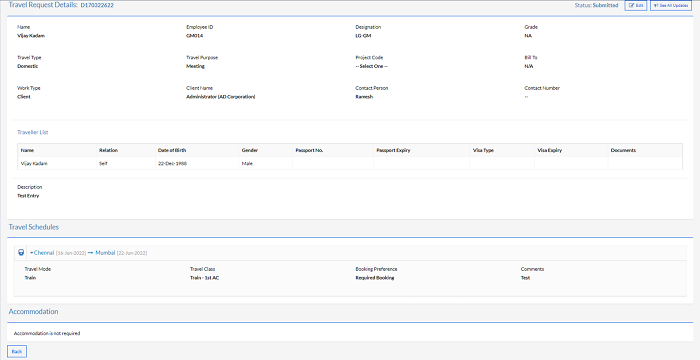
Clicking on the View button takes the user to a page where the user can view all the details of the request, including the travel type, purpose, type of work, client details, travel schedules and accommodation. This is shown in the screenshot below.
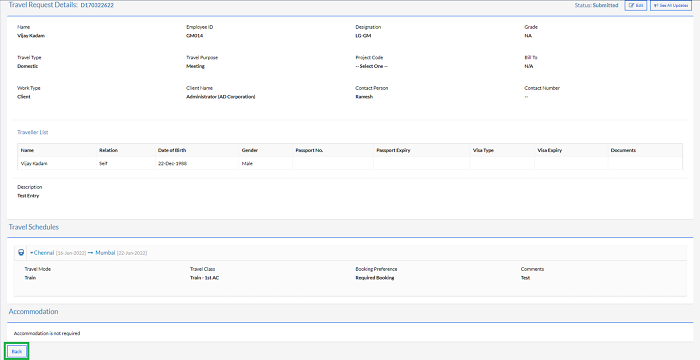
Once the user has viewed the details of the request, the user can click on the Back button as highlighted in the screenshot below, to go back to the Travel Requests page.\
Clicking on the Back button takes the user back to the Travel Requests page as shown below. The number of requests displayed on each page is 10 by default, but the user can change this by selecting a number from the Page Size drop-down menu at the bottom of the page, as highlighted in the screenshot below.
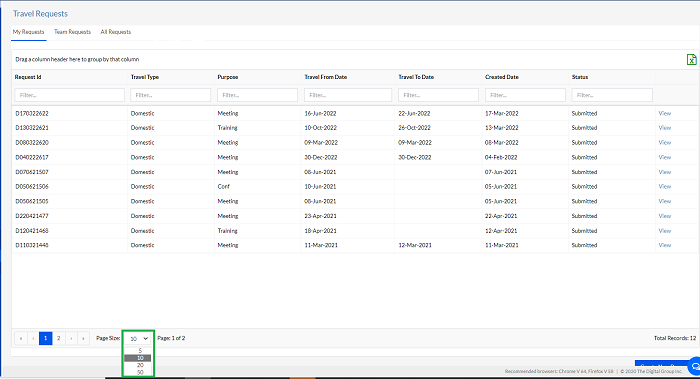
The Total Records or the total number of requests is also displayed at the bottom right corner of the page, as highlighted in the screenshot below. Also, the user has the option to export the list of requests to a MS Excel spreadsheet by clicking on the MS Excel icon at the top right corner of the page, as highlighted in the screenshot below.
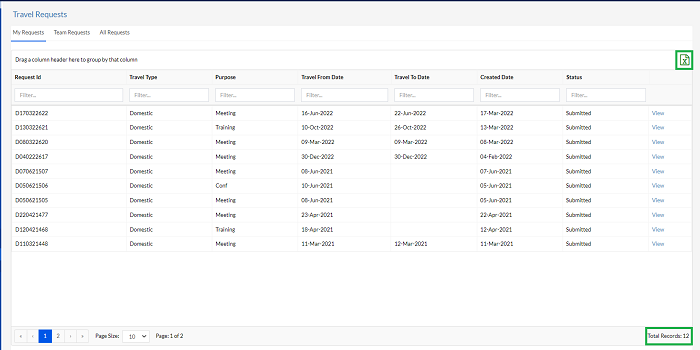
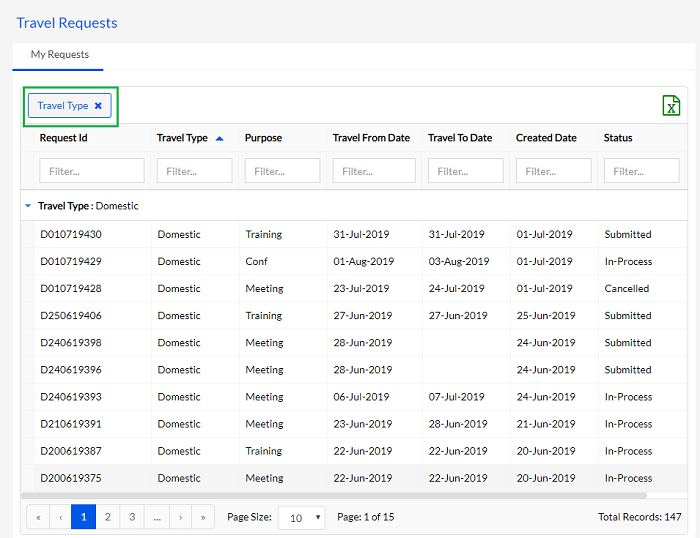
The user can also drag and drop any column header to the box above the list of records, in order to automatically sort the data based on that parameter. For example, the Travel Type column can be dragged to the space above to sort the data automatically on the basis of the Travel Type. This is highlighted in the screenshots below.