RAS - Manage Allocation
Once RAS Provider has added the Business Unit he can see the employees for the respective Business Unit which are added by admin.
3 tabs are visible here.
- Notifications
- Manage Resources
- Initiate Reallocation
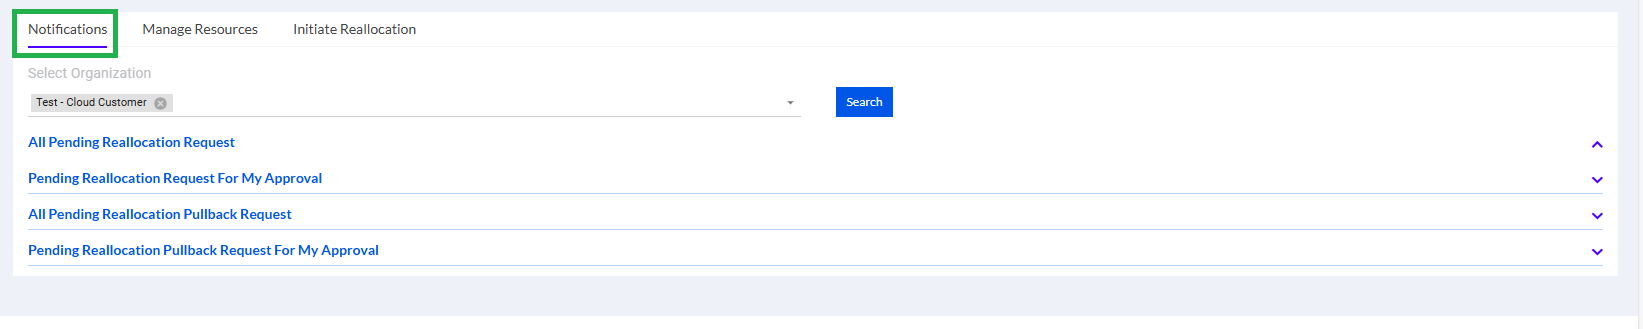
1.1. Notifications
The Notifications tab showcases a list of all the resources for whom Unfreeze request for allocation has been raised, along with the status of the request. This is as shown below.
It shows notification for reallocation.
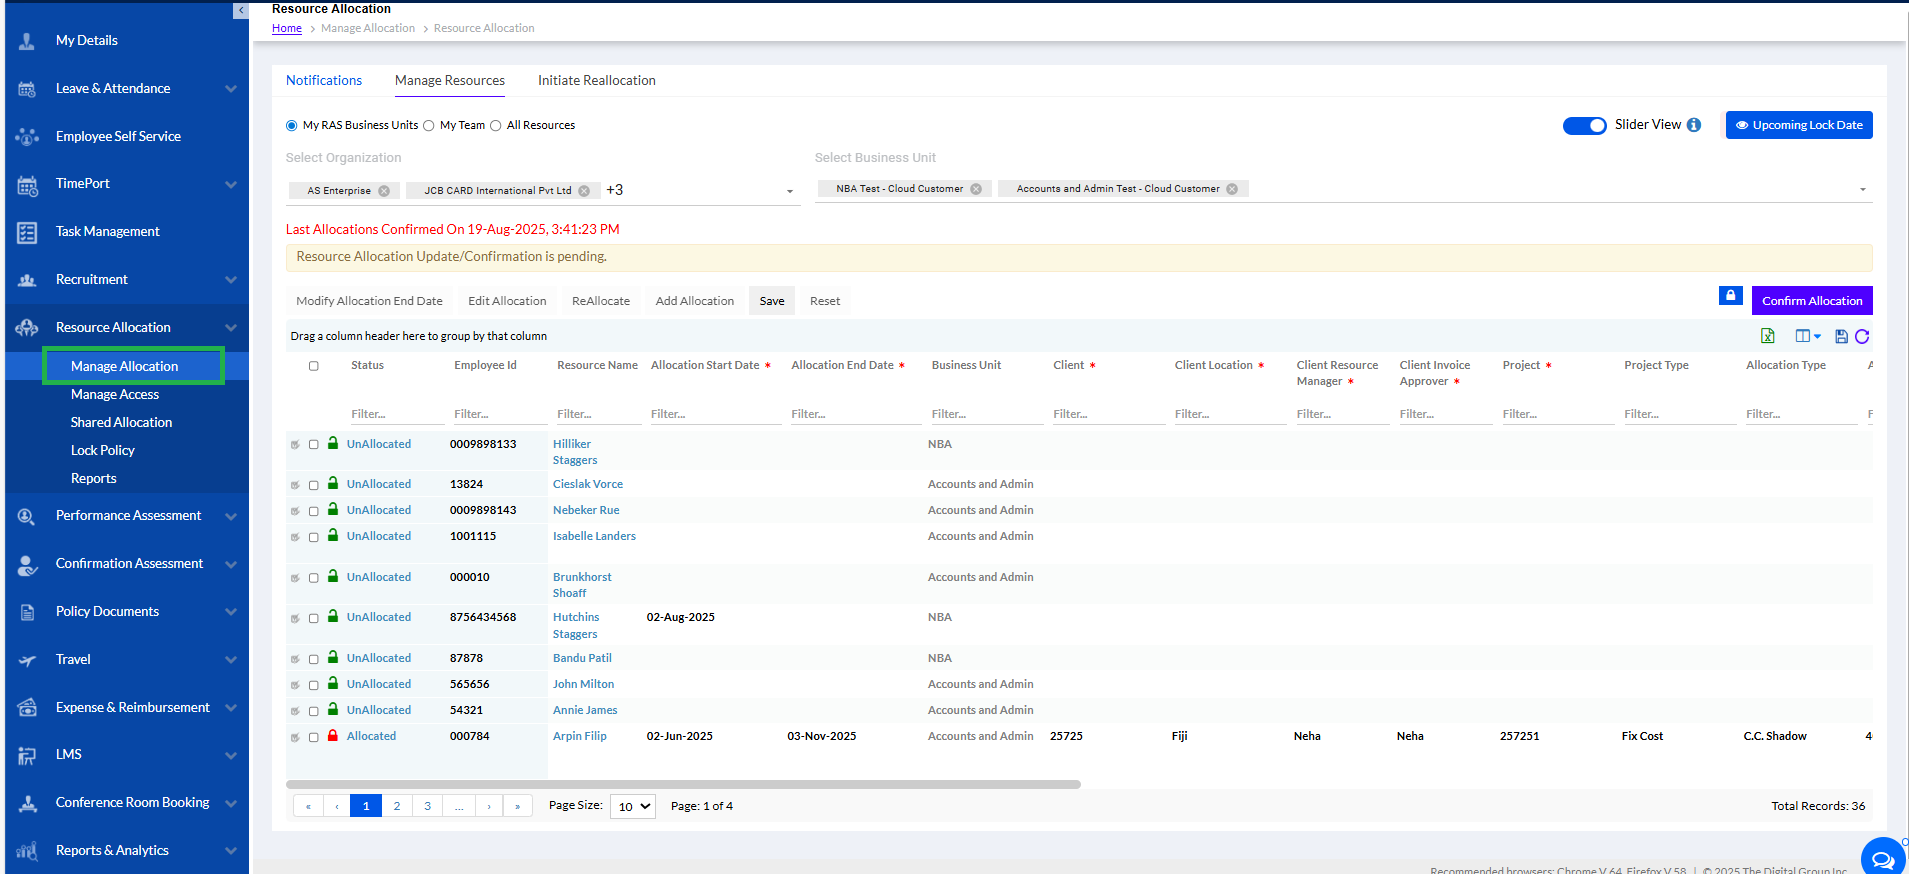
1.2. Manage Resources
For Admin User both// all tabs will be visible – My RAS Business Units, My Team & All Resources.
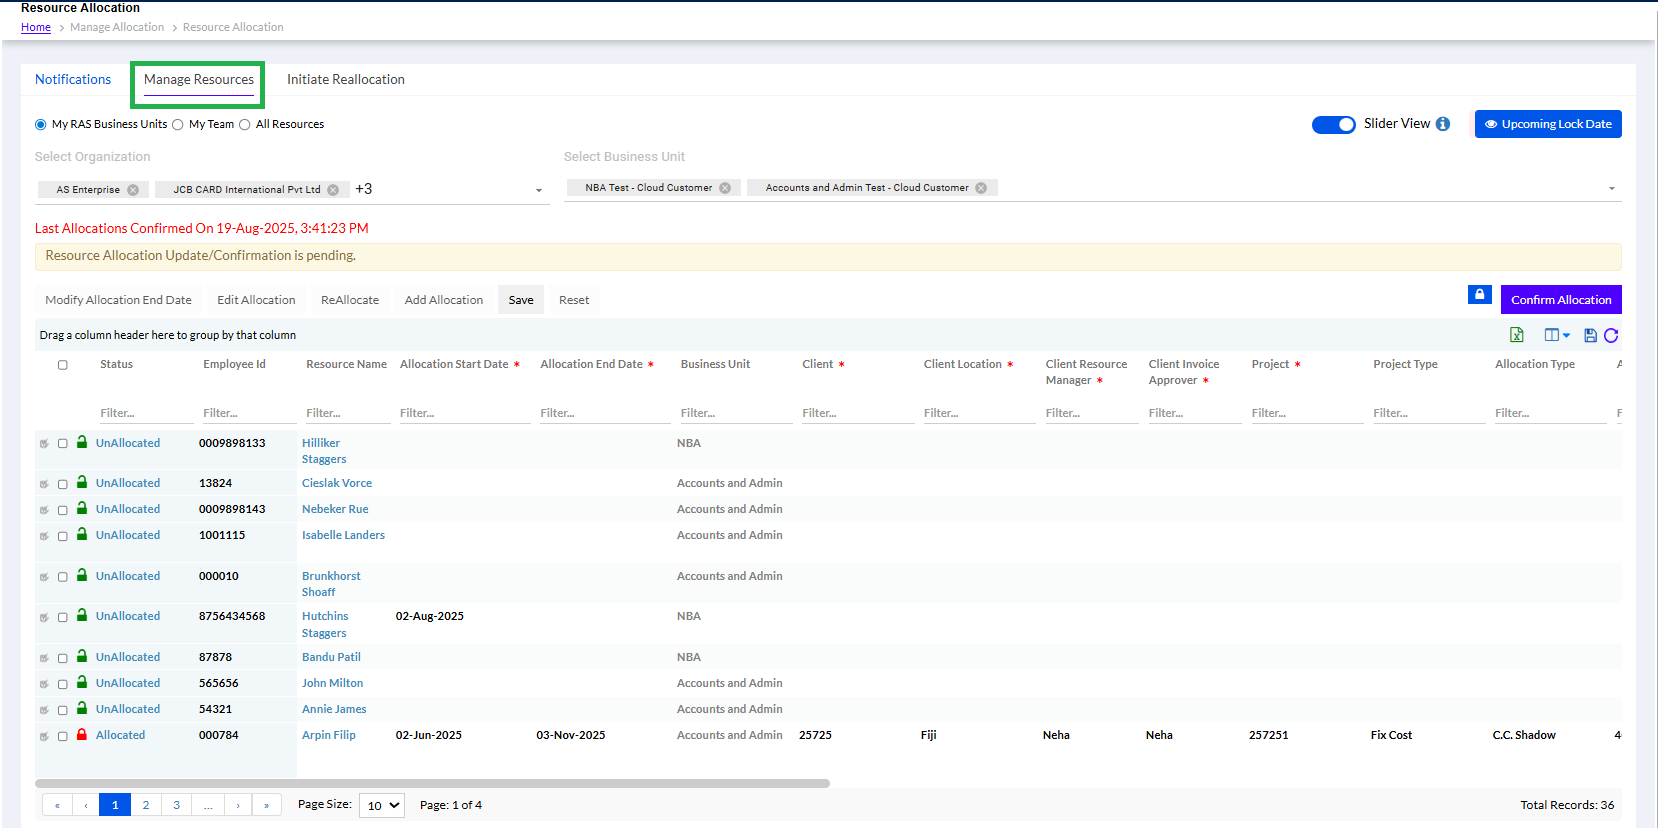
1.2.1. My RAS Business Units:
User will be able to see his Business Unit resources under this tab as per Business unit access given to RA provider in manage access tab. Here user also have options to check the employee as per the Organization and as per the Business Unit by using available filters “Select Organization” and “Select Business Unit”. To search the user has options to check the employee as per the Organization and as per the Business Unit.
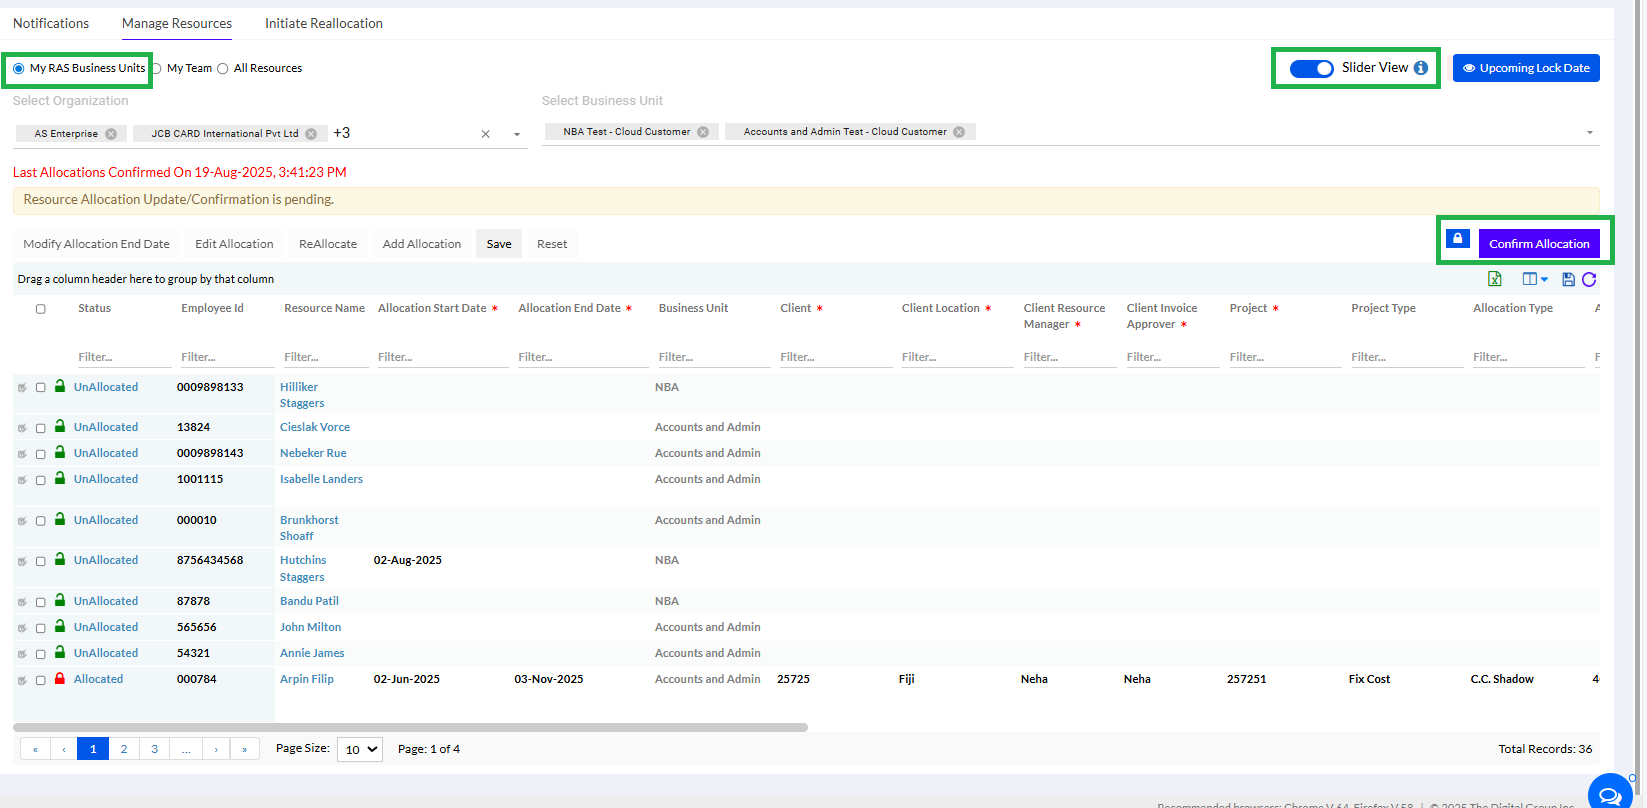
Under the Status, 2 status are mentioned the Allocated/ Unallocated and the Locked/Unlocked.
The Allocation Status are as below-
- UnAllocated: Resource is newly hired and not yet allocated to any Project. User can select new record and click on “Add Allocation “. Record shall get open in editable mode and user can give the required allocation details.
- Allocated: Resource is allocated to a project and this allocation entry updated by Manager.
The Lock Status are as per the table below (as per Date Conditions)-
Allocation Status | Lock Status | Date Conditions | Edit | Reallocate | Modify End Date |
Allocated | Locked | LockThroughdate > AllocationEndDate | No | Yes | Yes |
Allocated | Locked | LockThroughdate < AllocationEndDate | No | No | Yes |
Allocated | UnlockRequested | LockThroughdate > AllocationEndDate | No | Yes | Yes |
Allocated | UnlockRequested | LockThroughdate < AllocationEndDate | No | No | Yes |
Allocated | Unlocked | NA | Yes | Yes | Yes |
UnAllocated | UnLocked | NA | NA | NA | NA |


- Locked
 :- For Locked records, Lock Policy is already set up and falling in below scenario:
If Allocation End Date for a record < = Lock through Date, then status of Record shall be “Locked”
User cannot perform any action like “Modify Allocation End Date/Edit Allocation” on it. He/she has to raise unlock request by clicking on status link only.
- Unlocked
 :- Lock policy is set up already and a record is fulfilling below scenario:
If Allocation End date for a record > Lock through Date, then User can modify “Allocation End date” & “Available for Re- Allocation” details after
Lock through Date. To do any other modification, user needs to raise Unfreeze request.
- Unlock Requested
 :- Lock policy is set up already and record are “Locked” and manager wishes to modify details then he has to raise “Unfreeze request”. Once user requested the Status gets change to “Unlock Requested” for that record.
Admin received request under Resource Allocation > Notification.
Admin can Approve or Reject this request.
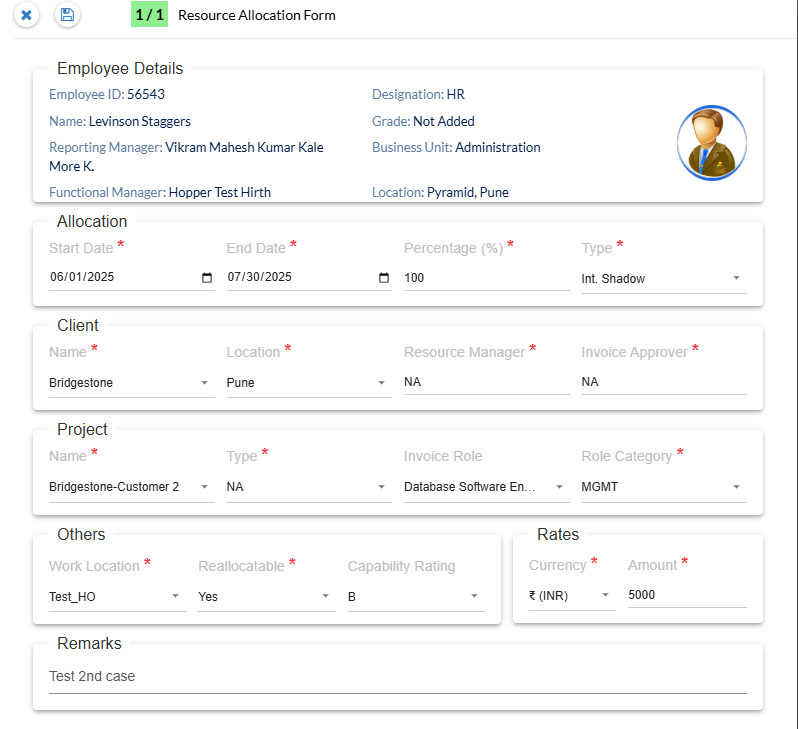
There is a Slider View as highlighted in the screenshot above. This is toggle button for slider. If user close the slider (display in grey colour) then user can make the changes in the grid. If the toggle button is ‘On’ then for this if user perform any action like edit Allocation or Add Allocation user will see that on the right-hand side of the page tab will open as shown below and user can make changes according to the selected option.
If the slider view is not selected, the user can do the modifications directly.
The icons shown in the 1st column are as per the assess provided to the user.
The “ ” icon gives the user to edit and confirm the allocation for the employee, after clicking the “Confirm Allocation”.
The “ ” icon gives the user to edit and view only.
The “ ” icon gives the user to view only.
User can drag any column in the header and can check the grid will be sorted according to the column dragged in the Header.
The Icon ‘i’ on Mouse hover –it shows Slider view for Edit Allocation, Add Allocation, Modify Allocation End Date.
Excel-sheet icon is displayed when user search the data for My RAS Business unit, My Team & All Resource. Clicking on the excel sheet icon the excel sheet should get download.
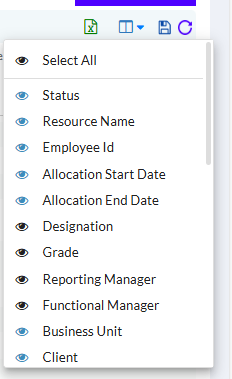
According to the selected eye icon the grid columns should be displayed. Select All eye icon functionality is ‘Select All’ should select all eye icons and clicking on it again it should ‘Deselect All’ eye icons. Deselecting all eye icons should remove the columns from the grid.
Save Grid Icon and Reset Grid Icon “ ” are the functionalities to save and reset grids. The Save Grid for this icon is to save the grid format which is set by the user. Clicking on it user will get the message as “Your column order is saved successfully”. And similarly, the reset grid icon resets the grid format which is set by the user back to default. Clicking on it user will get the message as “Resetting your column order”.
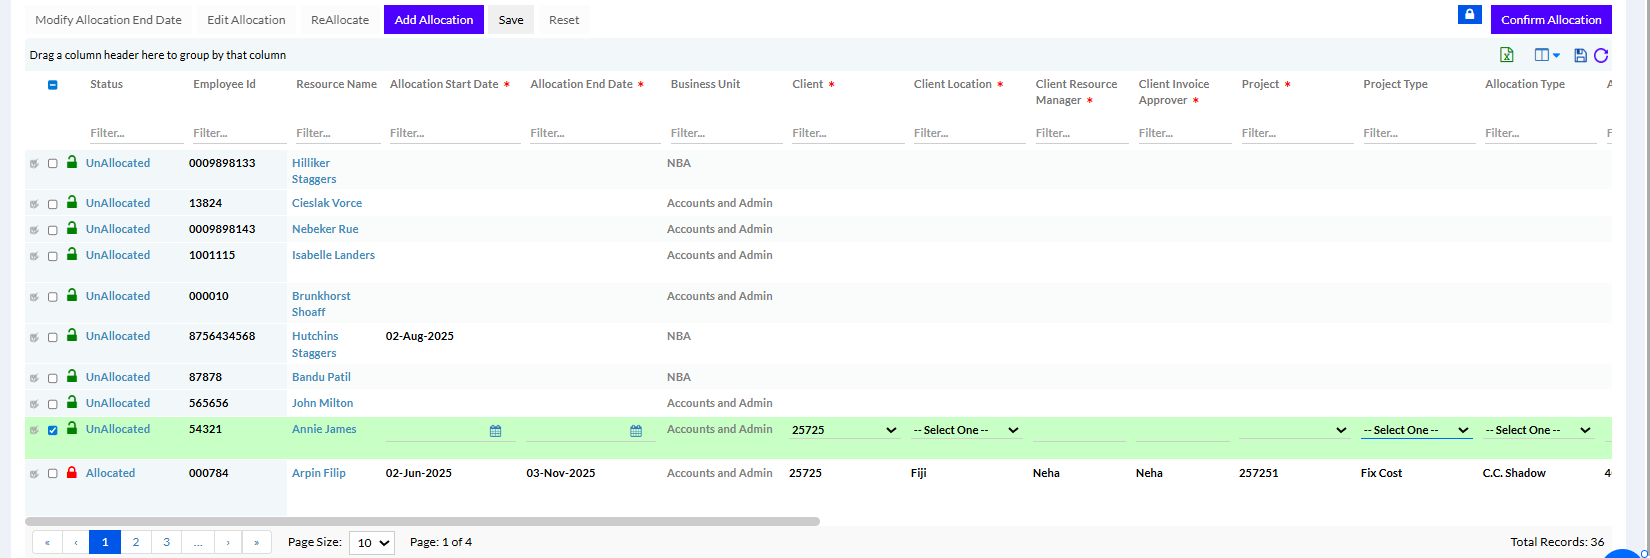
There are 5 buttons on top of the list, as follows
Modify Allocation End Date: In modify allocation end date only Allocation End Date, Available for Reallocation, Remarks should be editable.
Edit Allocation: For Edit Allocation the lock status should be Unlocked. User can click on Slider view if he wants to edit the allocation in slide (tab will open on the right side of the page).
Reallocate: If the lock status is Unlocked then user can reallocate the user even if previously allocated, to another project. Allocation can be more than 100% also.
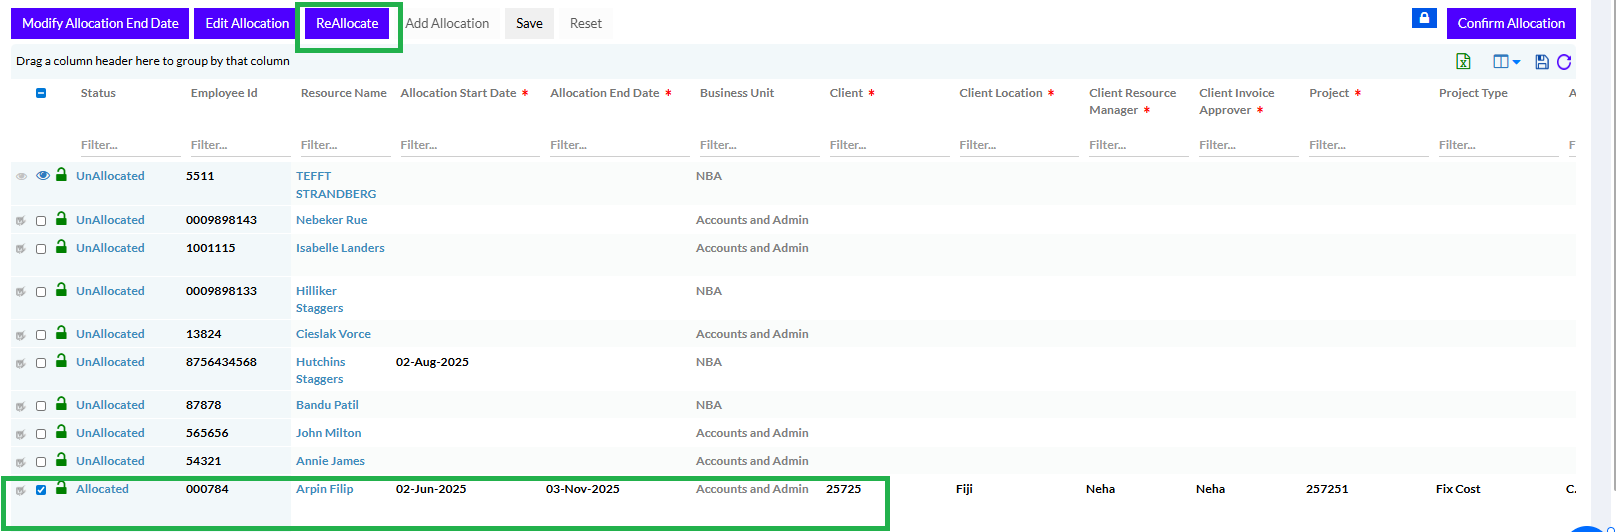
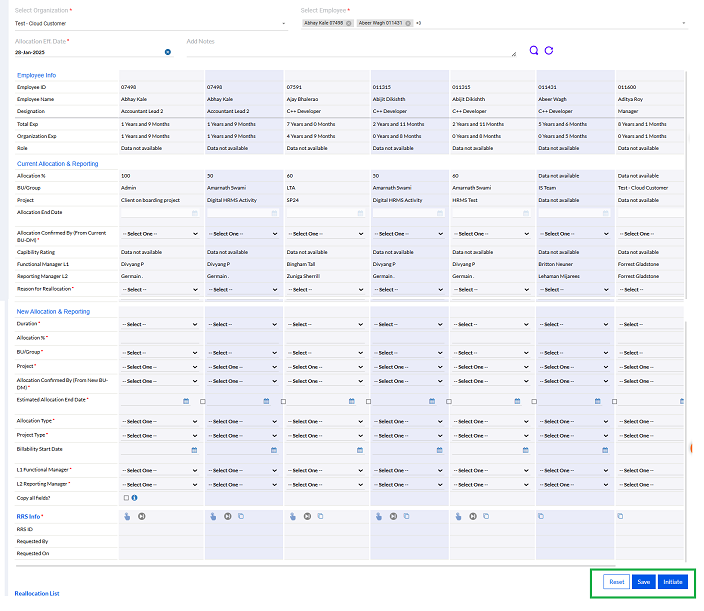
Once the user clicks re-allocate, the screen opens to make desired changes
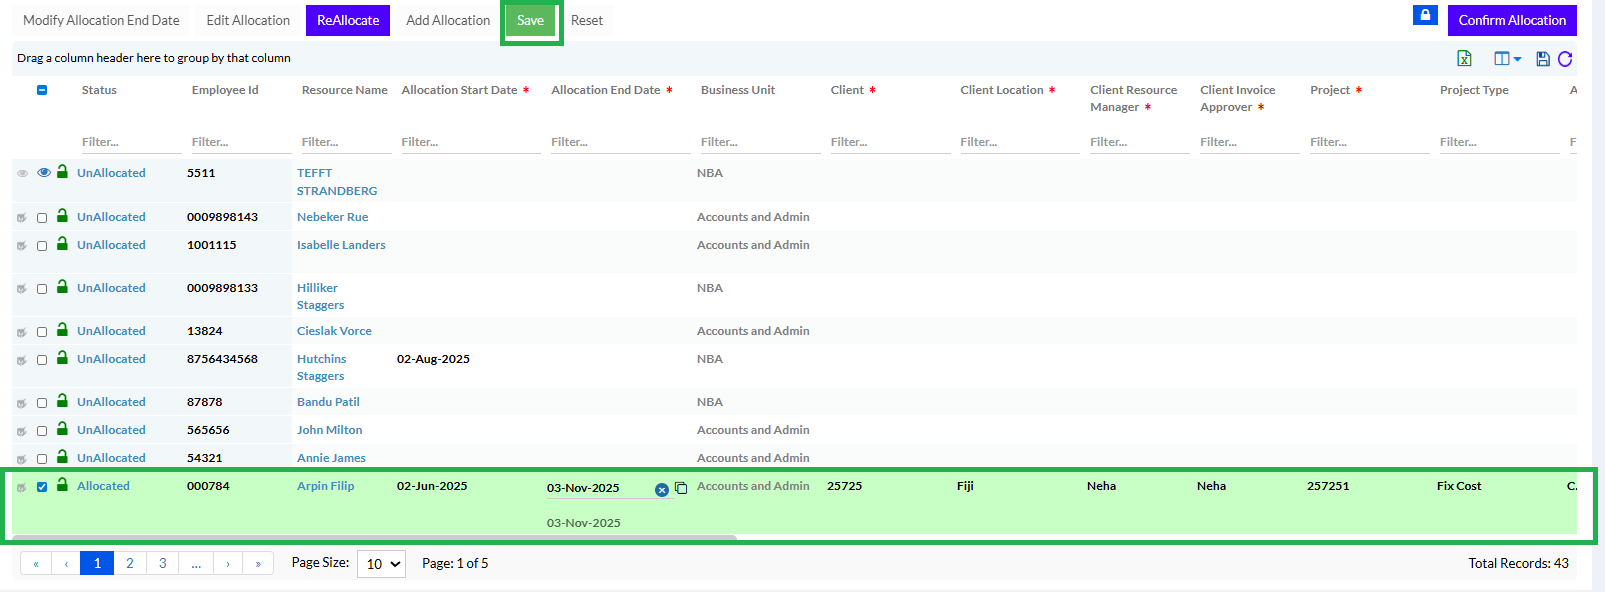
The user can click the Save button to save the new allocation.
Add Allocation:
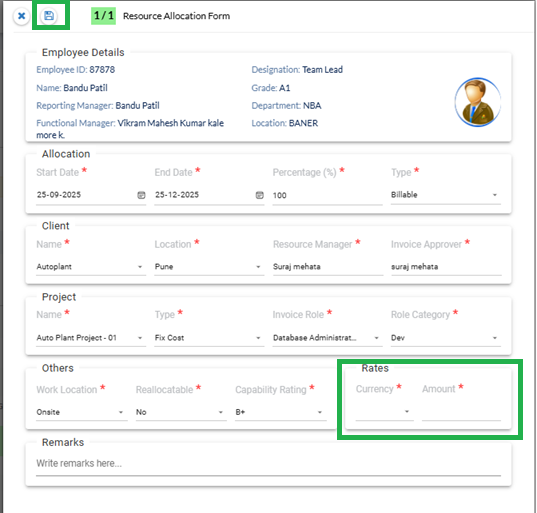
1) Selecting the Unallocated status record and clicking on Add Allocation will navigate user for Add Allocation. Employee ID, Resource Name, Designation, Reporting Manager, Functional Manager, Business Unit & Resource Location will come from core. Rest user have to add from UI and click on Save button. Any mandatory field not added will give warning message.
The Rates in Currents and Amount will be visible and can be added.
Note: The View Billing Rate Check Box, if it is checked then billing rates will be displaced in “Add Allocation”. When “Type” is Billable, the rate is compulsory.
2) User can select the Multiple New records/Allocations and do the Add Allocation by clicking the Save button.
Save: Clicking on Save button the data should get saved.
Reset: Clicking Reset button the added data should get Reset.
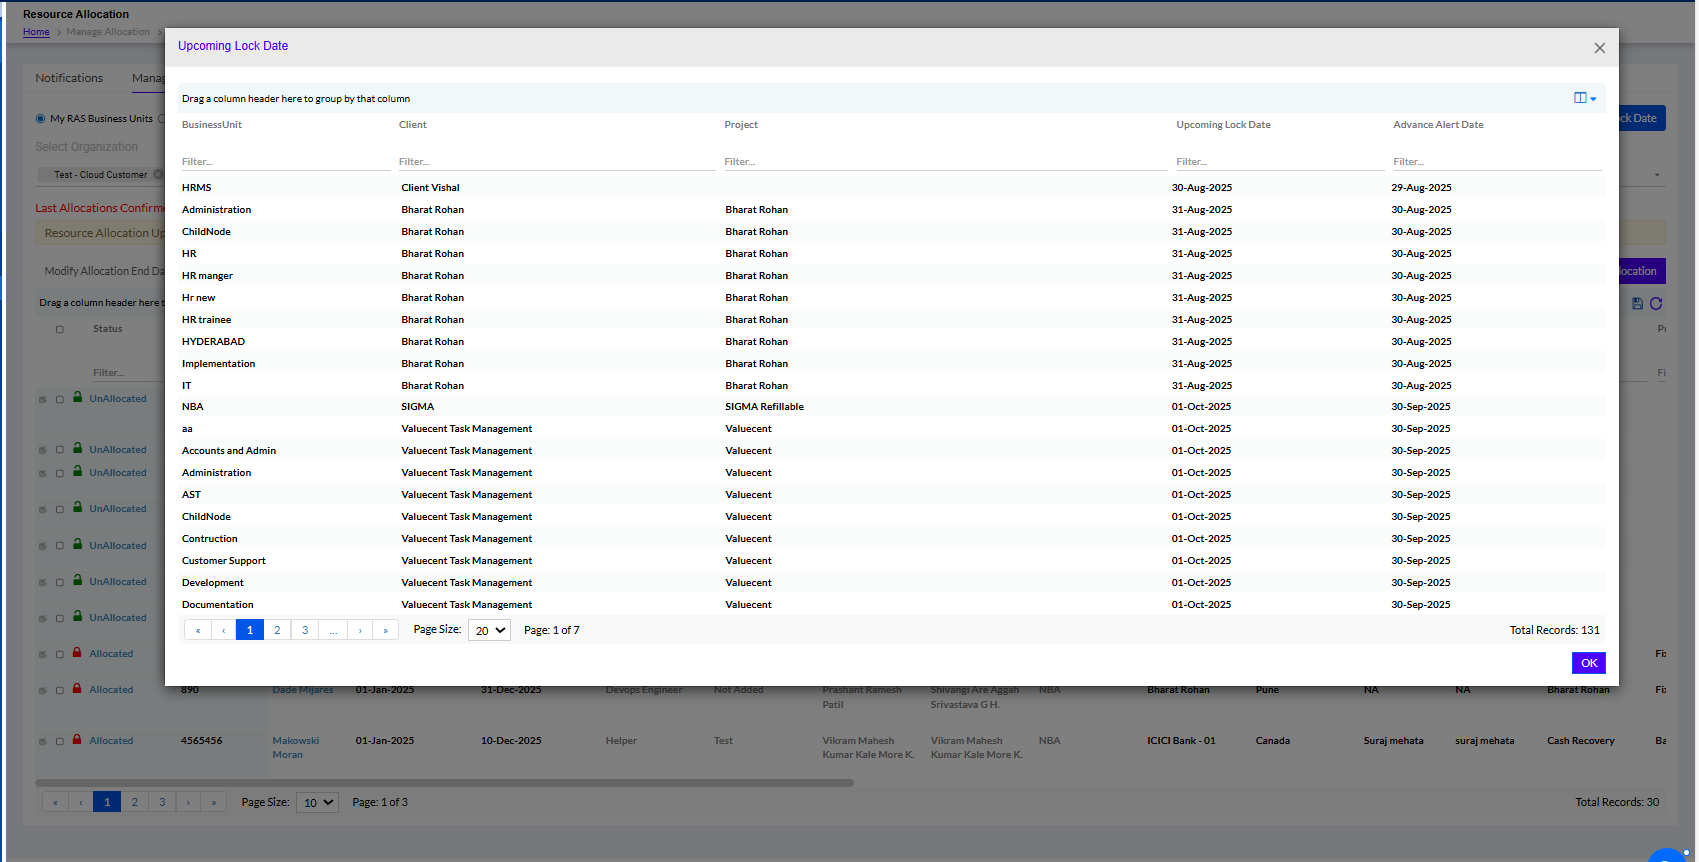
Once the user clicks “ ” the following screen opens with locking dates.
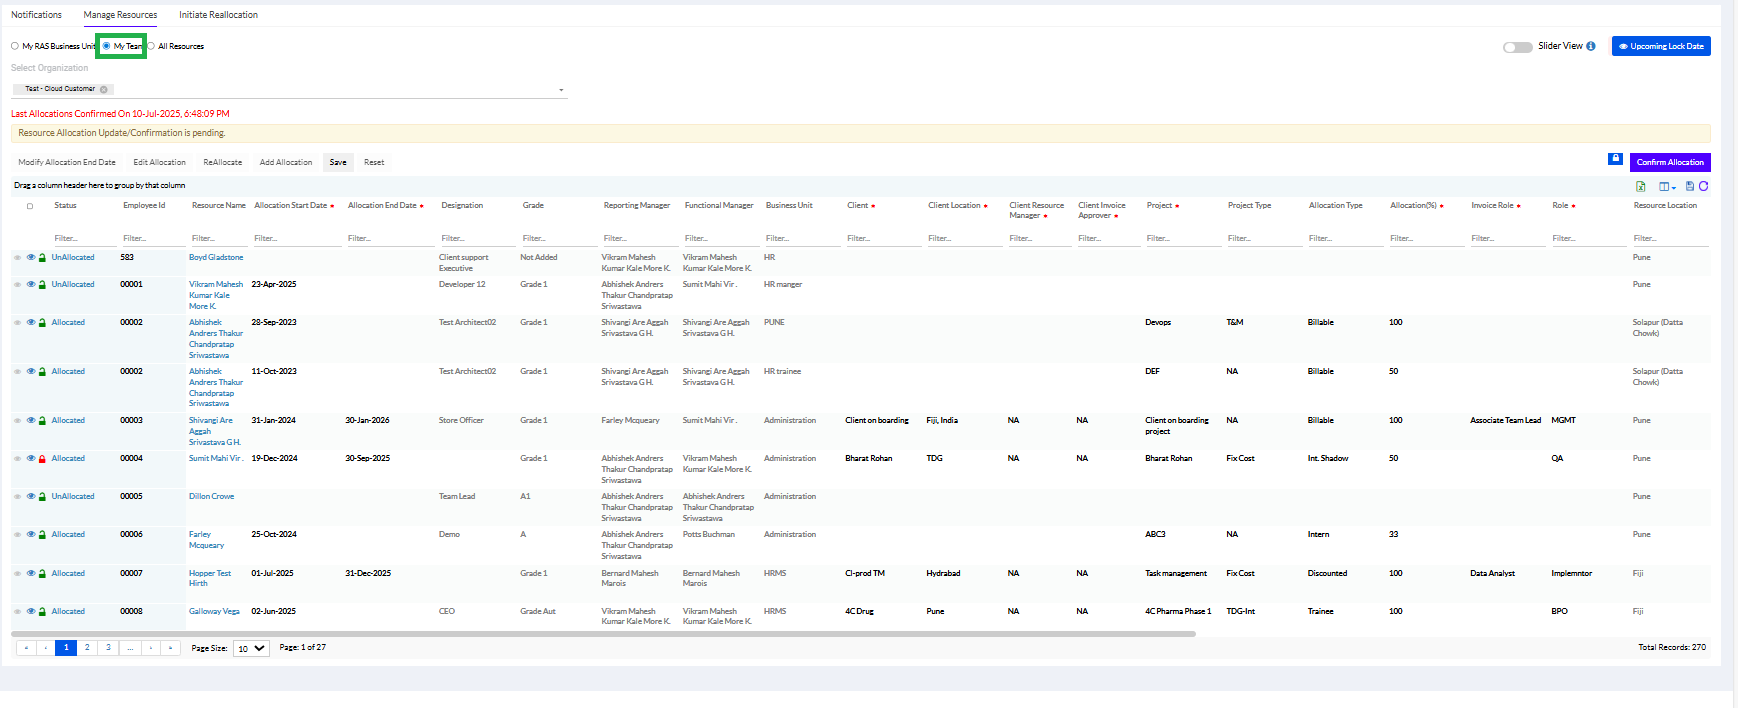
1.2.2. My Team (View only)
Union of direct and indirect resources under the manager are visible here.
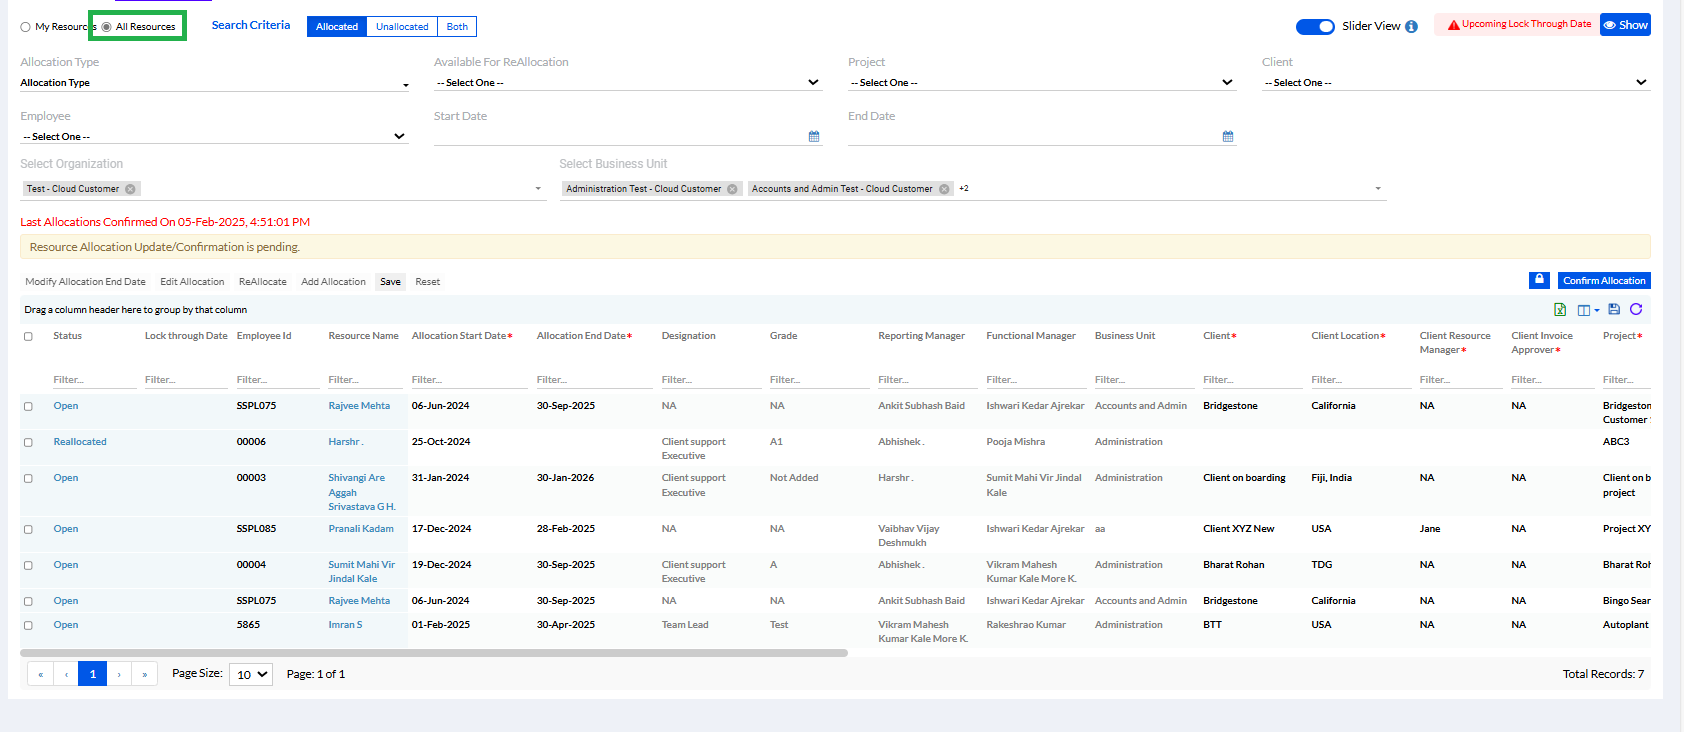
1.2.3. All Resources (View only)
Admin and super users only who can see beyond their teams and RAS BUs. Union of My RAS Resources and My Team + BU view access resources View resources light grey background
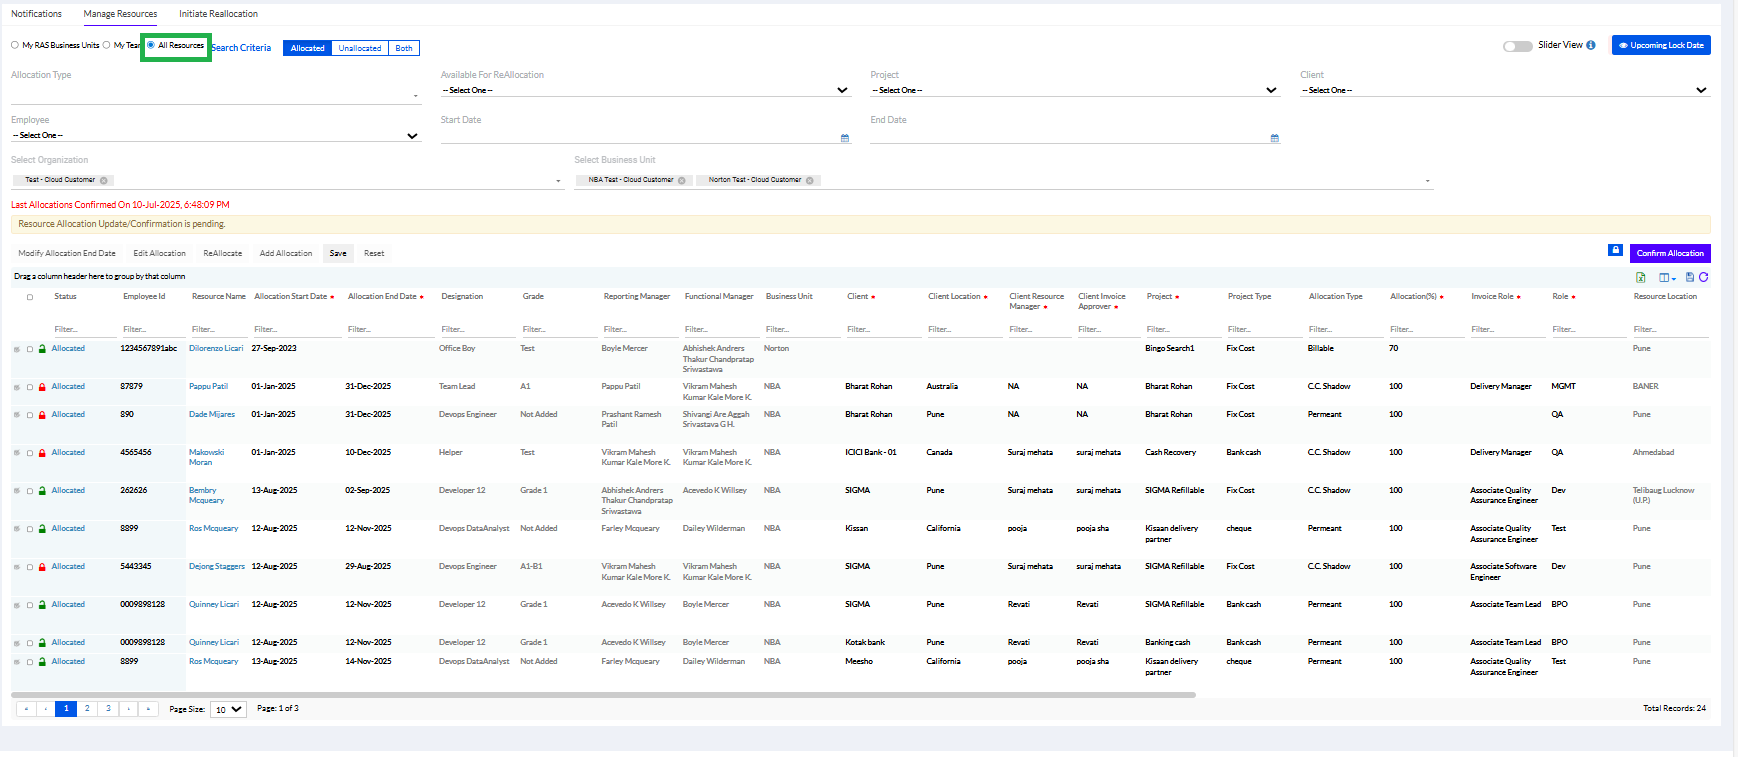
The Resources are Allocated, Unallocated or Both. They can be allocated only if they are unlocked.
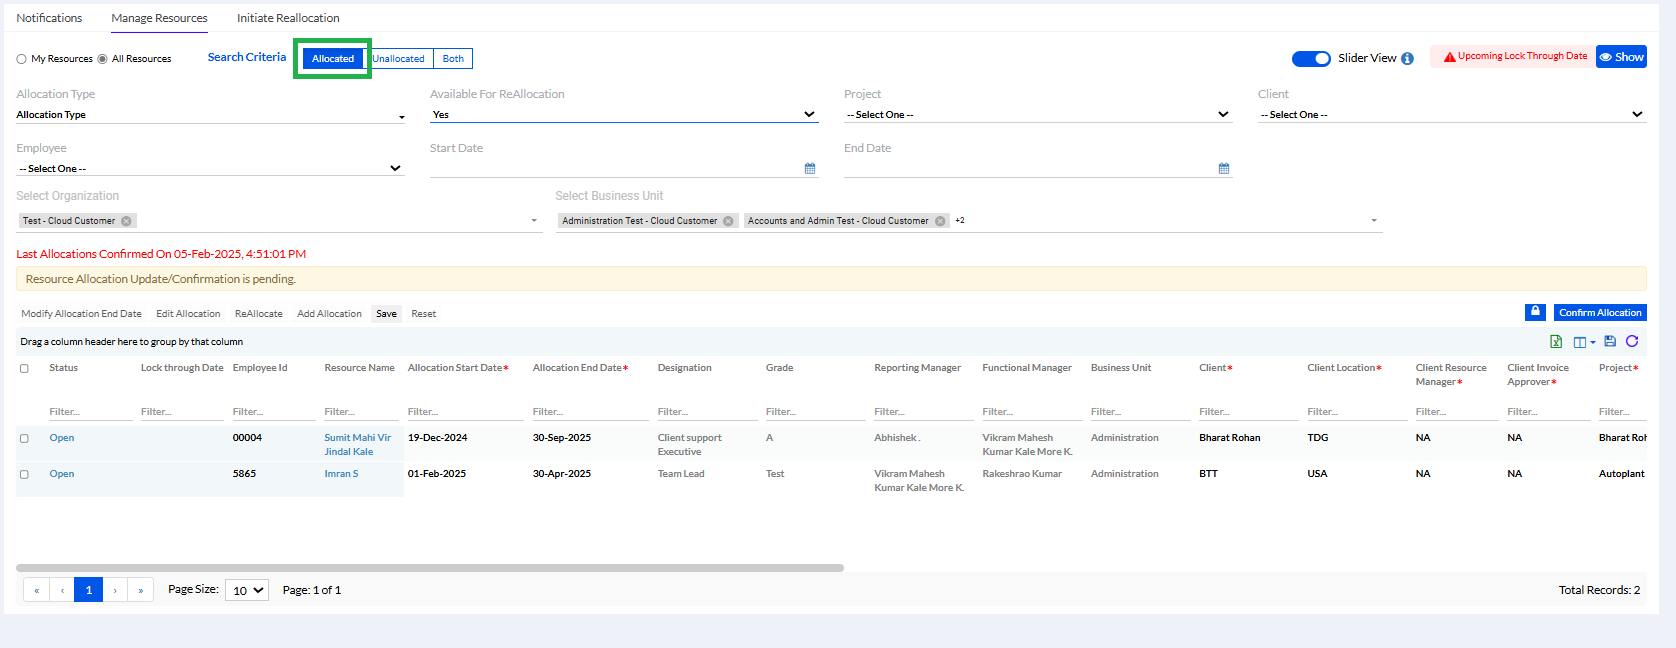
1.2.3.1. Allocated
If Admin user wants to see for Allocated resources in the Organization then he can select the tab as Allocated and click on search button, the data will be displayed in the Grid.
When the Admin clicks on the Allocated tab he selects the fields and can get the data according to the filters he applies. The fields are mentioned below –
- Allocation Type: A drop-down list of the different types of allocation of resources that the Admin needs to choose from.
- Available for Reallocation: The Admin needs to select Yes or No from the drop-down.
- Start Date: Admin can select the Start Date and can filter the data as per his requirements.
- End Date: Admin can select the End Date and can filter the data as per his requirements.
- Project: The Admin needs to select a project from the drop-down.
- Client: The Admin needs to select the client from the dropdown.
- Employee: The Admin user can select the employee name and can get the respective employee details in the grid according to the selected filters.
- Select Organization: The Admin needs to select relevant organization(s) from the drop-down.
- Business Unit: The Admin needs to enter the first letter of the business unit to open a drop-down menu.
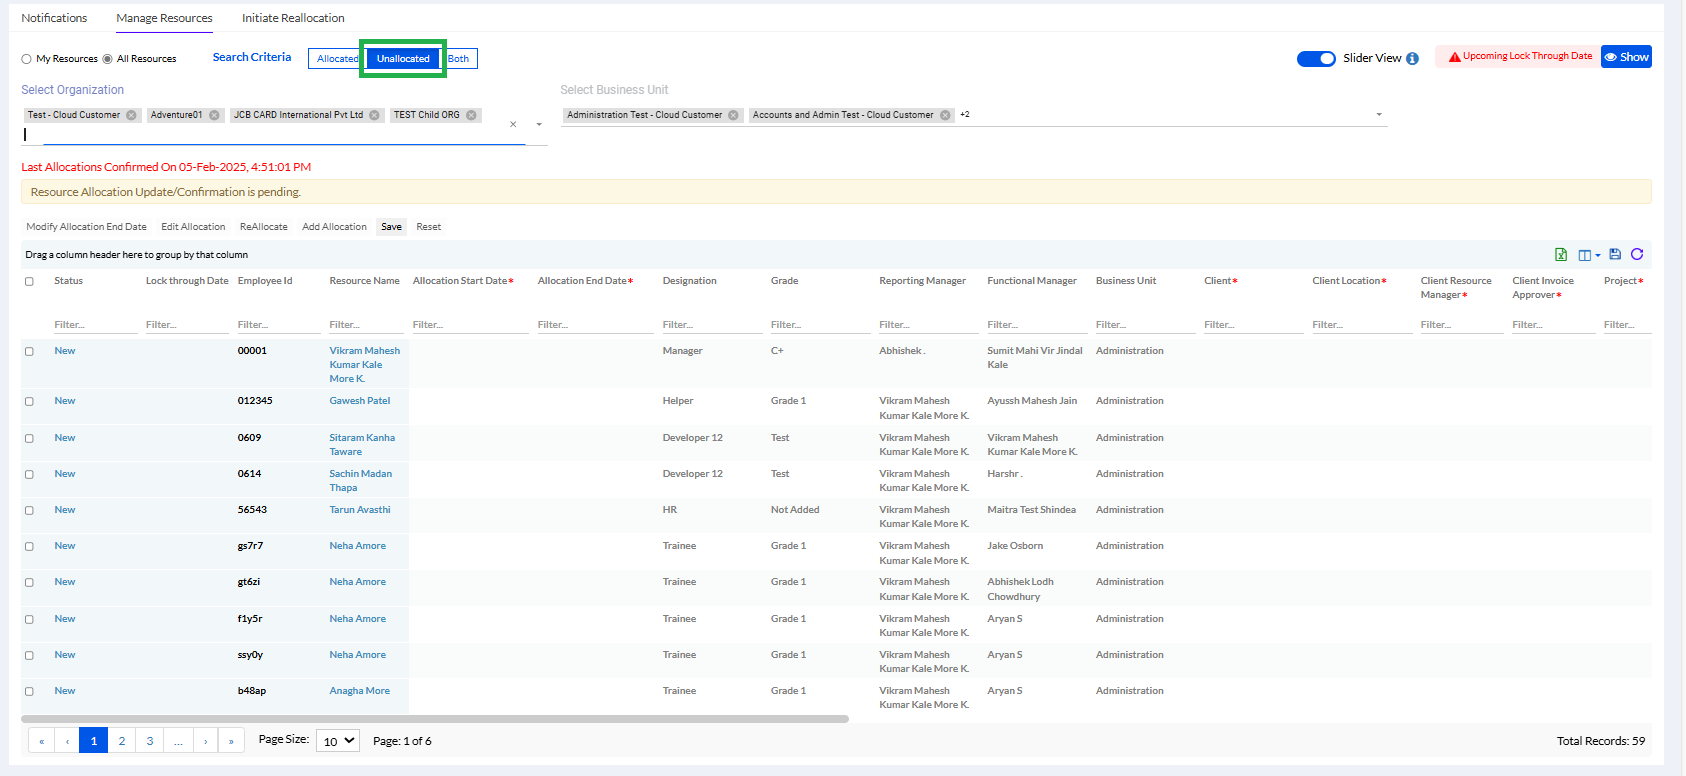
1.2.3.2. Unallocated
If Admin user wants to see Unallocated Resource list in the Organization the he can select the tab as Unallocated and click on search button the data will be displayed in the Grid.
When he clicks on Unallocated tab he will be able to see the fields mentioned below –
Select Organization: The Admin needs to select relevant organization(s) from the drop-down.
Business Unit: The Admin needs to enter the first letter of the business unit to open a drop-down menu.
Modify Allocation End Date: In modify allocation end date only Allocation End Date, Available for Reallocation, Remarks should be editable.
Edit Allocation: For Edit Allocation the status should Allocated. User can click on Slider view if he wants to edit the allocation in slide (A tab will open on the right side of the page).
Reallocate: If the status is Allocated, then user can reallocate the user to another project. Allocation can be more than 100% also.
Add Allocation: 1) Selecting the Unallocated status record and clicking on Add Allocation will navigate user for Add Allocation. Employee ID, Resource Name, Designation, Reporting Manager, Functional Manager, Business Unit & Resource Location will come from core. Rest user has to add from UI and click on Save button. Any mandatory field not added will give warning message.
2) User can select the Multiple New records and do the Add Allocation.
Save: Clicking on Save button the data should get saved
Reset: Clicking Reset button the added data should get Reset.
Drag a column header here to group by that column: User can drag any column in the header and can check the grid will sorted according the column dragged in the Header.
Slider View: This is toggle button for slider. If user close the slider (display in grey colour) then user can make the changes in the grid. If the toggle button is ‘On’ then for this if user perform any action like edit Allocation or Add Allocation user will see that on the right-hand side of the page tab will open up and user can make changes according to the selected option.
Icon ‘I’: On Mouse hover – Slider view for Edit Allocation, Add Allocation, Modify Allocation End Date.
Grid Menu: According the selected eye icon the grid columns should be displayed. Select All eye icon functionality is ‘Select All’ should select all eye icons and clicking on it again it should ‘Deselect All’ eye icons. Deselecting all eye icons should remove the columns from the grid.
Save Grid Format Icon: The functionality for this icon is to save the Grid format which is set by the user. Clicking on it, user will get the message as “Your column order is saved successfully”.
Reset Grid Format Icon: The functionality of this icon is to reset the grid format which is set by the user. Clicking on it, user will get the message as “Resetting your column order”.
1.2.3.3. Both
If Admin user wants to see both the allocated and unallocated Resource list together in the Organization the he can select the tab as Both and click on search button the data will be displayed in the Grid.
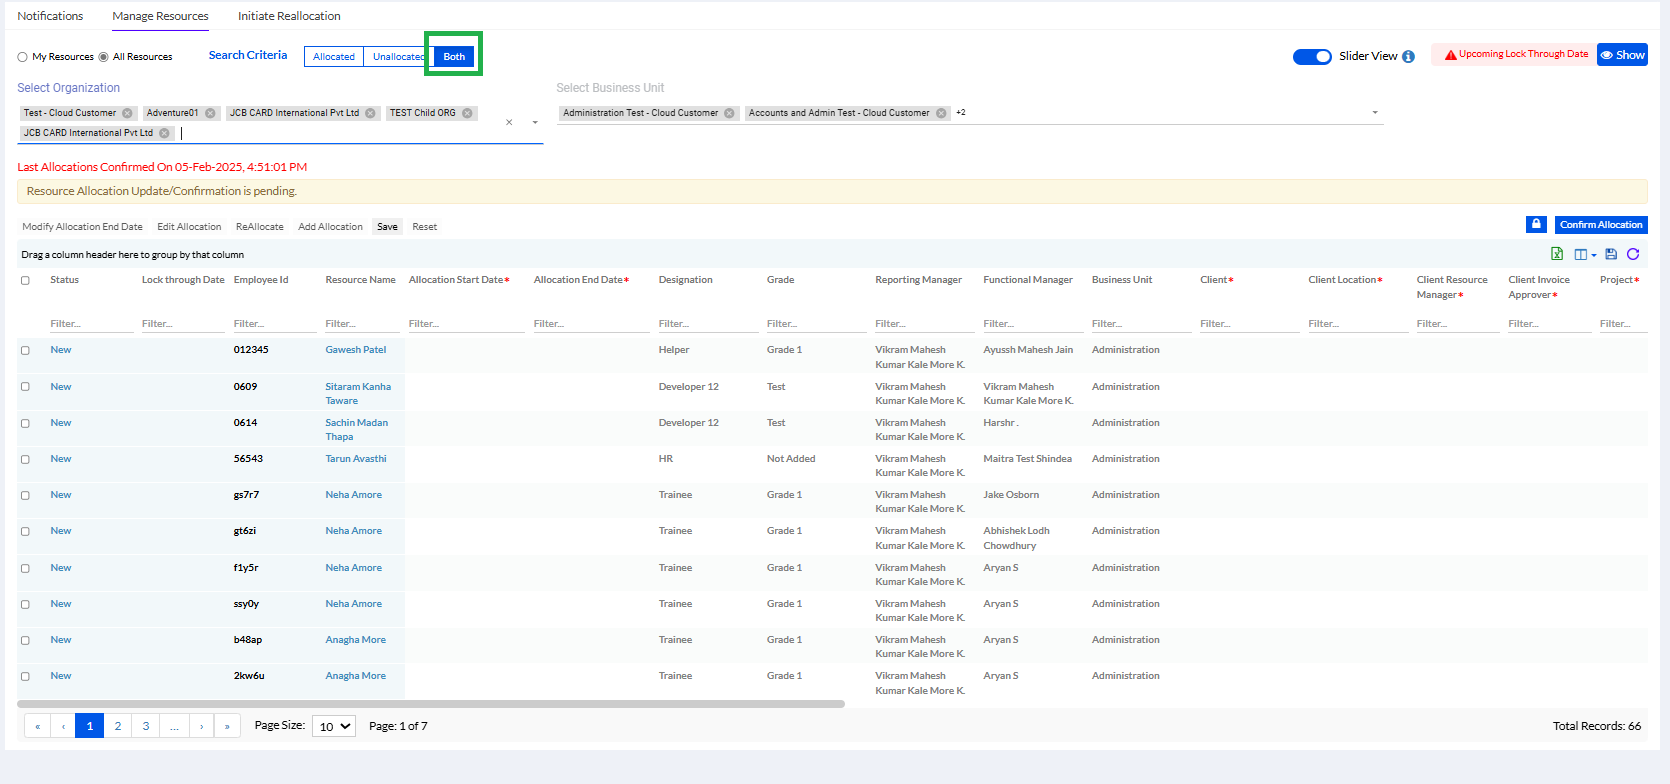
When he/she clicks on Both tab he/she will be able to see the fields mentioned below –
Select Organization: The Admin needs to select relevant organization(s) from the drop-down.
Business Unit: The Admin needs to enter the first letter of the business unit to open a drop-down menu.
Rest functionality are same.