My Bookings
Book Conference Room
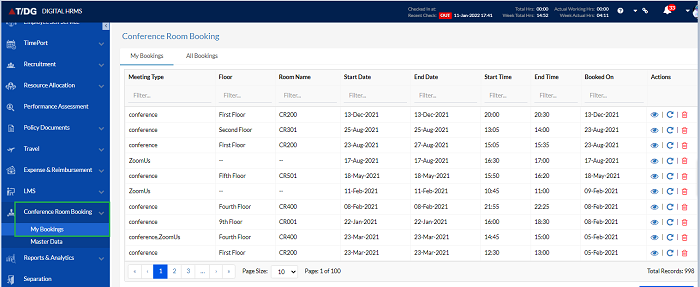
To book a conference room, the user needs to click on the My Bookings tab, as highlighted in the screenshot below.
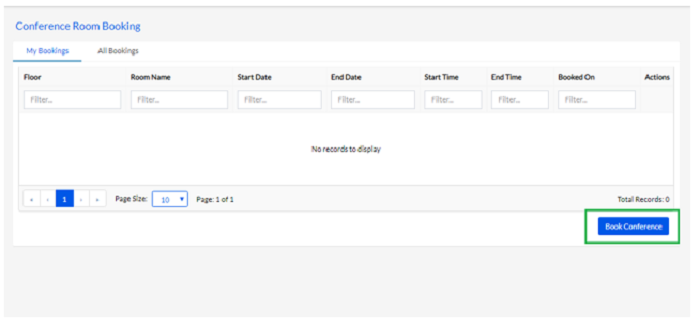
If the user needs to Book a conference room he needs to click on Book Conference button and he will be navigated to the Book Conference Room page.
On this screen, the user needs to specify the requirements for the conference room, by filling the following fields, as shown in the screenshot below.
Time Zone
This refers to the time zone as per which the meeting is scheduled.
Fill in the Time Zone from the Dropdown menu
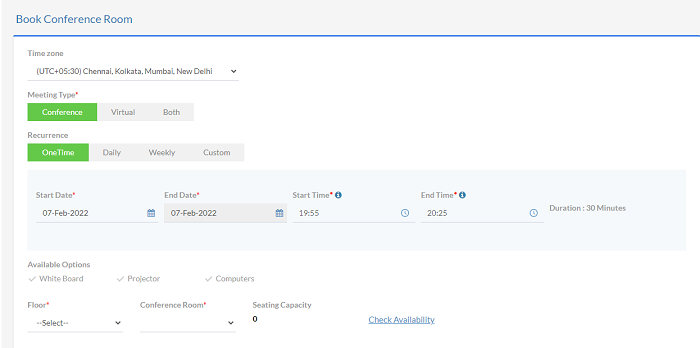
Meeting Type
This refers to whether the scheduled meeting will be conducted online or in the traditional way in a conference room.
The Meeting Type (Conference/Virtual/Both).

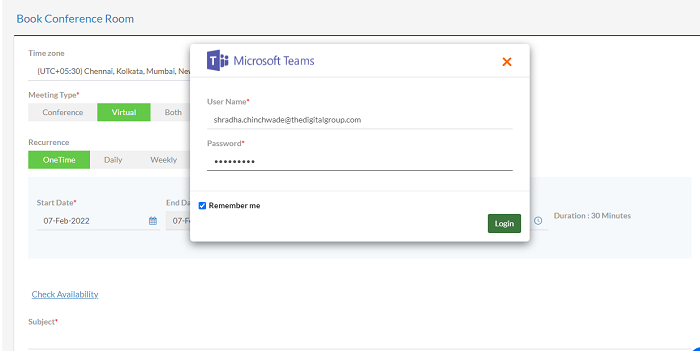
Virtual
As mentioned for Conference Meeting Type when Virtual type is selected user can see below changes on the Book Conference page.
Web Meeting Dropdown
User can select Virtual meeting option as Go to Meeting, Microsoft Teams, Zoom, Goggle Meet.
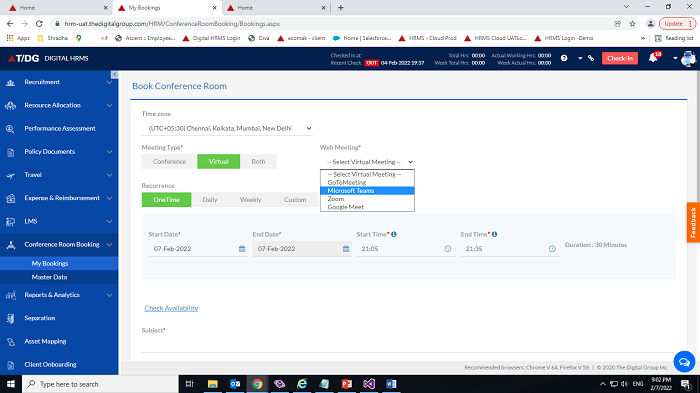
Note: These options are configurable from Admin Configuration - Conference Room Booking Options Set Up.
Clicking on Microsoft Teams application will ask for User login Id and password once its added user will get Login Successful message.
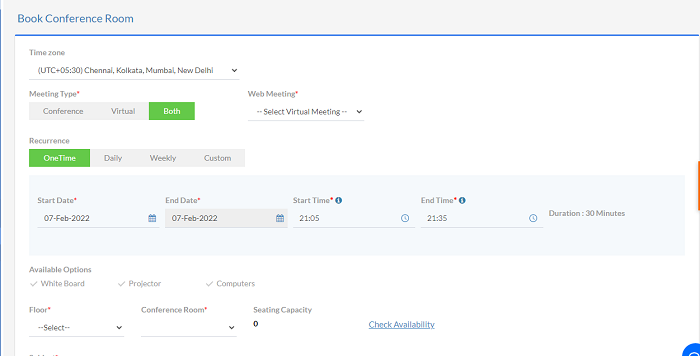
Both
When Meeting Type is selected as Both users need to add the mandatory details of Conference & Virtual. Please check the below screenshot.
Recurrence
This refers to whether the user needs to book a conference room Daily or Weekly. The Custom option allows the user to customize the preference.

One Time: In this type the booking is done only for One time, user can enter only same start date as end date. When user takes the cursor on End date that is disabled to make changes.
Daily: In this type the booking is done for Daily Basis depending upon how many days user has selected.
Weekly: In this type the booking is done on Weekly basis user needs to select Weekdays.
Custom: In this type the booking is done on Weekdays but user can select weekdays on which day he wants to keep the meeting.
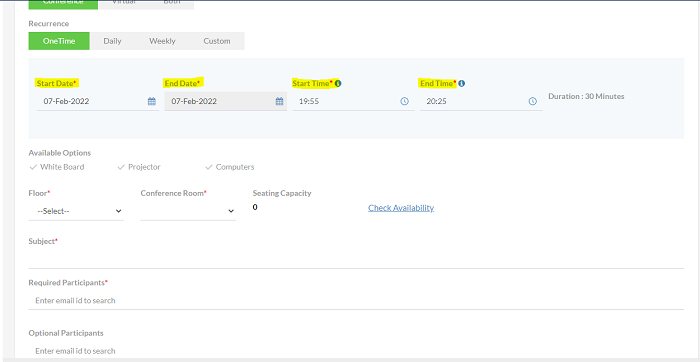
Date and Time:
These fields allow the user to fill in the date and time for which the booking is being made. This includes the Start Date, End Date, Start Time and End Time, as highlighted in the screenshot below.
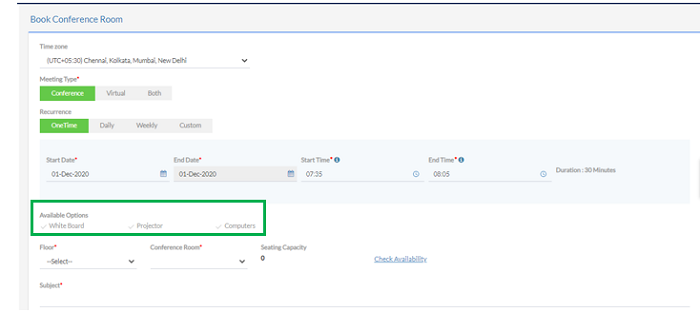
Available Options
The user needs to select the options required for the meeting that is planned in the conference room, as highlighted in the screenshot below. It is on the basis of these selections, that the user will get options for available conference rooms to book.
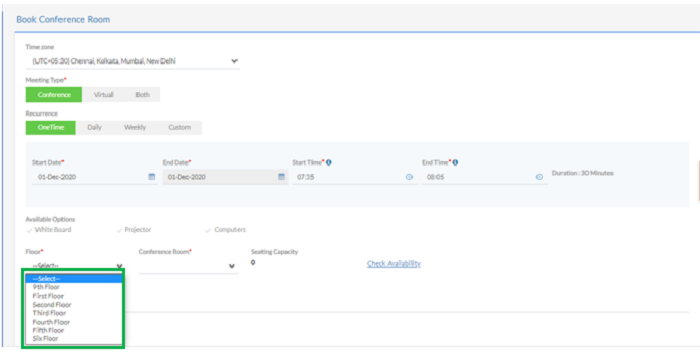
Floor
The user needs to select a floor from the available options as highlighted in the screenshot below.
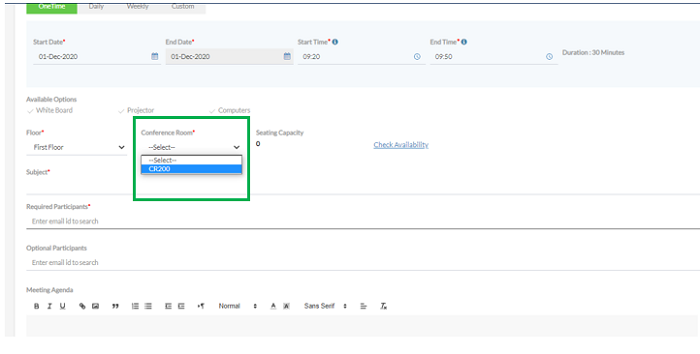
Room
After selecting a floor, the user needs to select a room from the available options, as highlighted in the screenshot below.
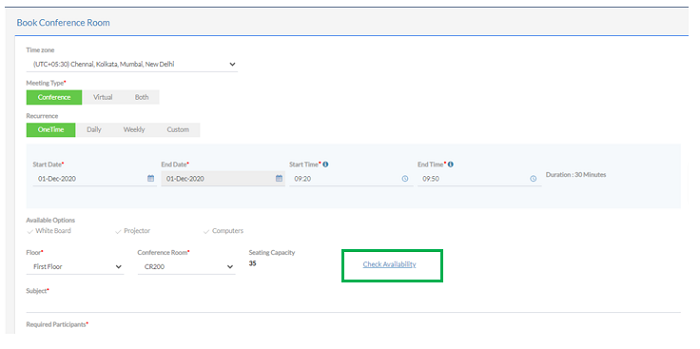
Check Availability
After selecting a room, the user needs to check its availability, by clicking on the Check Availability button, as highlighted in the screenshot below. According to the entered date and time and other criteria the availability is there then a pop up will be displayed as “Time Slot is available”

Required Participants
This is where the user needs to enter the emails of the participants who should compulsorily attend, as highlighted in the screenshot below.
Optional participants
This is where the user needs to enter the emails of the participants who may or may not attend, as highlighted in the screenshot below.
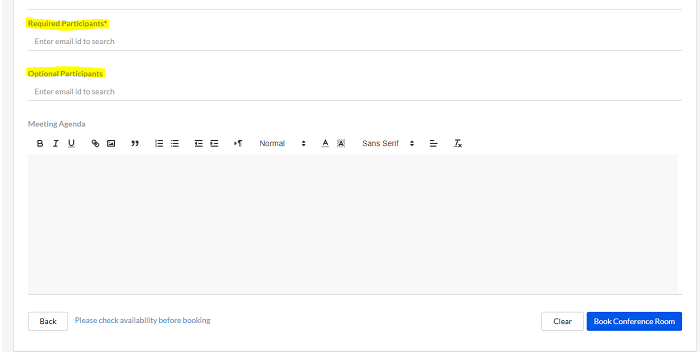
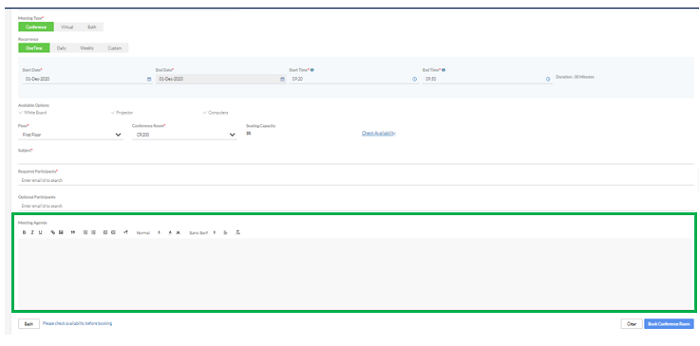
Meeting Agenda
This is where the user needs to enter the details of the meeting and the objective, as highlighted in the screenshot below.
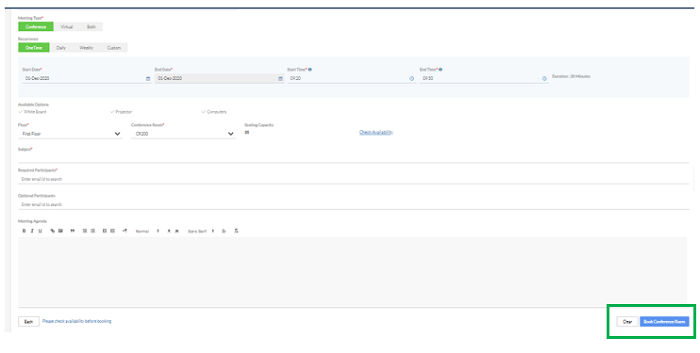
Once the user has entered all the details, the user needs to click on the Book Conference Room button to book the room. The user can also click on the Clear button to clear all the details, as highlighted in the screenshot below.
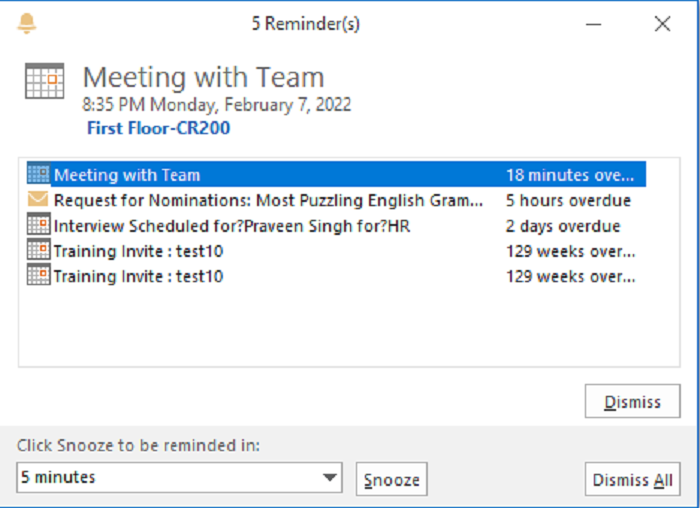
Note: The Conference Room booking details are sent to the respective participants on their MS Outlook official email id as a meeting invite.
Also, user can get notification from outlook for the meeting details. Please check the screenshot mentioned below.
View/Edit Conference Booking
Once the user has booked the conference room, there is the option to view details of the booking, delete bookings, reschedule bookings, and also to cancel a booking.
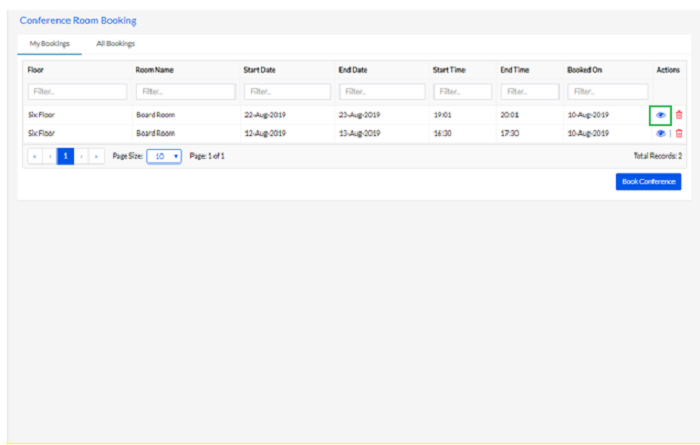
For all these options, the user needs to click on the My Bookings tab, where the bookings made by the user are displayed in the Grid.
The user can click on the Delete icon against each booking, to delete the booking, as highlighted in the screenshot below.
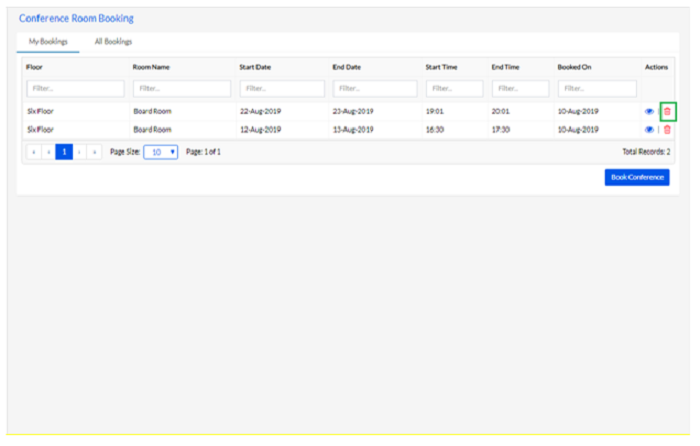
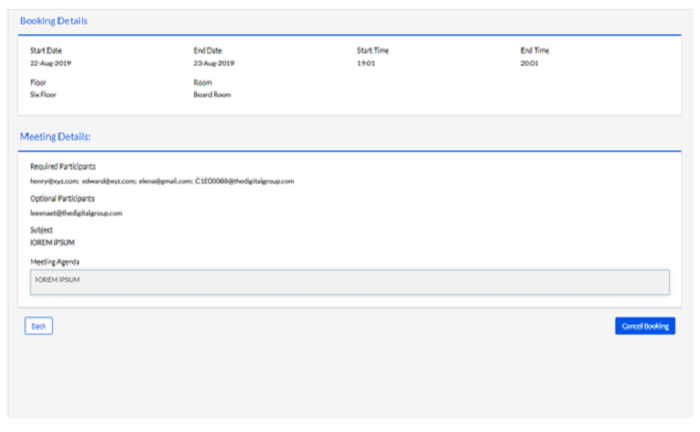
The user can click on the Eye icon against each booking, to view details of the booking, as highlighted in the screenshot below.

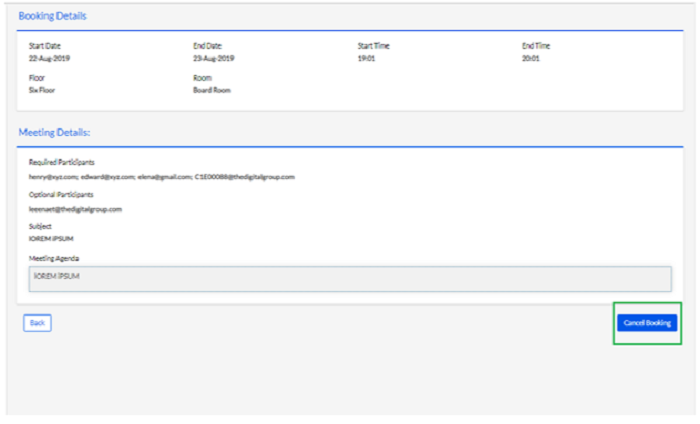
Once the user clicks on the Eye icon, the details of the booking request appear, as shown below.
After reviewing the details of the booking, the user can cancel the booking by clicking on the Cancel button, highlighted in the screenshot below.

The user can click on the Delete icon against each booking, to delete the booking, as highlighted in the screenshot below.

The user can click on the Eye icon against each booking, to view details of the booking, as highlighted in the screenshot below.
Once the user clicks on the Eye icon, the details of the booking request appear, as shown below.

After reviewing the details of the booking, the user can cancel the booking by clicking on the Cancel button, highlighted in the screenshot below.
Note: Edit conference Room Booking details & more enhancements are in the pipeline for later versions.