Travel - All Requests
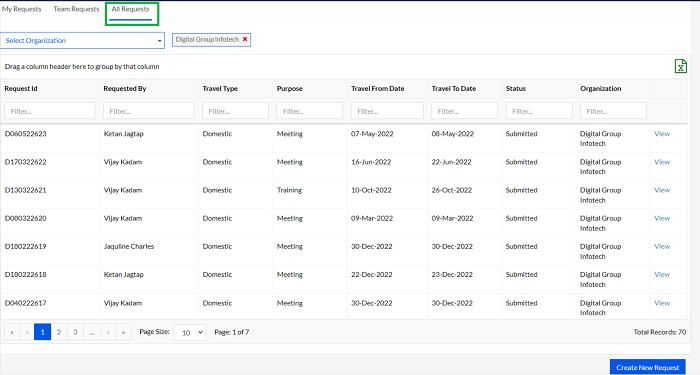
If the Travel request has been approved by the Manager, it goes to the Travel Desk Team. The Travel Desk Team gets to view all approved requests from all the teams in the organization under All Requests, as highlighted in the screenshot below.
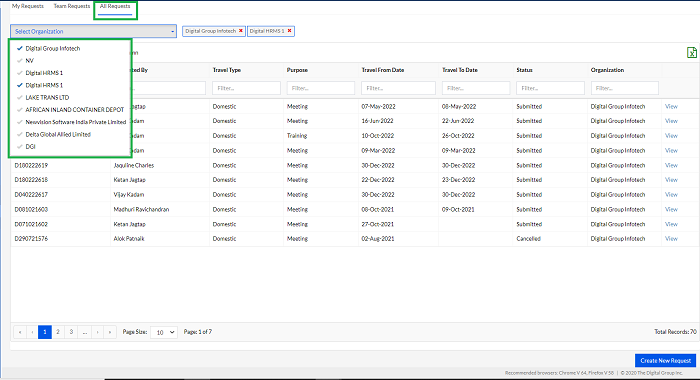
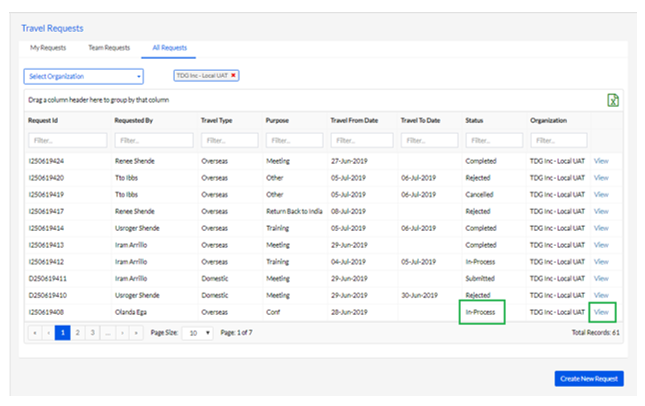
After clicking on the All Requests tab, the Travel Desk Team has to select the organization from a drop-down under the Select Organization tab, as highlighted in the screenshot below. The Travel Desk Team can select one or more options from this drop-down list, in order to view the respective requests.
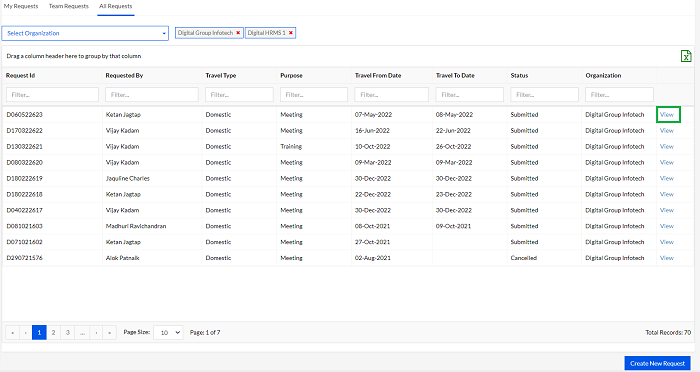
The Travel Desk Team can view the details of each request by clicking on View next to each request, as highlighted in the screenshot below.
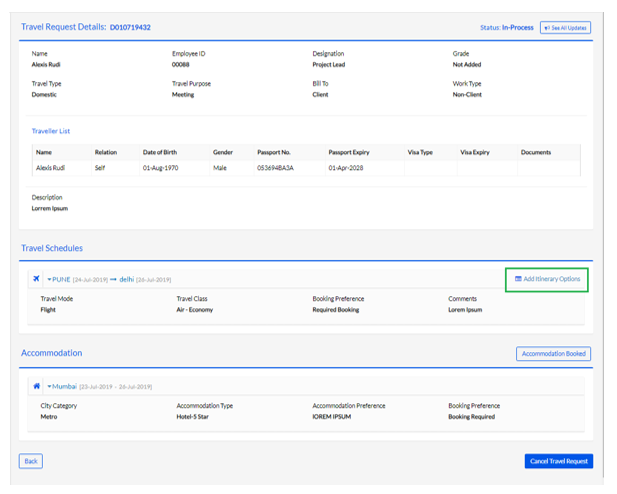
Once the Travel Desk Team clicks on the View button, a screen appears with the details of the request. The Travel Desk Team can accept or reject the request by clicking on the Cancel Request or Acknowledge Travel Request buttons as highlighted in the screenshot below.
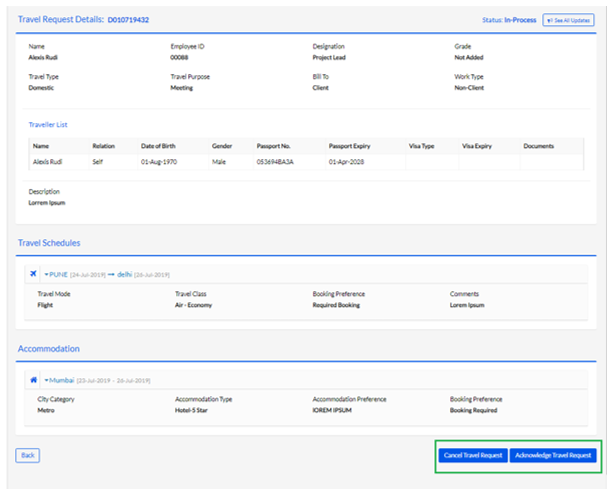
**Note: When the Travel Desk Team acknowledges or cancels the Travel request, an email is triggered to all the stakeholders.
Once the request is accepted by the Travel Desk Team, they can Add Itinerary Options as highlighted in the screenshot below.
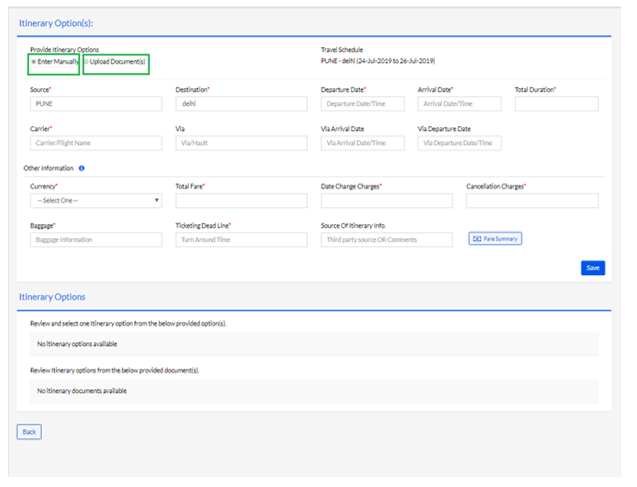
The Travel Desk Team can add one or multiple itinerary options by filling in the details as shown below.

The Travel Desk Team can choose to upload the itinerary information either manually by filling in the required fields or can also upload a ticket by clicking on the Upload Documents tab, as highlighted in the screenshot below.
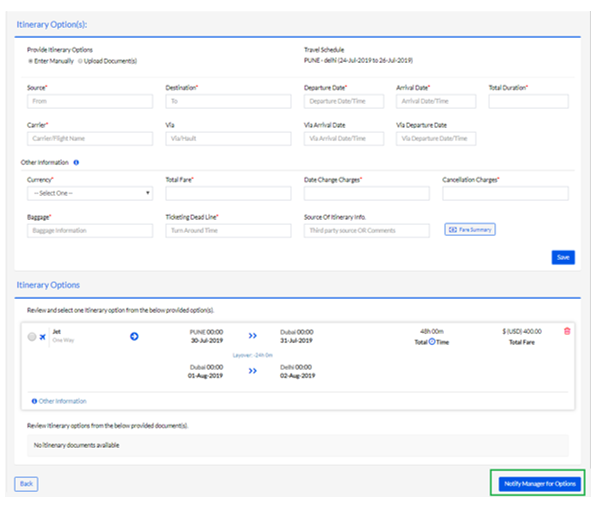
Once the details of an itinerary have been added, the Travel Desk Team needs to click on the Notify Manager for Options button to submit the itinerary, as highlighted in the screenshot below.
**Note: When the Travel Desk Team adds itinerary options, an email is triggered to all the stakeholders.
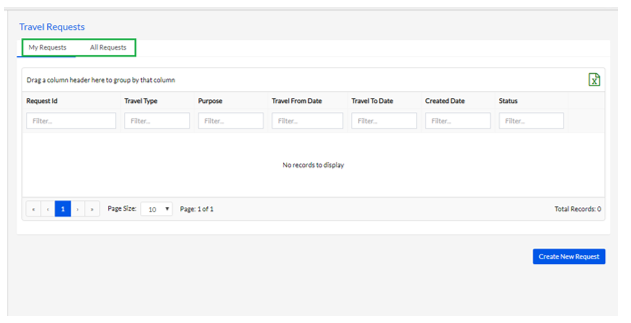
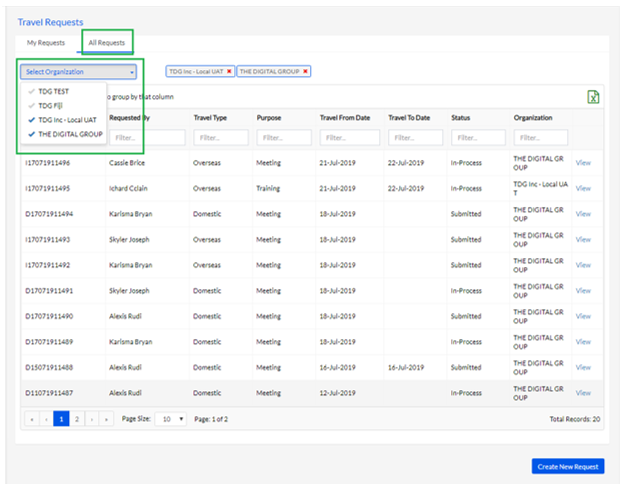
The Travel Desk Team can view a list of requests from all across the organization and also view details of each request. The Travel Desk Team can click on the My Requests tab to view own requests and the All Requests tab to view the requests raised by all employees in the organization. This is highlighted in the screenshot below.
After clicking on the All Requests tab, the Travel Desk Team has to select the organization from a drop-down under the Select Organization tab, as highlighted in the screenshot below. The Travel Desk Team can select one or more options from this drop-down list, in order to view the respective requests.
The requests for which the Travel Desk Team has submitted itinerary options, are marked as In Process, and one such instance is highlighted in the screenshot below. The Travel Desk Team can view the request by clicking on View as highlighted in the screenshot below.
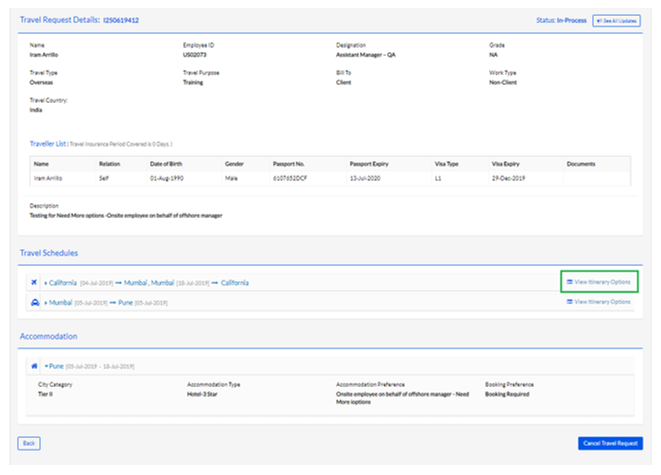
Once the Travel Desk Team clicks on the View button, a screen appears as shown below. The Travel Desk Team can then view the itineraries uploaded by the Travel Desk Team by clicking on the View Itinerary Options as highlighted in the screenshot below.
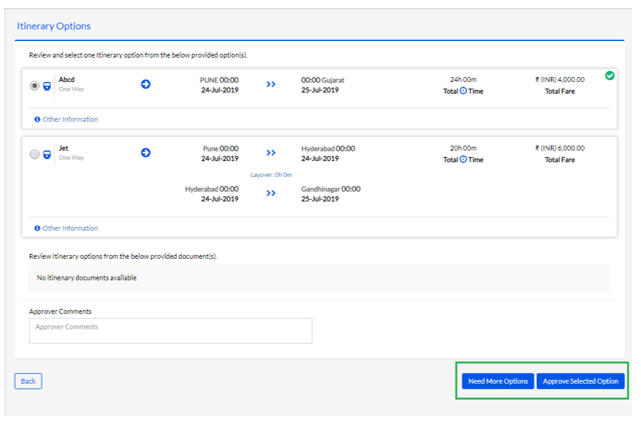
Once Travel Desk Team clicks on the View Itinerary button, the following screen appears where there is an option to select an itinerary option by clicking on the radio button against it, as highlighted in the screenshot below.
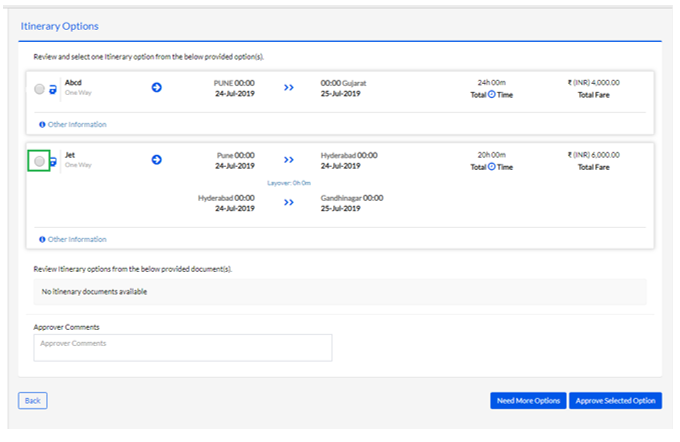
The Travel Desk Team can select a request and then either Approve it or ask for more options, using the Approve Selected Option and Need more Options buttons, respectively, as highlighted in the screenshot below.
Clicking on the Approve Selected Option can be used by the Travel Desk Team to approve one of the many itinerary options sent by the Travel Desk Team. Clicking on the Need more Options button can be used by the Travel Desk Team to seek more itinerary options from the Travel Desk Team.
Once the Travel Desk Team approves an itinerary, it is again sent to the team Manager of the applicant for a final approval.
**Note: When the Travel Desk Team approves an itinerary or asks for more options, an email is triggered to all the stakeholders.
**Note: After the Travel Desk Team approves the request, the team manager can still ask for more itinerary options using the Need More Options button.
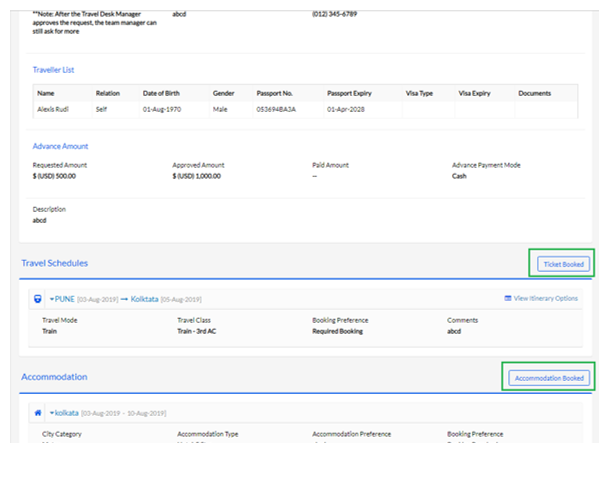
Once the Travel Desk Team as well as the L1 and L2 managers have approved the itinerary option(s), the Travel Desk Team can book the tickets and accommodation and then click on the Ticket Booked and Accommodation Booked buttons, as highlighted in the screenshot below.
Once Travel Desk Team has clicked on the buttons, a tick mark appears against the status, as highlighted in the screenshot below.
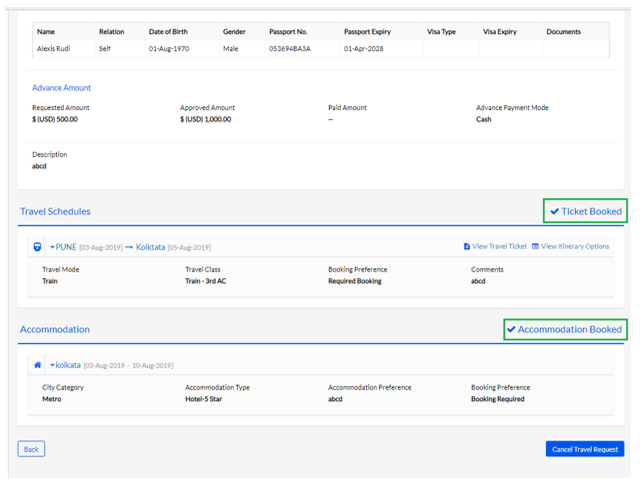
**Note: When the Travel Desk Team books the ticket and accommodation, an email is triggered with the accommodation details to the employee.
**Note: The employee can enter ticket information and modify the details even after the ticket is booked.