
Option Setup
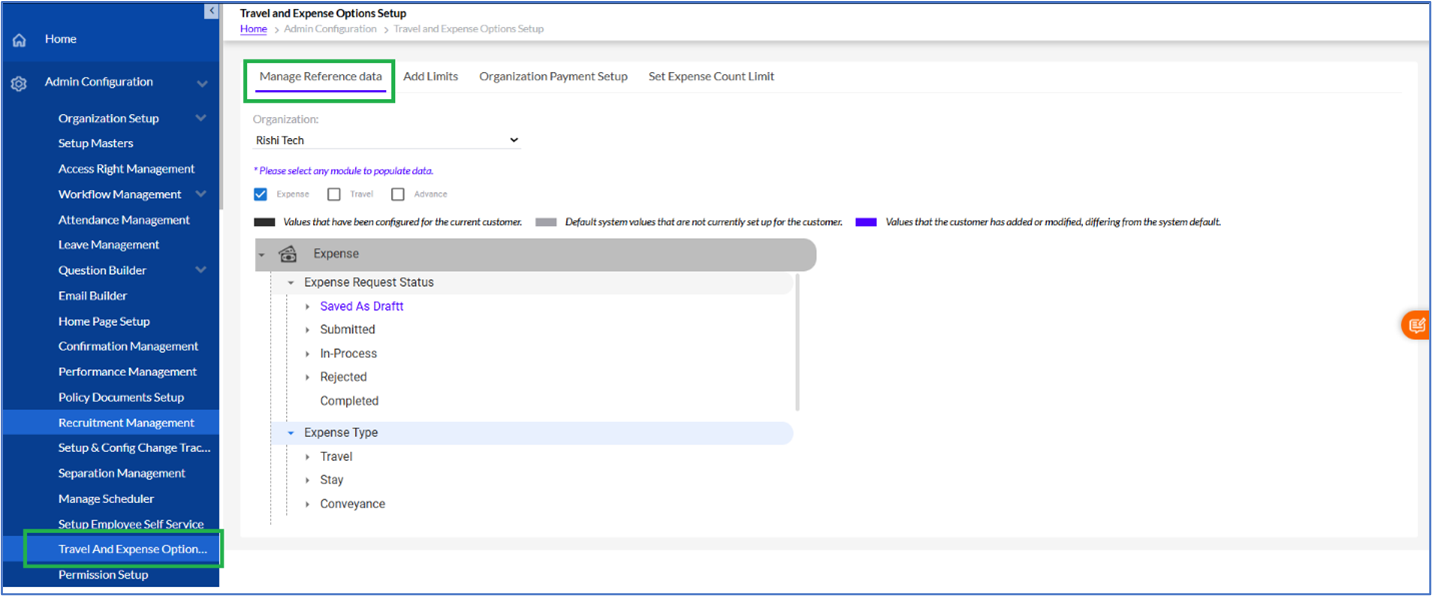
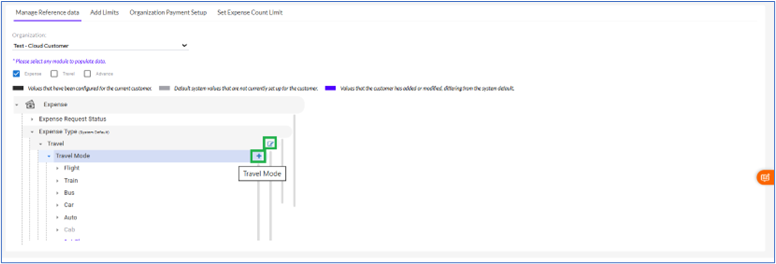
 ” icon to edit the expense type and you can click on the “+” to add new subtype.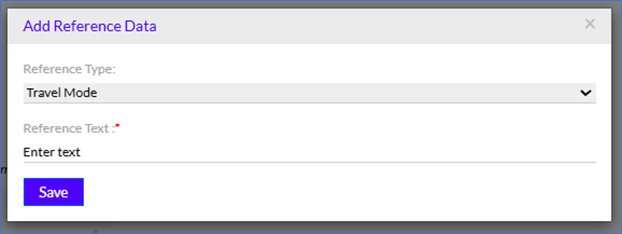


3. Organization Payment Setup
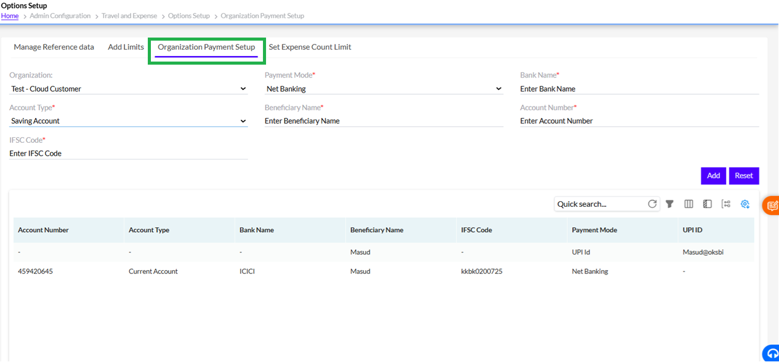
The Organization Payment Setup tab allows administrators to configure and maintain the organization's payment details that are used for expense reimbursements and travel-related payments. The configured information serves as the default payment reference for the selected organization.
- Fields and Functionality
- Organization – Select the organization for which the payment details are to be configured.
- Payment Mode – Choose the preferred payment method, such as Net Banking or other available payment options.
- Bank Name – Enter the name of the bank used for payments.
- Account Type – Select the bank account type (for example, Savings Account or Current Account).
- Beneficiary Name – Specify the account holder or beneficiary name.
- Account Number – Enter the beneficiary's bank account number.
- IFSC Code – Enter the bank's IFSC code to enable electronic fund transfers.
- Add – Saves the payment configuration for the selected organization.
- Reset – Clears all entered values without saving.
- Payment Details Grid
The grid at the bottom displays all configured payment records and includes the following information:
- Account Number
- Account Type
- Bank Name
- Beneficiary Name
- IFSC Code
- Payment Mode
- UPI ID (if configured)
The grid also provides Quick Search and standard grid options to search and manage existing payment configurations.
4. Set Expense Count Limit
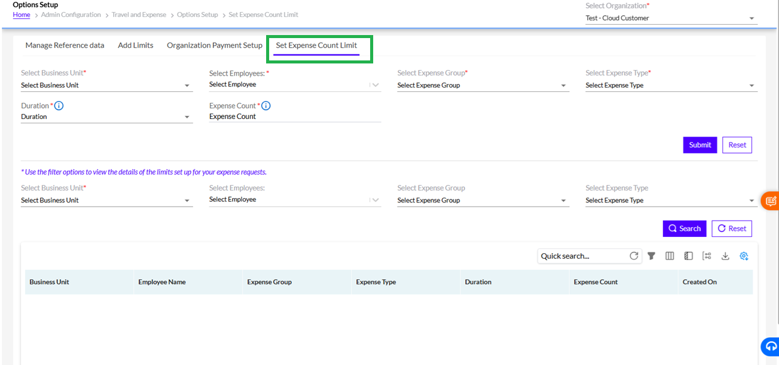
The Set Expense Count Limit tab enables administrators to define the maximum number of expense requests that employees can submit for a specific expense type within a selected duration.
Configuration Section
- Select Organization – Select the organization for which the expense count limit is to be configured.
- Select Business Unit – Choose the applicable business unit.
- Select Employees – Select one or more employees to whom the limit will apply.
- Select Expense Group – Select the expense category or group.
- Select Expense Type – Choose the expense type for which the count restriction is required.
- Duration – Define the validity period (for example, monthly, quarterly, or yearly, as configured).
- Expense Count – Specify the maximum number of expense requests allowed during the selected duration.
- Submit – Saves the expense count limit configuration.
- Reset – Clears all entered values.
Search and View
Use the filter section to search existing expense count limit configurations by Business Unit, Employee, Expense Group, and Expense Type. Click Search to display matching records or Reset to clear the filters.
Records Grid
The grid displays configured expense count limits with the following details:
- Business Unit
- Employee Name
- Expense Group
- Expense Type
- Duration
- Expense Count
- Created On
The grid also provides Quick Search and standard grid options to filter and manage existing records.