Asset Allocation-Deallocation
Once the Asset Categories have been defined by the Admi or HR, the mapping of the assets can be done under Asset Mapping. This section has the following 2 tabs:
Active Employee
Left Employee
1. Active Employee
Active employees are the current employees of the organization.
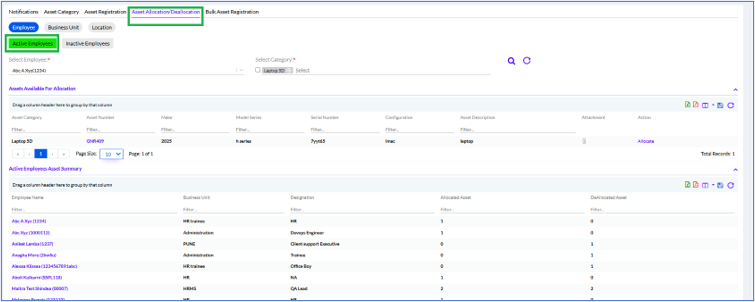
Under this tab, the HR/Admin can view the list of Allocated Assets to the employees of the organization, along with the Deallocated Assets details.
Select Employee from drop down
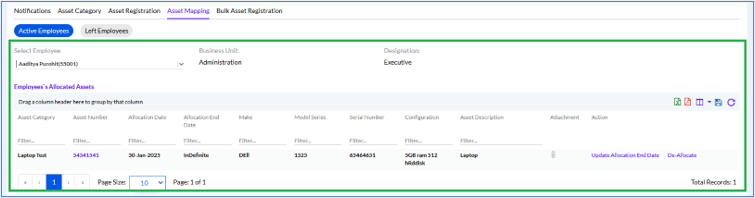
The details of allocation are displayed below as shown above.
The All Employees Allocated Assets Summary are displayed below in a grid
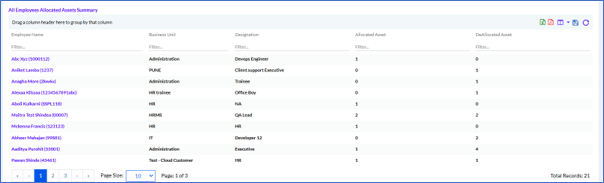
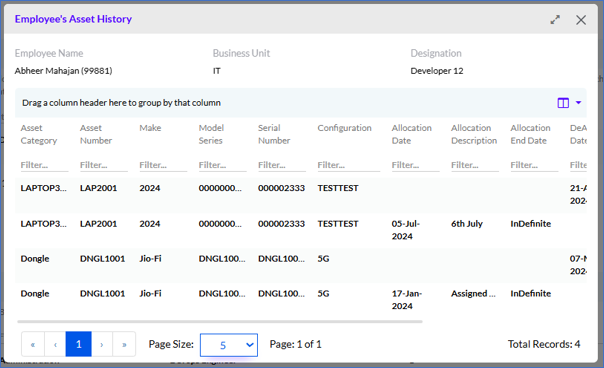
On clicking on employee’s entry the History opens up as shown below
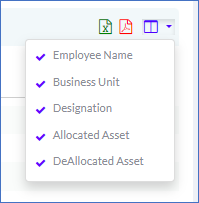
The number of columns visible on the grid can be modified by clicking on the Columns icon.
The data in the grid can be exported into a spreadsheet or PDF by clicking on the MS-Excel and PDF icons.
The Admin/HR can add new allocations by clicking on the Add icon.
Adding Asset Allocations
The Admin/HR clicks on the Select Employee to select an employee. The employee can be new or an existing employee.
New Employee
The newly joined employee if selected will not display any previously allocated assets.
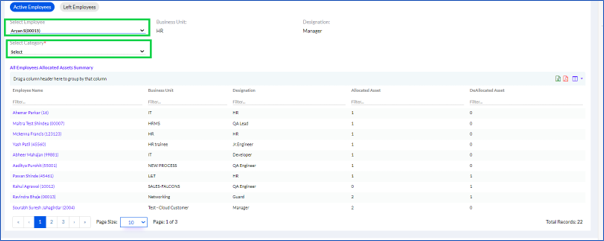
The user needs to select the Employee Name, the Business Unit and Designation are auto-populated.
Admin/HR clicks on the Select Category.
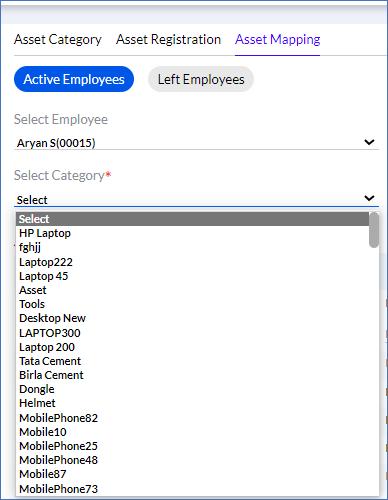
Select the particular asset.
Once selected if the asset is available it will be displayed below in a table as given below.
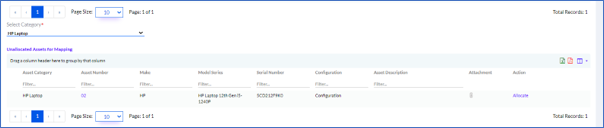
Click on Allocate a pop-up appears as follows
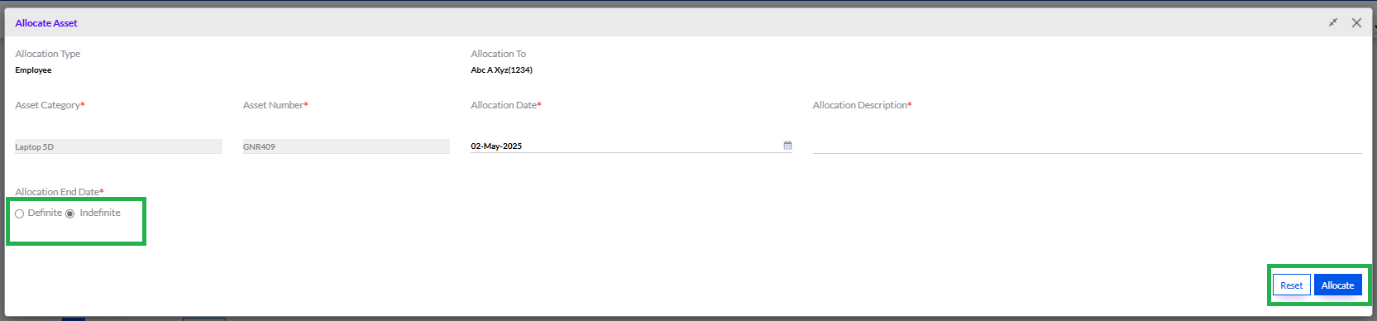
The Asset Category, Asset Number is auto displayed and Allocate Date from the Calendar and the Description must be added. Click the Allocate button. A confirmation Popup that the asset has been allocated is displayed.

The Reset button can be used to reset the entered values.
Existing Employee
In case of an existing employee the allocated assets will be displayed in a table as shown below. But, if the Admin/HR needs to add further they need to select the assets (un-allotted) in the Select Category.
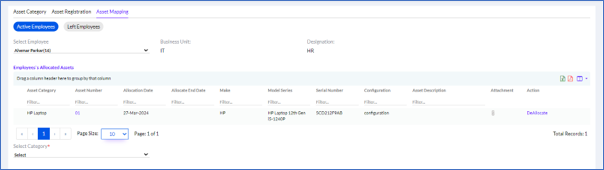
Rest process is same as in the care of New Employee.
2. Left Employee
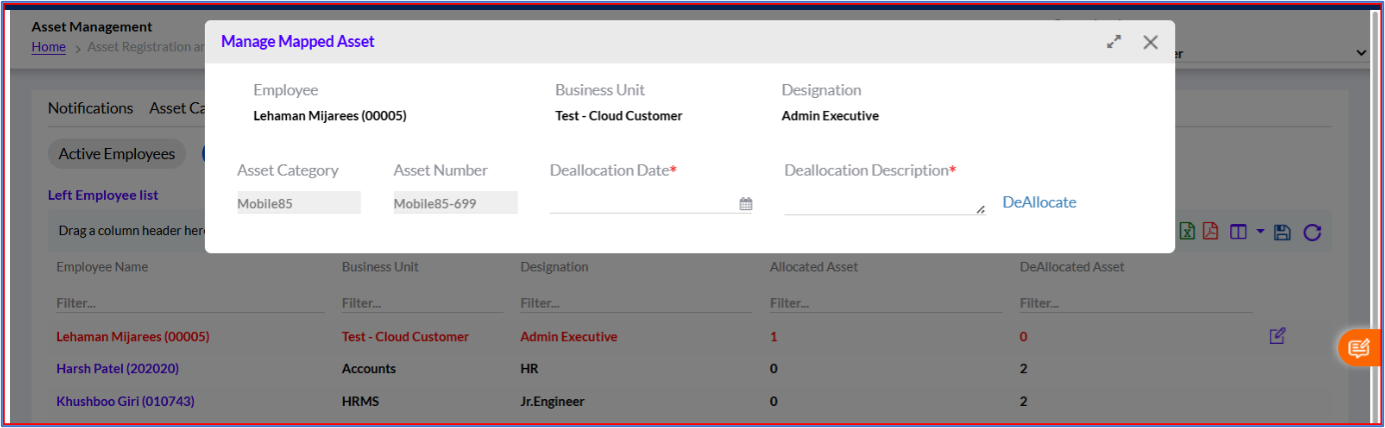
Under this tab, the Admin/HR can view a list of deactivated employees (employees who are no longer with the company). Here the Admin/HR has the provision to Deallocate the Assets if any, as indicated by the system, through a process of manual deallocation.
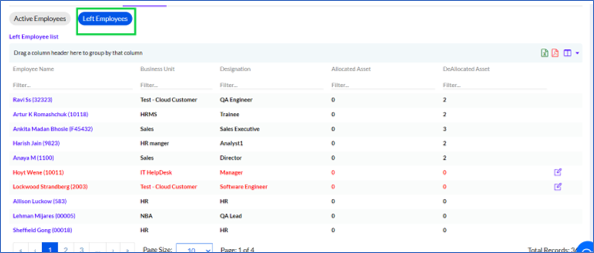
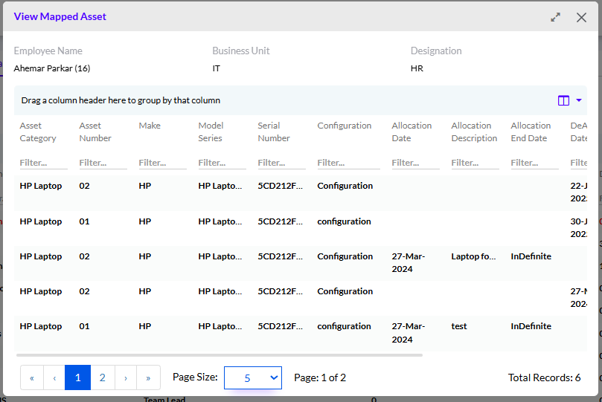
On clicking on employee’s entry the History opens up as shown below
The data in the grid can be exported into a spreadsheet or PDF by clicking on the MS-Excel and PDF icons.
The number of columns visible on the grid can be modified by clicking on the Columns icon.
The data on the grid can be sorted on the basis of the columns. The Admin needs to drag any column to sort the data based on the parameter in that column. For example, the Designation column can be dragged to sort the data with respect to the Designation.
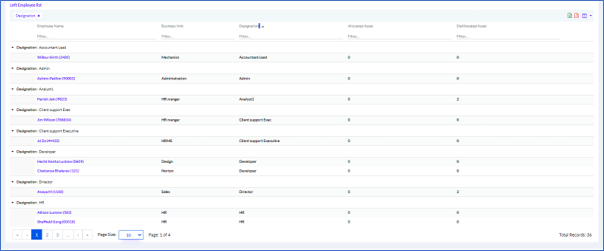
*Note: If an employee has been deactivated from the HRMS system, but the assets allocated to him earlier have not been deallocated yet, then the count of such employees appear as a notification at the top right corner of the Left Employee tab.
3. Editing Asset Allocations
On mouseover on each row, an Edit icon appears, which allows the Admin/HR to update the Asset Category for Left Employees who have been deactivated. The deactivated left employees are displayed in red.
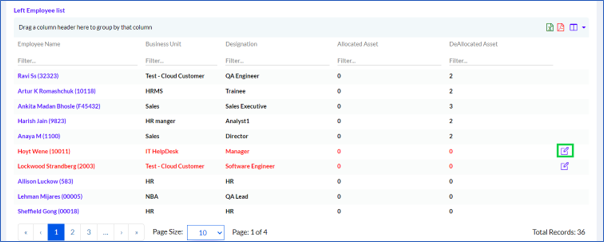
Once the Admin/HR clicks on the Edit icon, a pop-up appears where the Admin/HR needs to fill in the required details and click on the Submit button. The Reset button can be used to reset the data entered. Every time the asset allocations is edited, email notifications needs to be sent to all stakeholders.