TM - Configuration
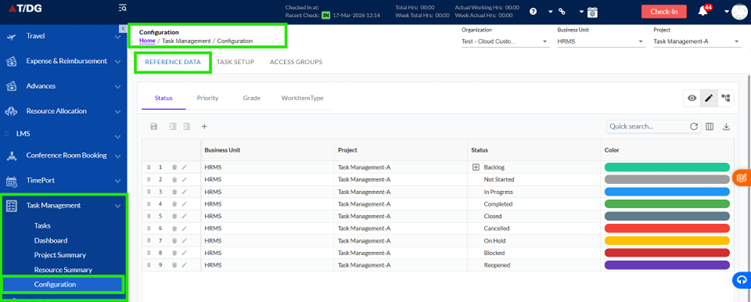
1. Reference Data
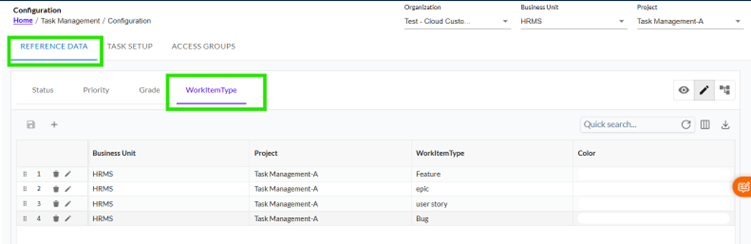
The Reference Data page allows users to manage important master data used across the system, such as Status, Priority, Grade, and Work Item Type.
This feature is designed to support a multi-level hierarchy, enabling organizations to define data at different levels and override it when needed.
The three levels supported are:
- Organization
- Business Unit (BU)
- Project
This ensures flexibility while maintaining centralized control over data.
Understanding Hierarchy and Inheritance
Reference data follows a structured hierarchy:
- Organization (Top level)
- Business Unit (Middle level)
- Project (Lowest level)
Inheritance Logic:
- Project-level data overrides BU-level data
- BU-level data overrides Organization-level data
This means lower-level configurations take priority over higher-level ones.
Supported Reference Types
The system supports the following reference types:
- Status
- Priority
- Grade
- Work Item Type
Each reference type is displayed in separate tabs for easy navigation.

Special Note – Status
- Status supports a hierarchical structure (multi-level)
- All other reference types are single level only
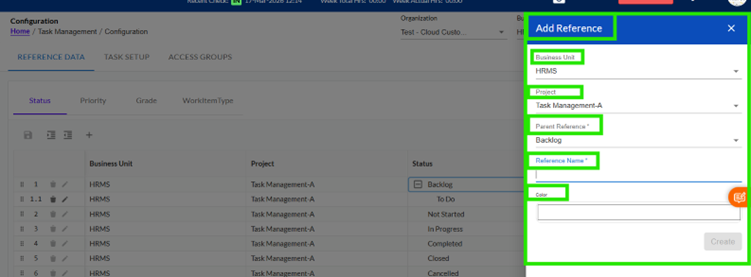
Adding a New Reference
To add a new reference:
- Click on the + (Add) button
- A popup will open
- Fill in the required details:
- Organization / BU / Project selection
- Reference Name
- Color
- Parent Reference (if applicable)
- Click Add/Save
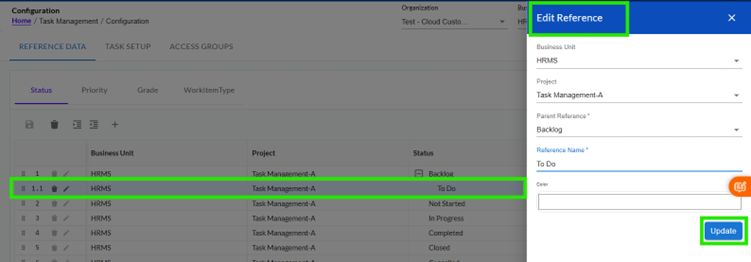
Editing a Reference
- Users can edit one reference at a time
- You can:
- Modify reference details
- Change its level (e.g., Project > BU > Organization)
Note:
- Bulk editing is not supported
- Editing level is considered a heavy operation
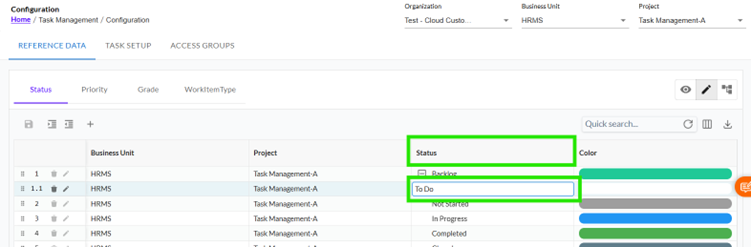
Inline Editing
Inline editing allows users to update references directly in the grid.
Editable Fields:
- Name (Status / Priority / etc.)
- Color
This makes quick updates easy without opening a popup.
Drag and Drop (Hierarchy Management – Status Only)
For Status, users can manage hierarchy using drag-and-drop.
Allowed Actions:
- Reorder items within the same parent
- Change sequence dynamically
Restrictions:
- Cannot move a child to a different parent
- Cannot break hierarchy structure
The system automatically maintains correct numbering and order.
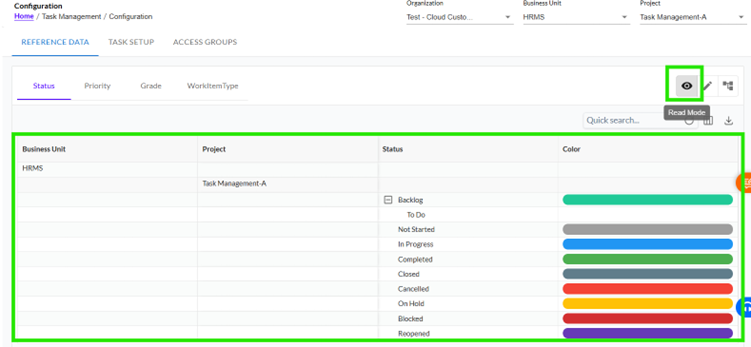
Read Mode (View Only)
In Read Mode:
- No editing is allowed
- Data is displayed in grouped format based on:
- Organization
- Business Unit
- Project
Helps users understand:
- Inherited references
- Overridden references
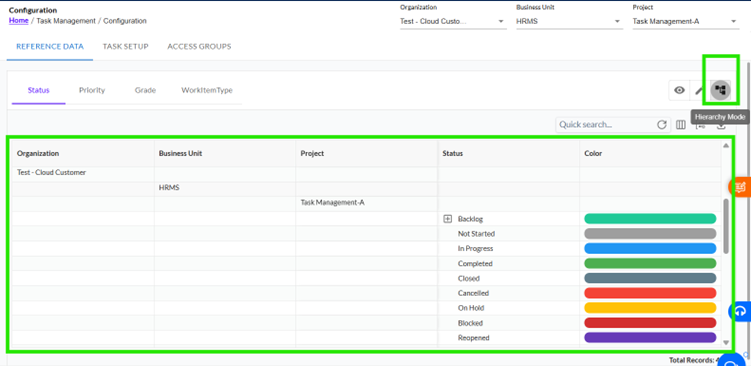
Hierarchy Mode
Hierarchy Mode shows the complete flow of reference data across levels.
It displays:
- Organization-level references
- BU-level references
- Project-level references
Helps visualize how data flows and overrides across levels.
Example Scenario:
If a parent organization (e.g., TDG) and a BU/project exist:
- Selecting a Project shows:
- Organization references
- BU references
- Project-specific overrides
Selection Rules & Validations
Mandatory Selection:
- Organization must always be selected
If not selected > No data is displayed
Additional Rules (Hierarchy Mode):
- Business Unit must be selected
- Project must be selected
If missing > Data will not be shown
System Behaviour
- Reference data always follows hierarchy rules
- Lower-level overrides are applied correctly
- UI clearly distinguishes:
- Organization-level data
- BU-level data
- Project-level data
- Sequence is maintained automatically
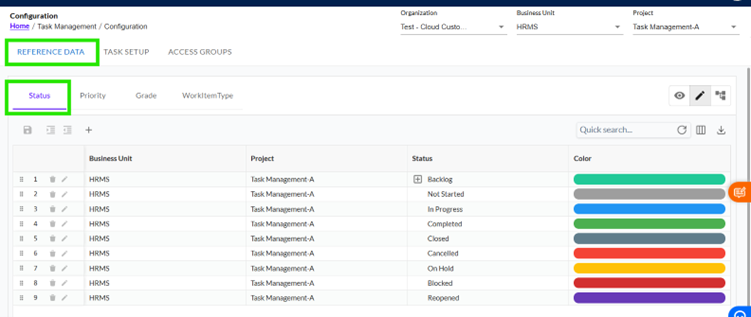
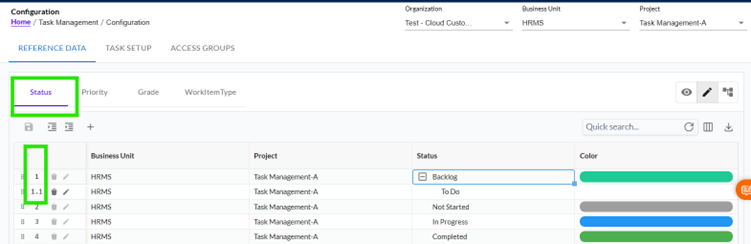
Status Configuration
The Status section manages task statuses in a hierarchical format.
Default System Statuses
The system provides default root-level statuses such as:
- Backlog
- Completed
- Closed
- Cancelled
- On Hold
- Blocked
- Reopened
These are:
- System-defined
- Cannot be edited or deleted
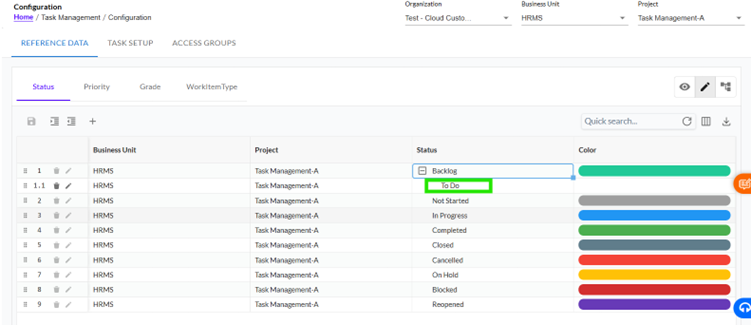
Creating Child Statuses
Users can create sub-statuses under parent statuses.
Example:
- Not Started
- Awaiting Approval
- Assigned
- In Progress
- Development In Progress
- QA In Progress
Methods to Add Child Status:
1.Using Add Popup
- Select parent status
- Enter child status name
- Save
2. Inline Add
- Click + near parent
- Enter name
- Status appears under parent
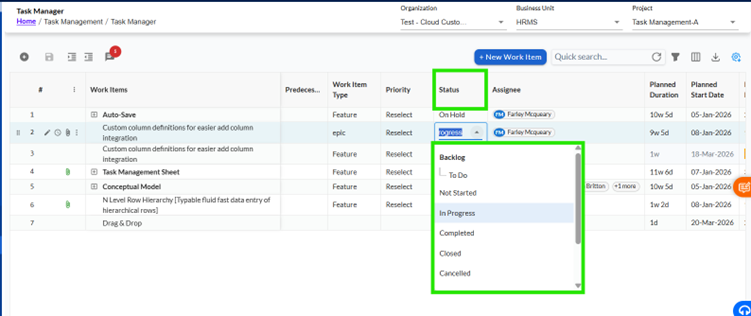
Status in Task Management Editor
All statuses are integrated into the Task Management screen.
Dropdown Behaviour:
- Status dropdown shows:
- Parent statuses
- Child statuses (indented)
- Order is preserved exactly as configured
No reordering or flattening happens.
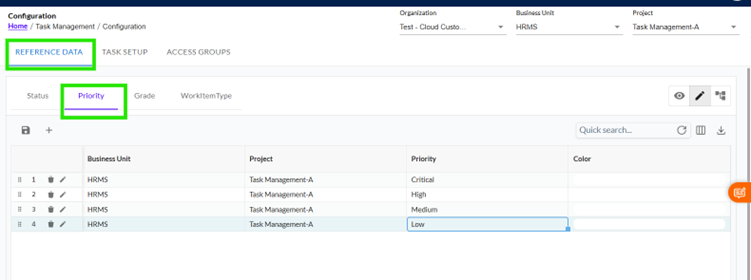
Priority
The Priority defines the urgency or importance of a task.
- It is a single-level reference (no hierarchy)
- Helps users identify and manage critical tasks first
- Supports color coding for quick visual recognition
- Used in task screens for sorting, filtering, and decision-making
- Follows hierarchy override:
- Project > BU > Organization

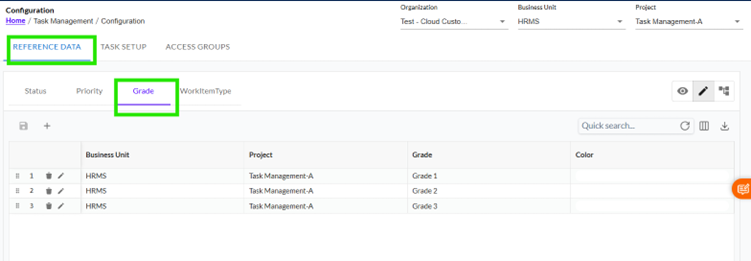
Grade
The Grade represents the level or classification of a task.
- It is a single-level reference (no hierarchy)
- Used to define complexity, level, or categorization
- Helps in task grouping and analysis
- Fully customizable based on business needs
- Follows hierarchy override:
- Project > BU > Organization

Work Item Type
The Work Item Type categorizes the type of work being performed.
- It is a single-level reference (no hierarchy)
- Used to classify tasks (e.g., Task, Bug, Enhancement)
- Helps in better organization and reporting
- Appears in task creation for clear work identification
- Follows hierarchy override:
- Project > BU > Organization
2 Task Setup
The Task Configuration page allows system administrators or authorized users to define how tasks behave across the application. This includes configuring how tasks are assigned and understanding task hierarchy settings.
This configuration is applied at an organizational level, ensuring that all projects follow a consistent structure and assignment logic.
With this feature, users can:
- Control whether tasks are assigned to one or multiple employees
- Understand task hierarchy settings
- Maintain consistency in task management
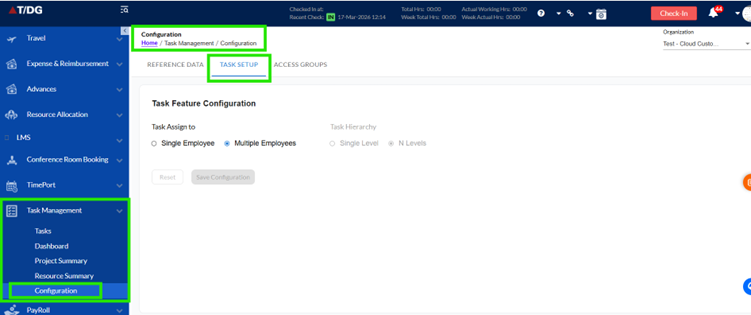
Access Task Configuration
To open the Task Configuration page, follow these steps:
- Log in to the system
- Navigate to the left-hand menu
- Click on Configuration
- Select Tasks
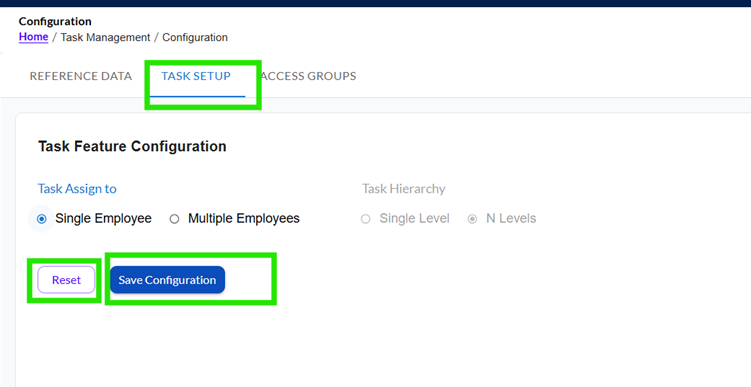
This will open the Task Feature Configuration screen.

Page Overview
The Task Configuration page contains a simple and structured form designed to prevent incorrect or invalid configurations.
On this page, you can:
- Define how tasks should be assigned
- View task hierarchy settings (currently disabled or read-only)
- Save your changes or reset them if needed
The page is designed with controlled inputs to ensure only valid selections are allowed.
Task Feature Configuration Section
This section is the core part of the page where task behaviour is defined.
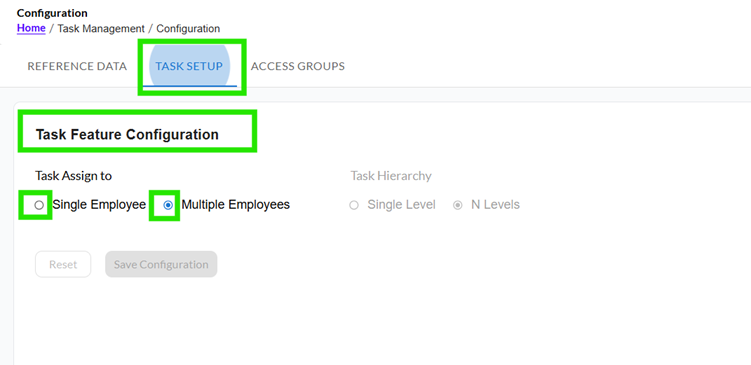
Task Assignment Settings (Task Assign To)
This setting controls how many users can be assigned to a single task.
Available Options:
- Single Employee
- Multiple Employees
Option 1: Single Employee
When Single Employee is selected:
- A task can be assigned to only one employee
- Ensures clear ownership of the task
- Helps in better accountability and tracking
Recommended when tasks require individual responsibility
Option 2: Multiple Employees
When Multiple Employees is selected:
- A task can be assigned to more than one employee
- Supports teamwork and collaboration
- Allows shared responsibility among users
Recommended when tasks require team effort or collaboration
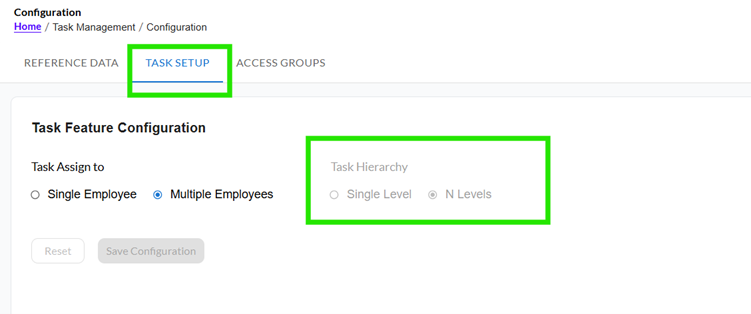
Task Hierarchy (Read-Only Section)
The Task Configuration page may display task hierarchy settings, but currently:
- These settings are disabled or read-only
- Users cannot modify hierarchy behaviour from this screen
This ensures system stability until hierarchy configuration is enabled in future updates.
Saving Configuration
After making changes:
- Click Save to apply the configuration
- Changes will be applied across the system
Reset Option:
- You can click Reset to discard changes and revert to previous settings
3. Access Groups
The Groups & Permissions module helps control what actions users can perform within the Task Management system. Access is managed based on user roles and group assignments, ensuring that the right users have the right level of control.
This feature helps to:
- Define who can view, create, update, assign, or delete tasks
- Avoid confusion in task operations
- Maintain proper access control across teams
- Provide a structured and secure way to manage user permissions
This document is based on defined system rules and serves as a reference for how permissions behave in the application.
Understanding Permissions
Permissions define what actions a user can perform on tasks.
Available Permission Types:
- View
- Allows users to view tasks
- This permission is enabled by default for all users
- Create
- Allows users to create new tasks
- Users can enter values in all fields during task creation
- Update
- Allows users to edit task details
- However, the following fields cannot be updated:
- Planned Duration
- Planned Start Date
- Planned End Date
- Assignee
- Modify Planned Dates
- Allows users to update:
- Planned Duration
- Planned Start Date
- Planned End Date
- Modify Assignee
- Allows users to change the task assignee
- May also trigger approval workflows (if applicable)
- Delete
- Allows users to delete tasks permanently
Types of Groups
Permissions are assigned through groups. There are two types of groups in the system:
1) Virtual Groups (System-Defined)
These groups are automatically created by the system based on context.
Examples:
- AnyOne > All logged-in users
- Task Creator > User who created the task
- Task Assignee > User assigned to the task
These groups help apply permissions dynamically based on task context.
2) Real Groups (User-Defined)
These groups are created and managed manually by admins.
Examples:
- Tech Lead
- Manager
Users can belong to multiple groups, and the system will automatically combine permissions.
3) How Permissions Are Applied
Effective Permission Logic:
- If a user belongs to multiple groups > Maximum access is granted
- Permissions are evaluated:
- At group level
- Then based on task context (creator, assignee, etc.)
Example: If a user is both Manager and Tech Lead, they will get the highest permission available from both groups.
Managing Groups (Admin Functionality)
Admins can manage groups through the Groups & Permissions module.
Access Groups List Page
The system displays a list of all groups with:
- Group Name
- Group Type
- Members Count
- Permissions
- Actions
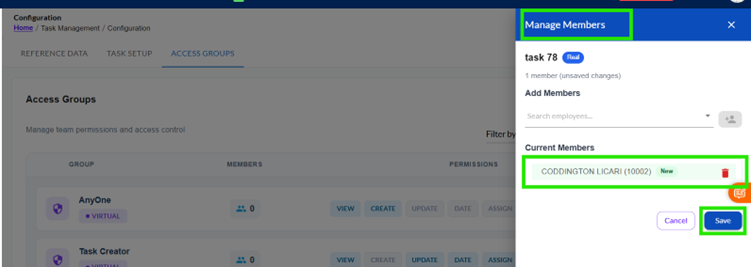
4) Managing Members
Clicking the Members icon opens the Manage Members popup.
Features:
- View total members
- Search users
- Add/remove members
Behaviour:
- If no members exist > Message shown:
“No members in this group yet.”
- Changes are saved only after clicking Done
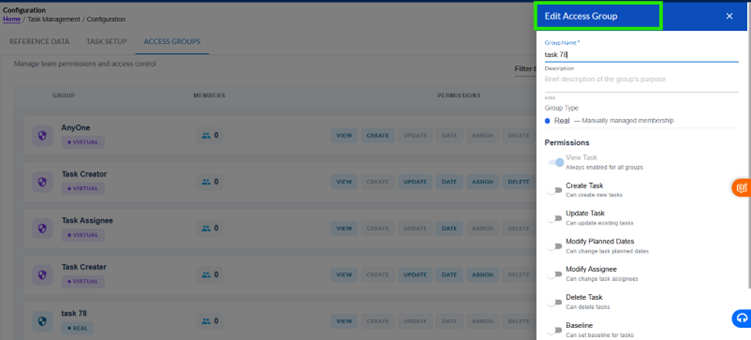
5) Editing a Group
Click the Edit icon to modify group details.
Editable Fields:
- Group Name
- Description
Permission Controls:
- Create Task
- Update Task
- Delete Task
- Modify Planned Dates
- View Task
- Modify Assignee
Behaviour:
- Changes are saved only after clicking Save/Update
- If no changes are made > Nothing is updated
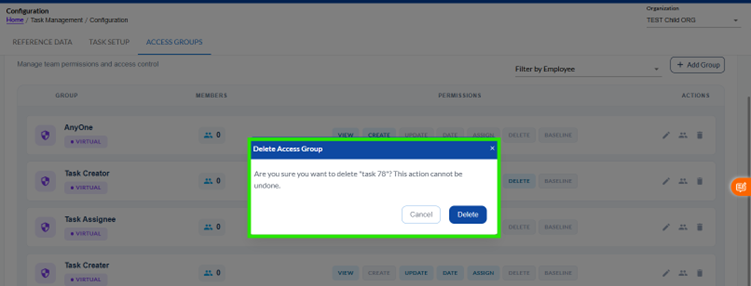
6) Deleting a Group
Click the Delete icon to remove a group.
Confirmation Message:
“Are you sure you want to delete ‘<Group Name.>?
This action cannot be undone.”
Actions:
- Cancel > No change
- Delete > Group is permanently removed
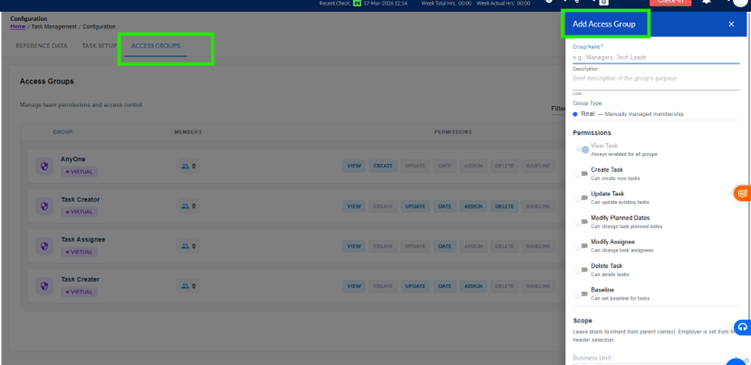
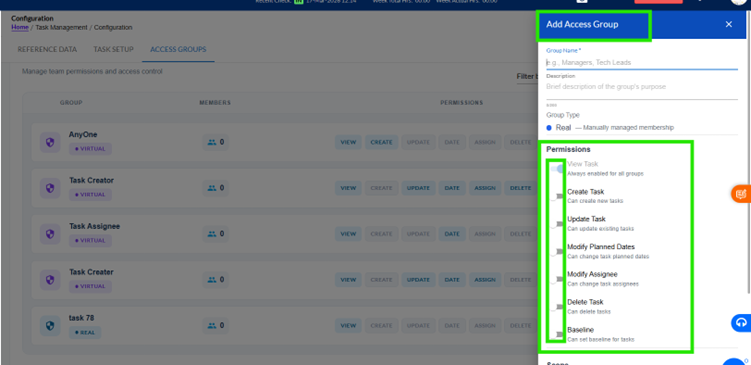
7) Adding a New Group
Click + Add Group to create a new access group.
Required Fields:
- Group Name (mandatory)
- Description (optional)
- Group Type (Real)
Permissions:
- All permissions are OFF by default
Validation:
- Group name is required
- Duplicate group names are not allowed
8) Permission Behaviour
- Permissions are configurable per group
- Applied dynamically to users
- Changes take effect immediately
- No system restart required
9) UI & Usability Guidelines
- All popups open smoothly without page refresh
- Panels can be closed using X icon
- Buttons are clearly labelled
- Disabled options are visually distinct